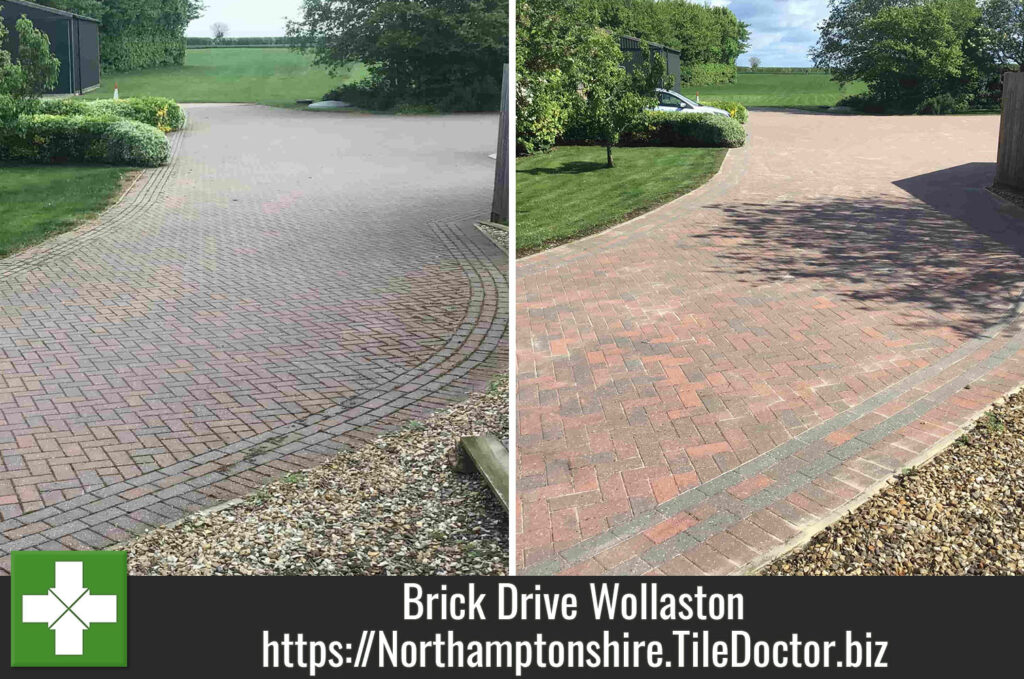
Large Brick Paved Driveway Deep Cleaned in Wollaston
This client from the village of Wollaston called us out to renovate their block paved driveway and adjacent courtyard. The drive had weathered since installation and had the usual problem of weeds, lichen and algae growing in the sand between bricks.

If the root of a weed is allowed to grow it will reach down under the brick making it difficult to remove later. I therefore recommend maintaining a driveway at least annually to ensure these problems can be kept under control. For most brick paved driveways this can be done yourself but if you have a large installation such as the entrance to this Farm do give me a call as I have special equipment that makes the work easier.

Cleaning a Brick Paved Driveway
I arrived at the farm at 8am and set up our professional petrol driven jet washer and to prepare the site for work. Working in sections I first applied a dilution of Tile Doctor Brick Driveway Cleaner to area and left it to soften the moss and assist with the removal of lichen staining and blackspot. This was followed by pressure washing using a rotary surface cleaner to minimise splashing, this process removes top soiling from the blocks and any weeds, moss etc from in between the blocks, this really helps get a more even result than just using a lance attachment.
Once the section had been scrubbed a lance attachment was used to jet wash and clean all the edging stones and hard to access areas before rinsing down walls, shrubs etc. Luckily weather was on our side so we were able to return the following day to apply a weed treatment and brush in kiln dried sand which we supplied to inhibit the growth of weeds and keep the courtyard weed free for longer. This transformation took just under 3 days in total.

The customer was extremely happy with the results we managed to achieve and the customer has had us back to carry out further work to restore their patio area.

Professional Clean of a Brick Paved Driveway in Northamptonshire
Large Brick Paved Driveway Deep Cleaned in Wollaston Read More »