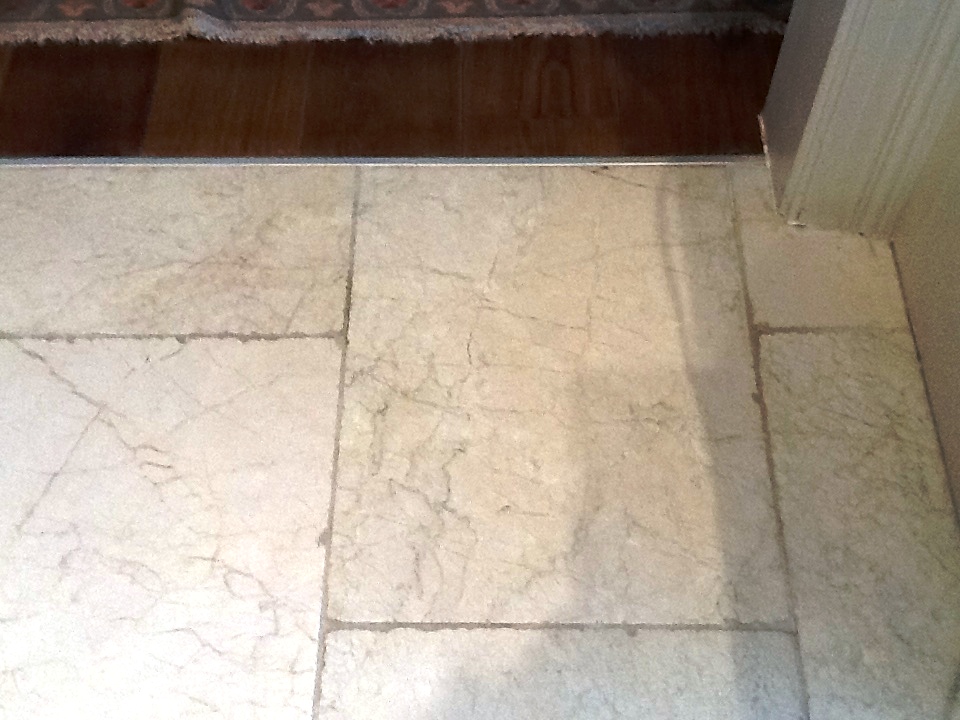
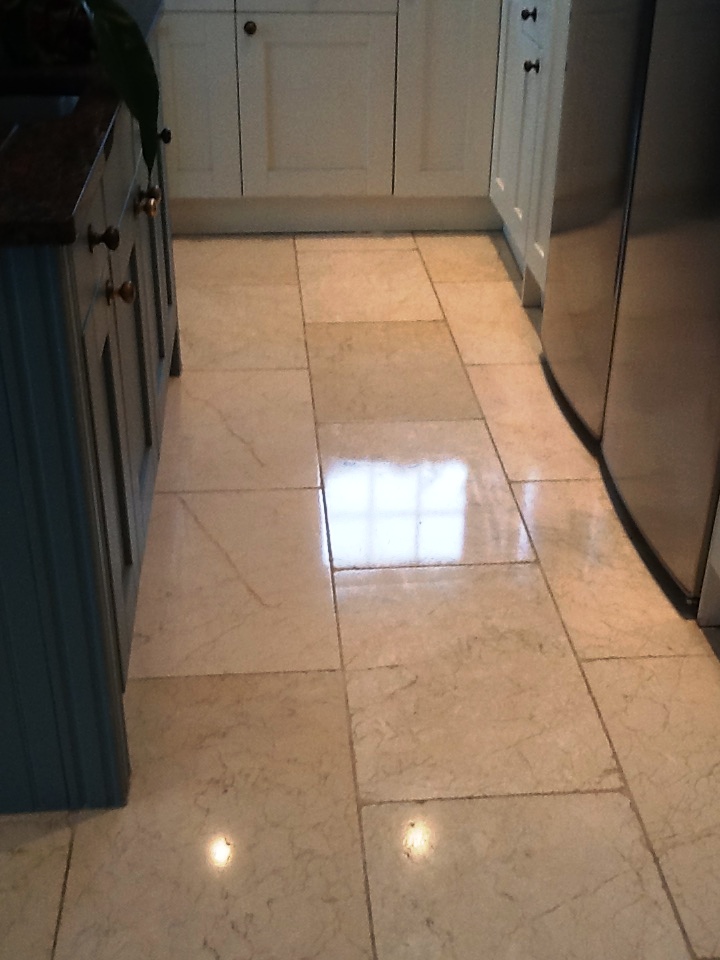
The following post shows the kind of results we can achieve for a Marble tiled floor which hadn’t been properly cleaned, polished or re-sealed for several years. This floor was also suffering from numerous cracks and other instances of damage tiles.

I was contacted by the property owners, who live in the quaint town of Great Doddington, about making the necessary repairs and also providing the complete restoration the floor had been in desperate need of for so long.

As the property owners were due a holiday they trusted me with their keys; this turned out for the best as I was able to focus on clearing the area and carrying out the work without impacting them however it did mean I was under pressure to complete the floor in time for their return.
Cleaning and Repairing a Marble Tiled Floor
As you can see from the photographs (below), the floor appeared dull and ingrained with dirt – a deep clean was long overdue. Before I started I cleared the room was of all furniture, before brushing and vacuuming the surface of the floor to remove any dust and debris.
Then, to commence the first stage of the cleaning process, I used the Tile Doctor Burnishing pad system to polish out any light scratches and surfaces stains. I started by applying the Coarse red pad with a little water for lubrication, followed by the Medium blue pad and then the Fine yellow pad to refine the polish even further.
Next, I paid special attention to the dirty grout lines, cleaning then manually with a combination of hand brushes and Tile Doctor Pro Clean, a high alkaline cleaner that works well for removing soil buildup on a wide range of natural stone floors. The areas I cleaned came out really well, and were then dried with fans before I began the repairs.
As the cracks in the tiles were caused by settlement issues, I opted to use a flexible grout to fill them. The grout used was Jasmine in colour to best match the natural colour of the tiles. I mixed it with water and then applied it to the cracks with a trowel, before allowing it to dry for roughly an hour and then wiping of any excess. There were so many cracks and small holes to deal with that I used bits and pieces of equipment to mark where I had carried out the repairs as some can be hard to see once dry!

Sealing a Marble Tiled Floor
I returned to the property the following day to perfect the polish on the floor and seal the tiles to protect against further damage and dirt. I used the Very Fine green burnishing pad (the final of the four pad burnishing system) along with a small amount of water to finally bring these tiles back to their natural level of shine. This also helped to further blend in the repairs by removing any remaining excess filler.
My choice of sealer was Tile Doctor Colour Grow, an impregnating sealer that is a favourite for high end Marble and Limestone floors since it really enhances the natural shades in the stone. Additionally, by penetrating deep into the pores of the stone Colour Grow will provide the durable protection against ingrained dirt and stains that this floor had been lacking for a long time.

The appearance of this Marble floor was completely transformed, ready for the customers to enjoy when they arrived back form their holiday. Quite often people suffer from so-called ‘holiday hangovers’, but no doubt these customers continued to relax, enjoying their newly restored Sun room and kitchen.

