Victorian Tiled Hallway Repaired and Restored in Irthlingborough
The following photos show a period Victorian floor in Irthlingborough which is close to Rushden and Wellingborough. Our client had discovered the floor after lifting a carpet that had been down for over a decade, the tiles had been stained with bitumen, which I assume was used as an adhesive, and she was keen to find out if it could be restored to its original condition.

I attended the property to survey the floor and could see as well as the bitumen there were loose tiles in a couple of areas by the doorway that would also need looking at. Fortunately, I was able to reassure her that I could remove the bitumen residue and resolve the loose tiles and provided a quotation via e mail a few days later. Pleased the issues could be resolved the quote was accepted and we agreed a date for the work to be carried out.

Cleaning and Repairing a Victorian Tiled Hallway Floor
After unloading my equipment, I taped up the skirting boards and doors to protect them. Next, I began by applying a coatings remover called Tile Doctor Remove and Go along the edges of the floor and allowed it to dwell for five to ten minutes to break down the bitumen, this was then agitated by using brushes, before rinsing with a wet vacuum pick up machine.
Once all the edges were cleaned, I started scrubbing the floor working in sections of two to three square meters using a 17” black scrubbing pad attached to a rotary floor machine. I worked back towards the front door working the Remove & Go into the tiles. This system released most of the dirt, staining and bitumen out of the Victorian tiles to the surface where it could be removed with a wet vacuum.
I then attached a coarse 200-grit burnishing pad to the rotary scrubbing machine and began working over the entire area adding a little water at each stage. This process removed the remaining bitumen and staining and gave the tiles a new lease of life. Again, the soiling was removed with the wet vacuum.
Repairing Victorian Hallway Tiles
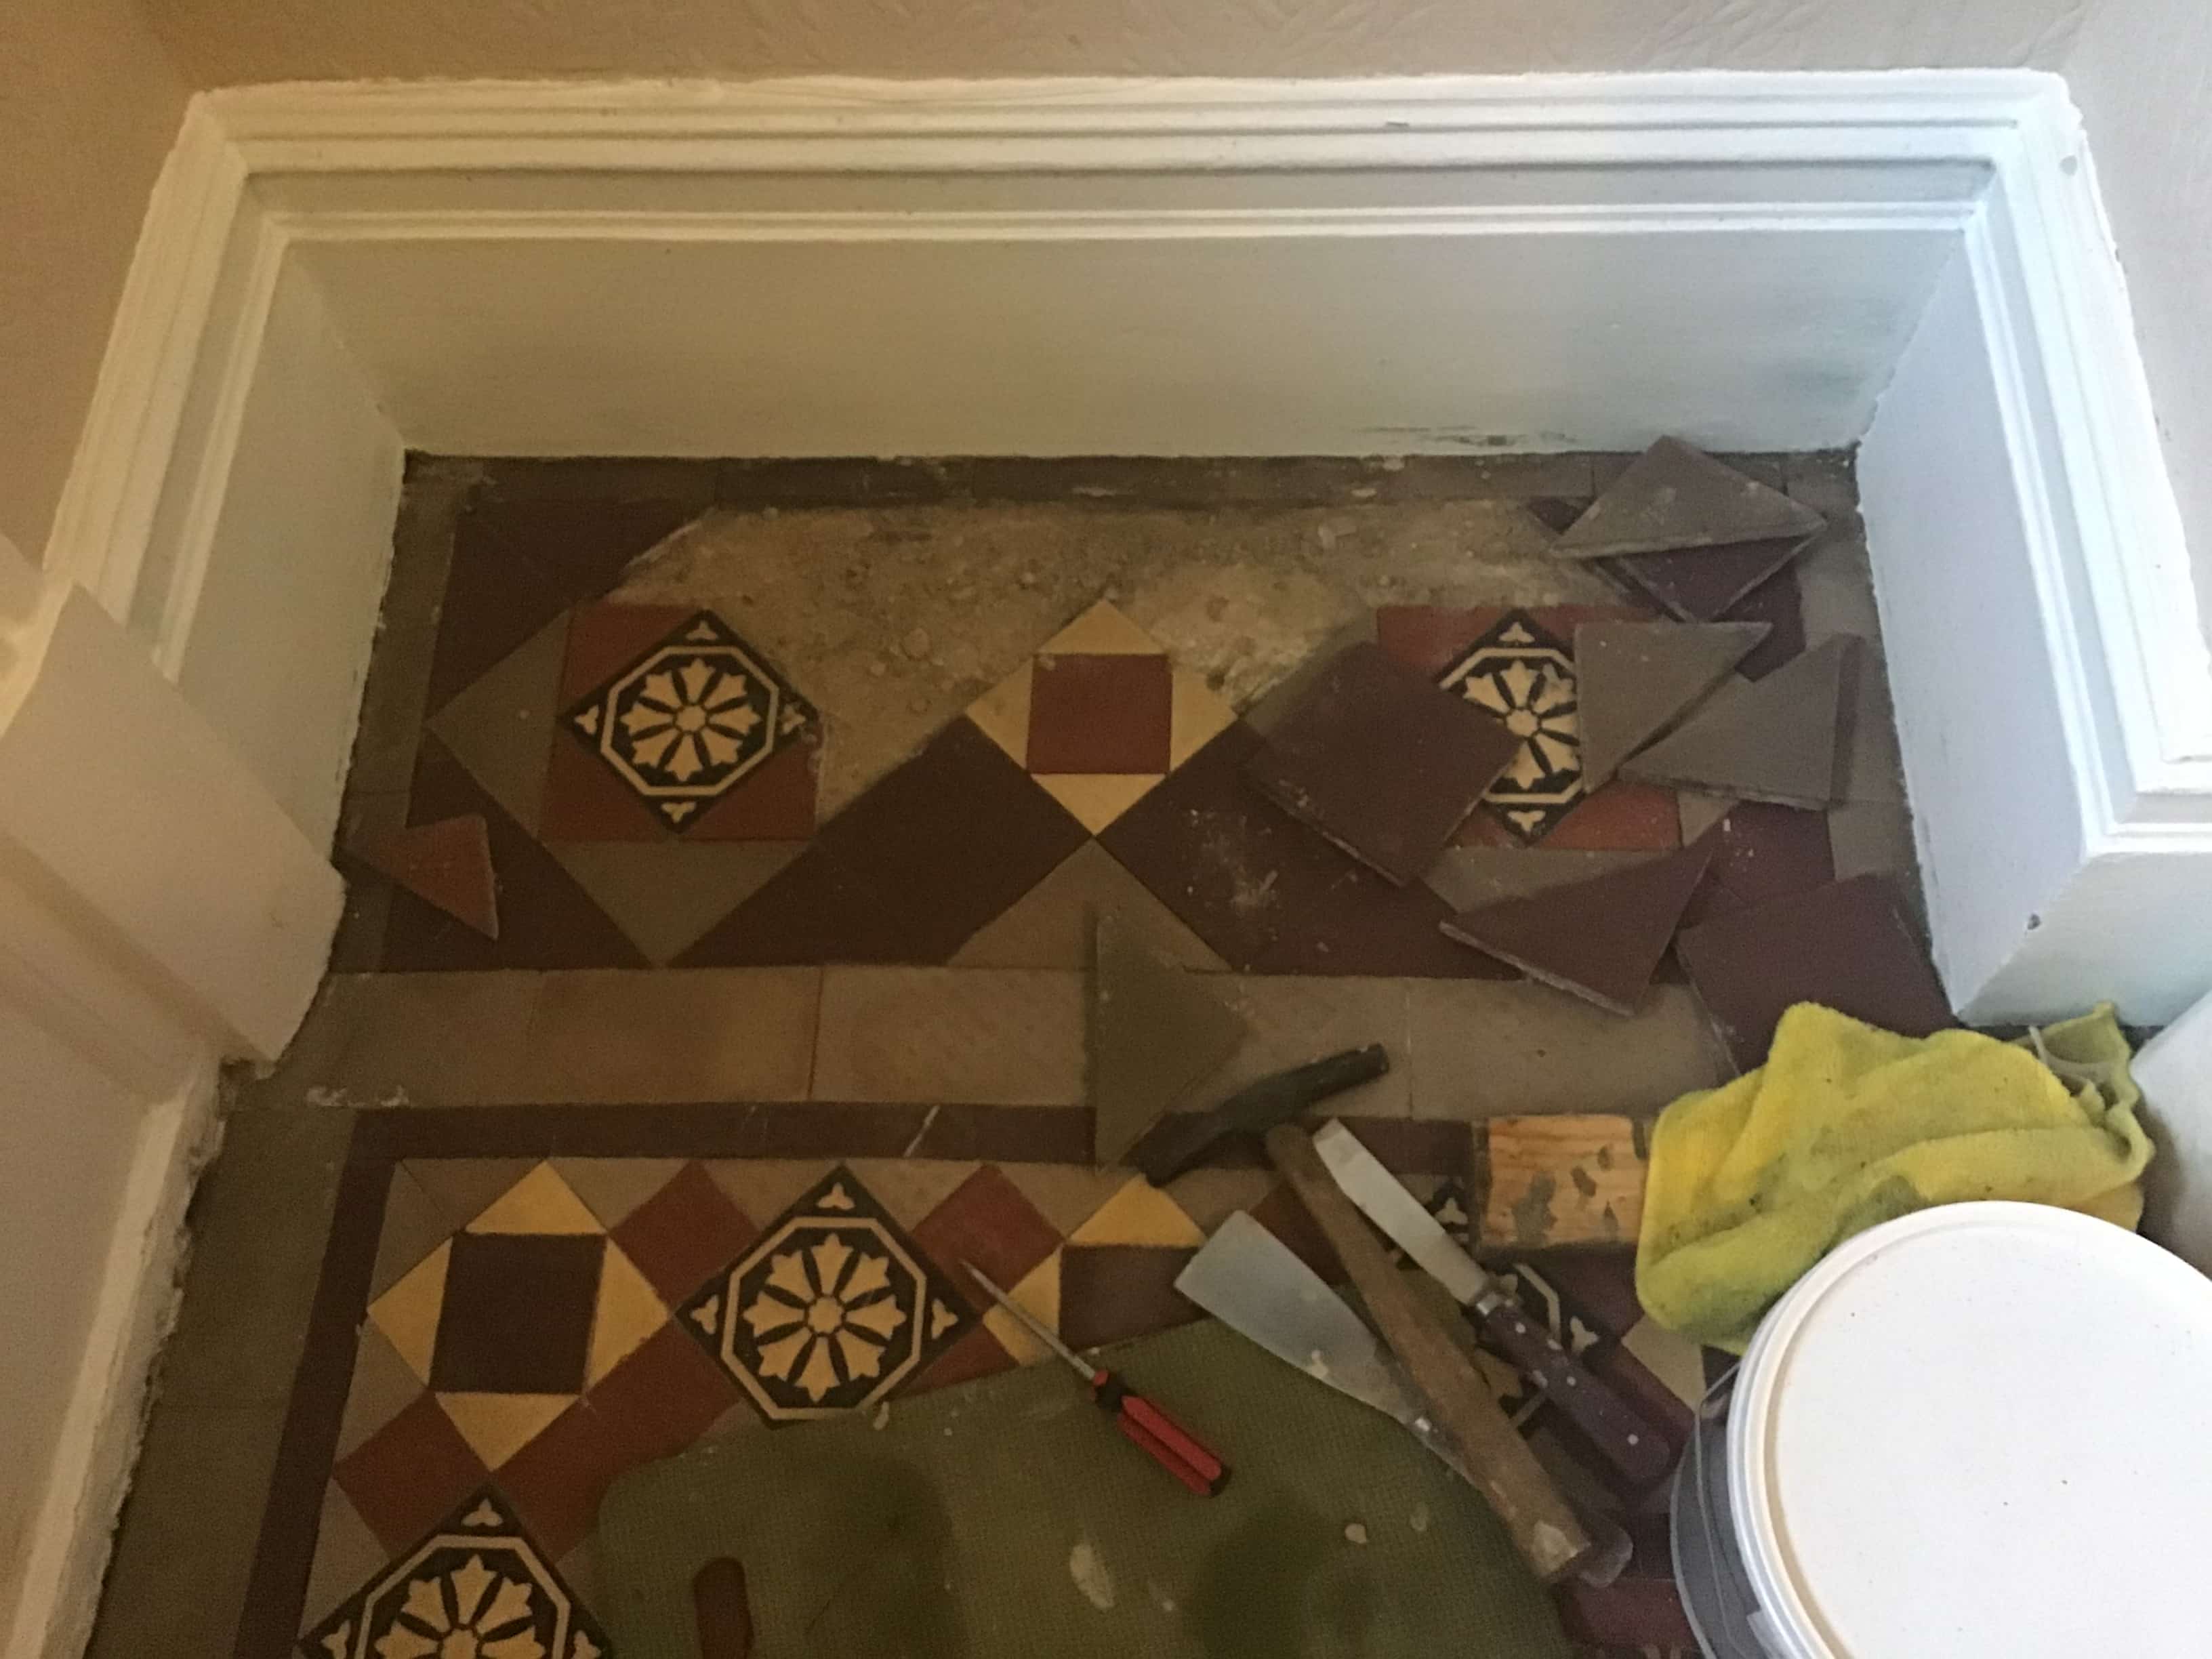
Once the area was clean, I was able to commence work on the repairs. As you can see from the photos there were 2 areas of approximately 18″ x 10″ where the subfloor had moved, and all of the tiles needed to be lifted so it could be repaired.

The sub floor was then broken up, removed, and replaced with a new cement screed level with the original base.
 |
 |
Once the screed had set, I was then able to relay the original tiles with the original pattern and regrout these sections to secure them in position.

Once the grout had gone off, I was able to finally give these areas a clean using Tile Doctor Grout Clean-up to remove any residue and grout smears before the area was sealed.
Sealing a Victorian Tiled Hallway Floor
The hallway was then left to dry out for a couple of days, old floors like this one don’t have the benefit of a plastic membrane to protect them damp so it can take a while. Tiles need to be dry before sealing, otherwise the results can be inconsistent so it’s worth the wait.

When I returned the first task was to take a few moisture readings with a damp meter and check the repaired sections had set solidly. All was well so I started with the first coat of sealer which for this floor was Tile Doctor Colour Grow sealant which leaves a natural finish. This is a breathable sealant which is an important consideration for a floor without a damp proof membrane, being breathable it will allow moisture to pass from the sub floor and evaporate at the surface. A non-breathable sealer would effectively seal in the moisture which over time will build under the floor until it eventually reaches the walls causing rising damp.

The client was happy with the results and left the following positive feedback which is always appreciated.

Professional Restoration of a Victorian Tiled Hallway in Northamptonshire
Victorian Tiled Hallway Repaired and Restored in Irthlingborough Read More »

