Grout Sealing

Grout Haze Removed From Porcelain Floor Tiles Northampton

Removing Polymer Grout Haze following Porcelain Floor Installation in Northampton

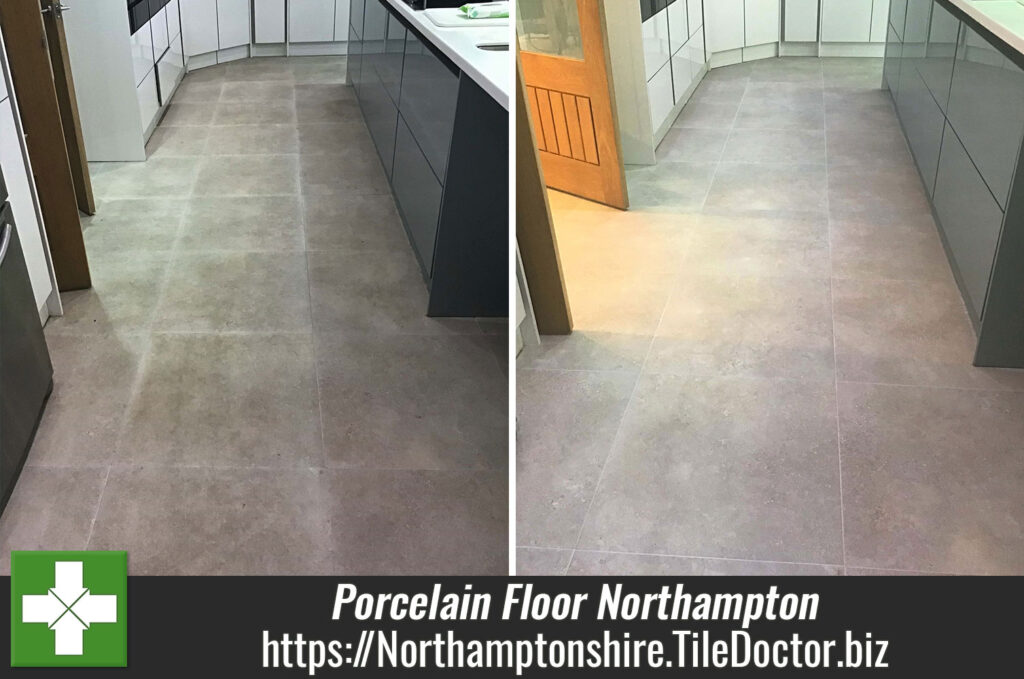
This client from Northampton called contact me about their newly installed Porcelain tiles which appeared to be much darker than they remembered from in the shop. They were disappointed with their appearance and so I agreed a time to pop round, diagnose the issues and come up with a solution.

Grout Haze Before Removal From Porcelain Floor Tiles Northampton

Once at the property I quickly established after testing a couple of tiles that there was grout haze over the entire area from installation. This happens when the grout starts to dry on the tile before it is cleaned and fully rinsed off. This problem was compounded by the customer vigorously mopping the floor with several different products trying to resolve this issue themselves and the product building up and attracting more soil to the areas, therefore darkening it further.

Grout Haze Before Removal From Porcelain Floor Tiles Northampton

The test clean I conducted removed the grout haze to reveal the tile they had been originally expecting. Impressed with the results from the test they asked me to repeat the process on the whole floor which included the kitchen and adjoining dining area. I worked out a quote which was agreed and a date scheduled for my return.

Removing Grout Haze from a Porcelain Tiled Floor

Fortunately, the owner knew which grouting product was used when laying the floor, this was very useful as polymer-based grouts need a different approach to traditional grouts. As it turns out it was a polymer-based grout which makes sense as they are known to set faster and cause this problem as a result.

The process I used was to apply Tile Doctor Remove and Go to a workable section of the floor which was approximately 8m2. The solution was allowed to dwell for ten minutes or so prior to agitating with a rotary brush machine. This area was then rinsed off with water and a wet and dry pick-up machine. This process is used to break down the polymers in the grout but does not fully remove the haze from the tiles, that is covered in the next section.

Part two of treating the grout haze involves the application of Tile Doctor Grout Clean-Up to the tile and allowing it to dwell for a further ten minutes, a black buffing pad is then used with the rotary machine to scrub the product into the Porcelain tile. As before the soiled solution is removed with another rinse and extracted with the wet and dry pick-up machine.

Once that was done, I inspected the floor to ensure all the grout haze has been removed and repeated the 2nd stage process where required.

Sealing a Porcelain Tiled Floor

I allowed the floors to dry off overnight and returned the following day to apply Tile Doctor Ultra Seal Sealant over all the areas, this is especially good for protecting the grout lines from staining.

Grout Haze After Removal From Porcelain Floor Tiles Northampton

Given the dark colour of the Porcelain tiles it’s difficult to appreciate the improvement from the photographs, my customer was extremely happy with the result though and left the following glowing review:

“Fabulous service from Phil and great results really really pleased. Lovely man and very hard working. Thank you”

Before leaving I made sure to discuss aftercare cleaning, which for this floor I recommend using Tile Doctor pH Neutral Tile Cleaner which is a gentle but effective cleaning product designed for use on sealed tile and stone.

Grout Haze After Removal From Porcelain Floor Tiles Northampton


Porcelain Tile Cleaning in Northamptonshire

Removing Polymer Grout Haze following Porcelain Floor Installation in Northampton Read More »

Limestone Kitchen Floor Cleaned Sealed Boughton Northamptonshire

Limestone Kitchen Floor Cleaned, Polished and Sealed in Boughton

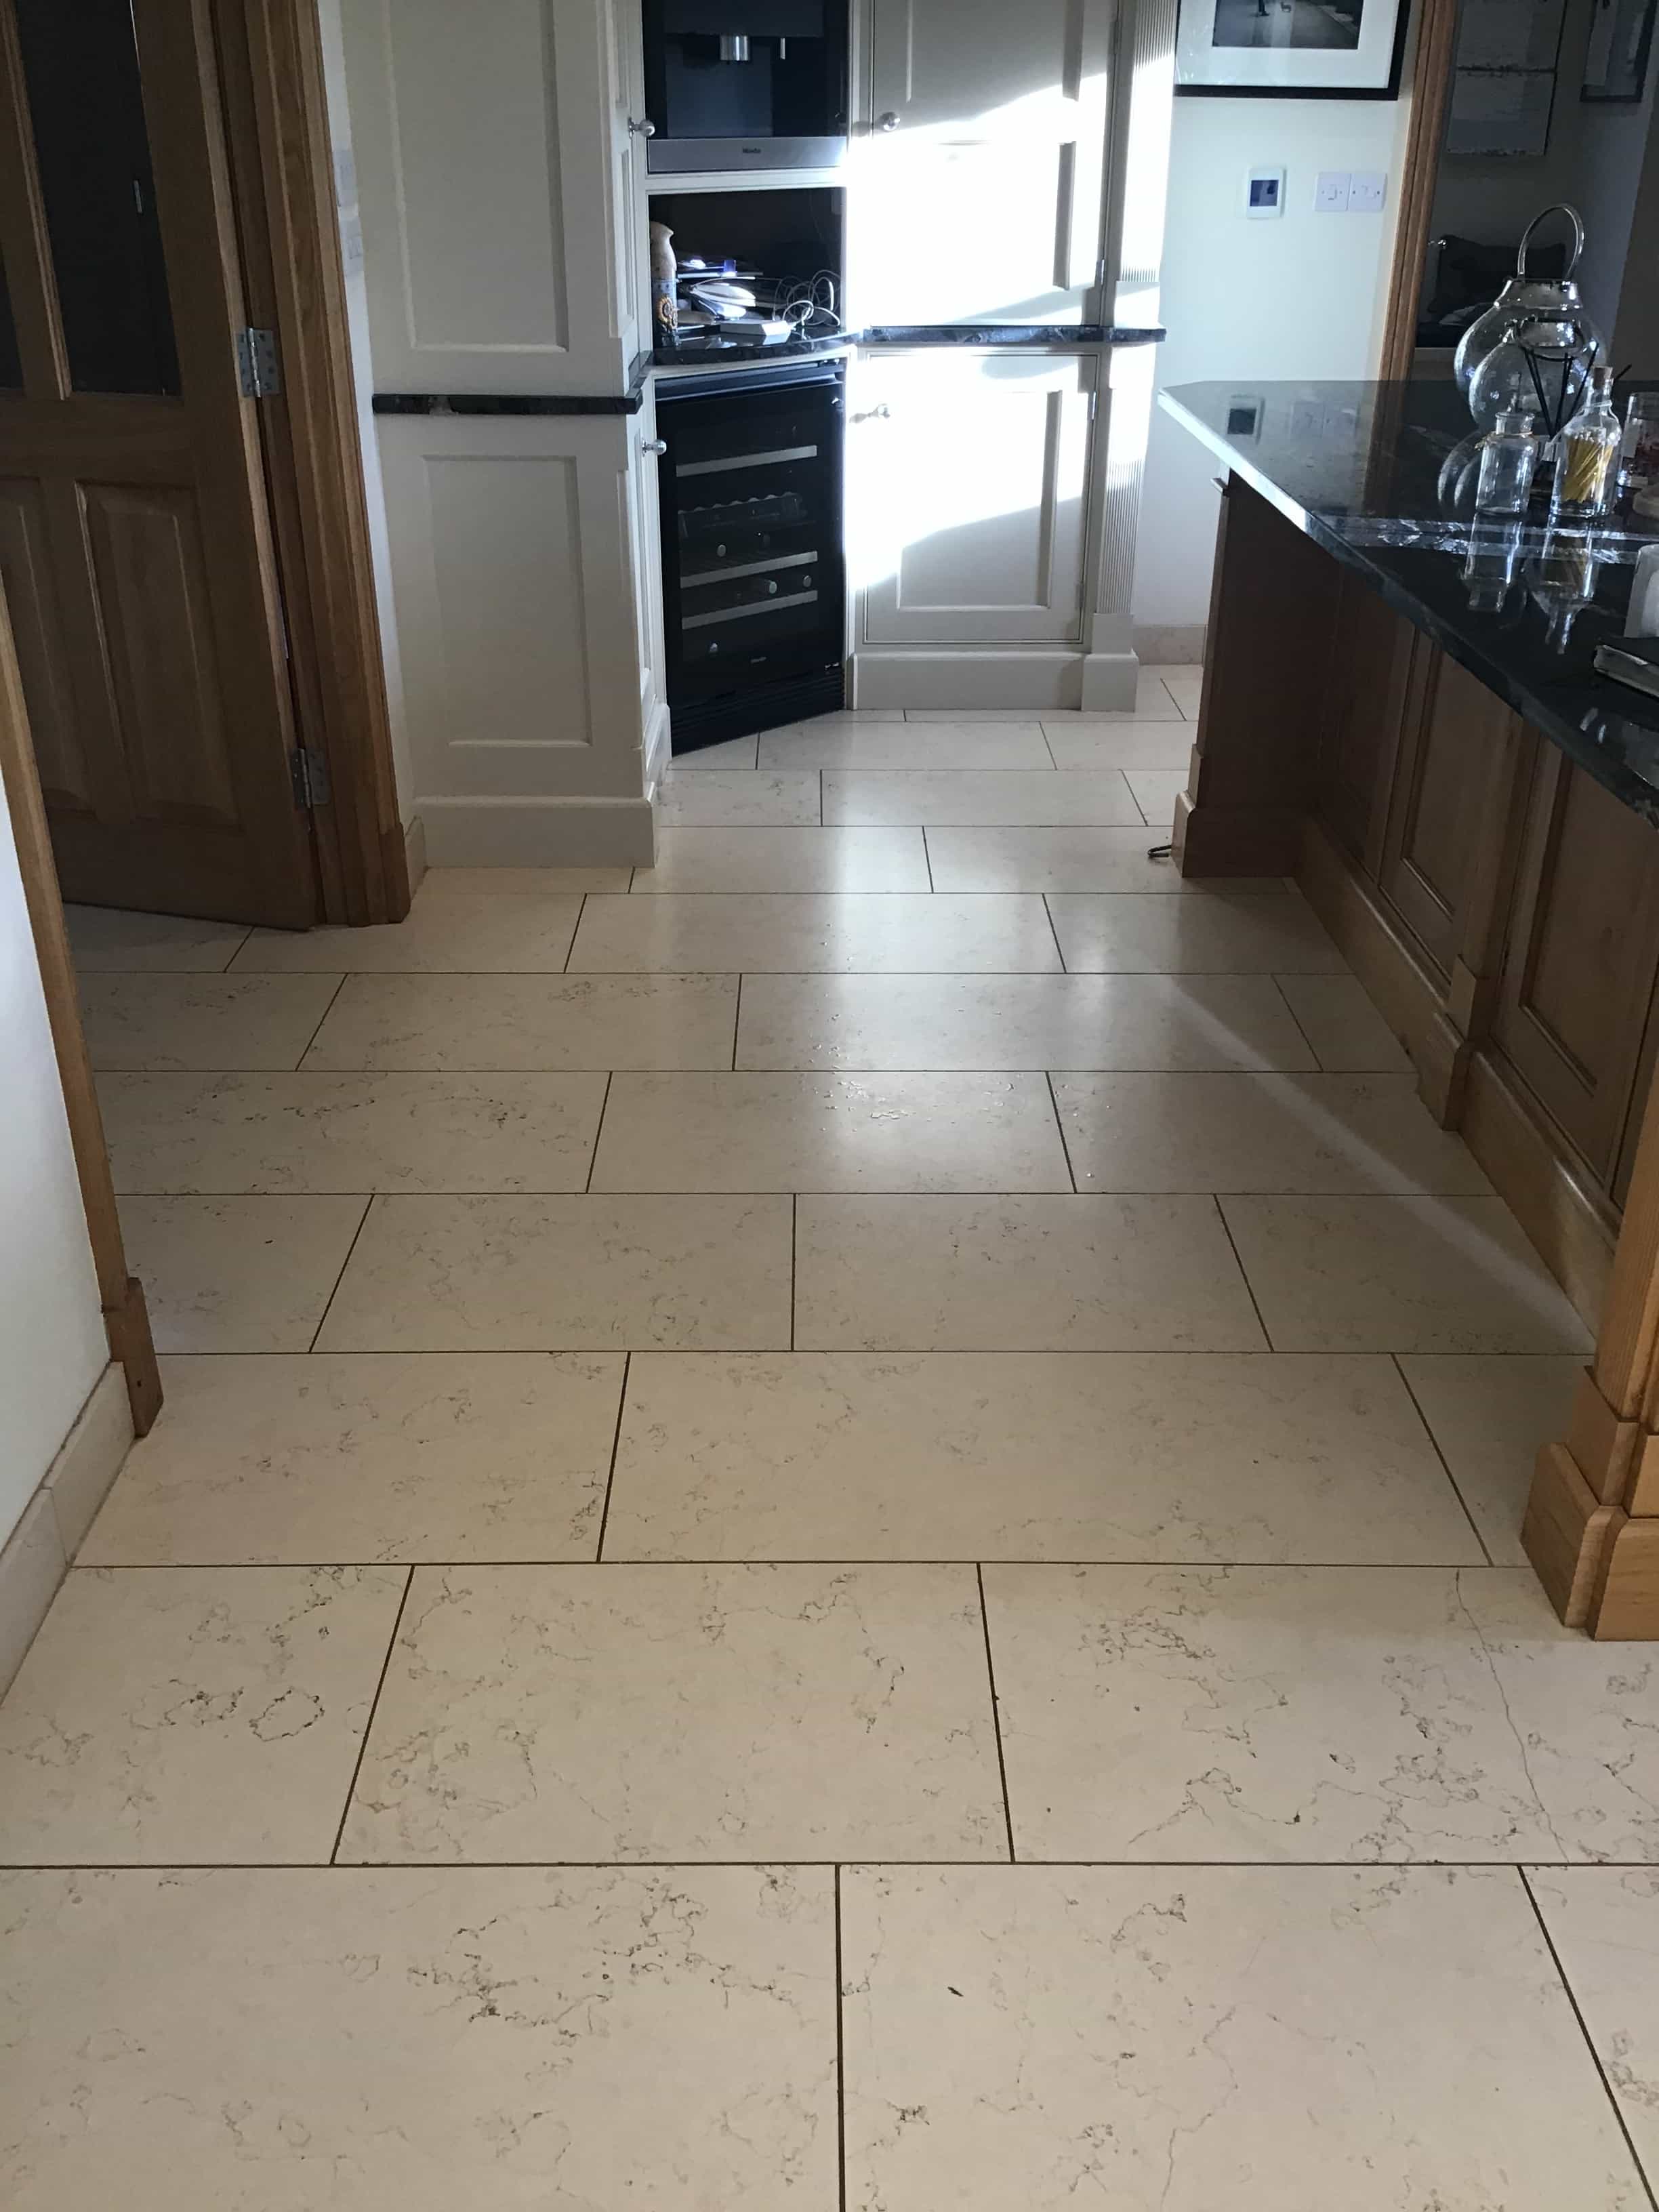
These photos are of a four-year-old Limestone kitchen floor at a property in Boughton that the customer was finding hard to keep clean and maintain a shine. Part of the problem was he owned two dogs and we often warn about the problems of dog urine on sealed tile and stone due to it being high in nitrogen.

Limstone Kitchen Floor Before Clean Polish Boughton

On my initial visit I was able to ascertain that the sealer had almost completely worn off, leaving the stone vulnerable to dirt becoming ingrained into the pores of the stone. I come across this problem a lot, in my experience when stone floors are installed by tilers, they generally apply a single coat of sealant which wears off over time, and as discussed earlier can be prematurely degraded by strong chemicals.

Limstone Kitchen Floor Before Clean Polish Boughton

My quote to renovate the Limestone floor was accepted and included a deep clean to the stone and grout, stone polish and then re-seal.

Cleaning/Polishing Limestone Tiled Flooring

I arrived on site on the arranged date and began by scrubbing all the grout lines with Tile Doctor grout brushes and a 3:1 dilution of Tile Doctor Pro-Clean. I then moved on to a small handheld polishing machine to clean around the tile edges using 800 and 1500 grit diamond encrusted burnishing pad to achieve a deep clean.

The process was then repeated throughout the rest of the area using larger 17” burnishing pads fitted to a floor polishing machine. The burnishing pads I used come in a set of four starting with 400-grit and moving up to 800, 1500 and 3000 grit, after each pad is applied the floor is rinsed with water and the soil extracted with a wet vacuum.

It took me much of the day to complete this stage of the renovation and the floor was still damp so once done I left for the day, allowing the floor to dry off overnight.

Sealing a Limestone Tiled Kitchen Floor

I returned the following day to complete the final polish using the 3000-grit burnishing pad, this gave a high polished finish which the customer had requested. This last pad is applied dry with only a little water splashed onto the tile, a process we call a spray burnish.

The floor was then sealed with three applications of Tile Doctor Ultra Seal Sealant to protect the newly restored and polished tiles. Ultra-Seal is a penetrating sealer that soaks into those recently cleaned pores in the stone, occupying the space and preventing any dirt from becoming ingrained there. It’s also a natural look sealer so it doesn’t change the colour of the stone in anyway and is almost indetectable once applied.

“Hard work from Philip has left us with a kitchen floor brought back to life – cleaned and sealed in little over 24 hours – brilliant job – Thanks”

Before leaving I gave the customer some tips on maintenance and a complimentary bottle of Tile Doctor Stone Soap to enable him to keep the floor looking its best, this product works well with the sealant we applied and is PH neutral so won’t degrade the new sealer.

Limestone Kitchen Floor After Clean Polish Boughton


Professional Restoration of a Limestone Tiled Kitchen Floor in Northamptonshire

Limestone Kitchen Floor Cleaned, Polished and Sealed in Boughton Read More »

Limestone Tiled Floor Before and After Renovation Wellingborough

Renovating Polished Limestone Floor with Stained Grout in Wellingborough

This Limestone tiled floor installed in a kitchen and family room at a property in Wellingborough is a great example of how this material can lose its appearance without a regular maintenance plan in place.

Limestone Tile and Stained Grout Before Cleaning Wellingborough

The customer called me as not only was she concerned that the floor had lost its lustre the grey grout had become very stained and almost black in heavy traffic areas, in fact my customer had originally asked about re-grouting but I was confident it could be cleaned.
I provided a quote which they were happy to accept.

Limestone Tile and Stained Grout Before Cleaning Wellingborough Limestone Tile and Stained Grout Before Cleaning Wellingborough

Cleaning/Polishing Limestone Tiled Flooring

The area was a nice wide 6 metre by 5 metre space and except for a few items of furniture that would need moving around there were relatively few obstacles. I reasoned the most efficient way to restore the polished appearance of the Limestone would be to use a set of diamond encrusted Burnishing Pads. These are fitted to a rotary machine and applied to the stone in sequence from coarse to smooth. It’s an effective process that cuts back the layer of dirt on the floor and then we build back up the polish.

We started burnishing the Limestone with a coarse 400-grit pad fitted to a rotary machine and applied with a little water for lubrication. The coarse pad is very good at removing dirt and old sealers from stone and once completed the resultant surface water and loose dirt is removed using a wet vacuum.

At this point I turned my attention to the badly stained grout lines, and applied a strong solution of Tile Doctor Pro-Clean which was scrubbed in along the grout lines using a stiff grout brush, this is necessary as the recessed nature of the grout makes it difficult for the rotary pads to reach it.

I then repeated the burnishing process with the medium 800-grit pad and fine 1500-grit pad, the 800-grit pad removes any small surface scratches and the 1500-grit further refines the look of the Limestone slowly restoring its polished appearance.

Renovating Stained Grout on a Limestone Tiled Floor

After the whole floor had been burnished in this way it was given a further rinse with water and the soil extracted as before. I then inspected the floor to see if more work would be needed.

I was not fully happy with how some of the grout lines had responded, some were still slightly stained, and some marks were visible in the high traffic areas. I had already discussed on my initial visit with the client that this might be the case and it was agreed between us that should this be the case I would apply a Tile Doctor Grout Colourant in Light Grey to recolour all the grout lines and achieve a uniform finish.

The stone and grout was still damp from cleaning and polishing, so I decided to leave the grout colouring until the following day.

Sealing a Limestone Tiled Kitchen Floor

On day two I started by grout recolouring all the grout lines, it’s a straight forward process but can be a little tedious where there is a lot of grout to cover. Once complete I allowed the grout colour to dry for a couple of hours before moving onto the next step.

The last pad to be applied in the stone burnishing process is the very fine 3000-grit polishing pad which is applied dry to the tiles using a small amount of water sprayed onto the floor and leaves the stone dry and with a polished silk finish.

The floor was then sealed using two coats of Tile Doctor Ultra Seal Sealant allowing the first coat to dry before applying the second. Ultra-Seal is an impregnating sealer that works by occupying the pores in the stone thereby preventing dirt from becoming ingrained there. It’s also a natural look sealer that doesn’t affect the appearance of the stone

Limestone Tile and Stained Grout After Renovation Wellingborough Limestone Tile and Stained Grout After Renovation Wellingborough

My customer was very happy with the transformation of her floor and provided the feedback copies below. In-fact she was so impressed with the results that she also used our services to restore the grout and silicon in one of her bathrooms.

“Phil was on time & easy to deal with and did an amazing job on my kitchen and bathroom floors and the carpets & sofa. No fuss, just a great job. Liz O.”

Limestone Tile and Stained Grout After Renovation Wellingborough


Professional Restoration of a Limestone Tiled Kitchen Floor in Northamptonshire

Renovating Polished Limestone Floor with Stained Grout in Wellingborough Read More »

Scroll to Top