tile maintenance

Black Marble in Brackley During Polishing

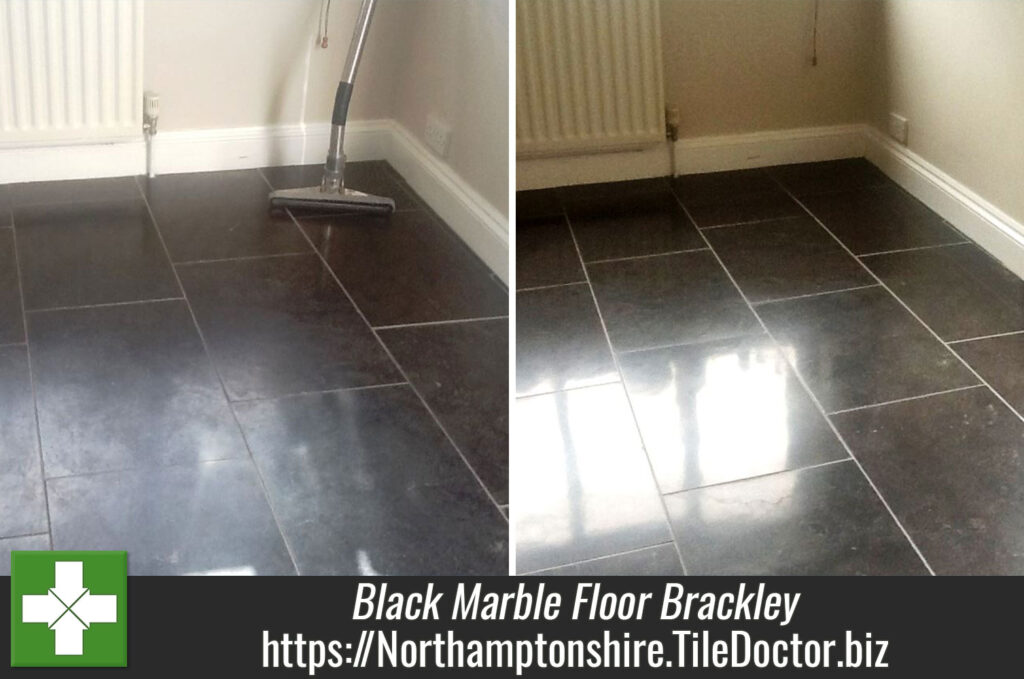
Putting the shine back on a Black Marble Floor in Brackley

This customer from the town of Brackley near Northampton got in touch with us to discuss their lovely black Marble tiled floor where it was proving difficult to maintain the shine. I went to visit and after carrying out some tests and asking a number of questions it became clear that that the product that had been used for regular cleaning had a high alkaline detergent content which was not suitable for the floor and had been causing smears, there were also light scratches due to the soiling levels. For polished stone or sealed floors we always recommend a neutral PH cleaning product such a Tile Doctor Neutral Cleaner.

Black Marble in Brackley Before Polishing

Burnishing Polished Black Marble Tiles

To remove the light scratches and restore the shine on the Marble it was necessary to cut back the surface and re-polish with a set of burnishing pads. The pads come in a set of four and are applied in sequence starting with a coarse pad together with a little water to cut through the old sealer and grime. You then progress through the other finer pads one by one until you get to the final polishing pad which provides a high polish.

Black Marble in Brackley During Polishing

After polishing the floor was rinsed down to remove any slurry from the polishing process and then allowed to dry before sealing with Tile Doctor Colour Grow which impregnates the pores in the stone enhancing the natural colours and protecting it from future staining.

Black Marble in Brackley After Polishing

Before leaving we spoke again on the types of cleaning solutions to get the best results and she was over the moon with the results.

Maintaining Polished Black Marble Tiles in Northamptonshire-

Putting the shine back on a Black Marble Floor in Brackley Read More »

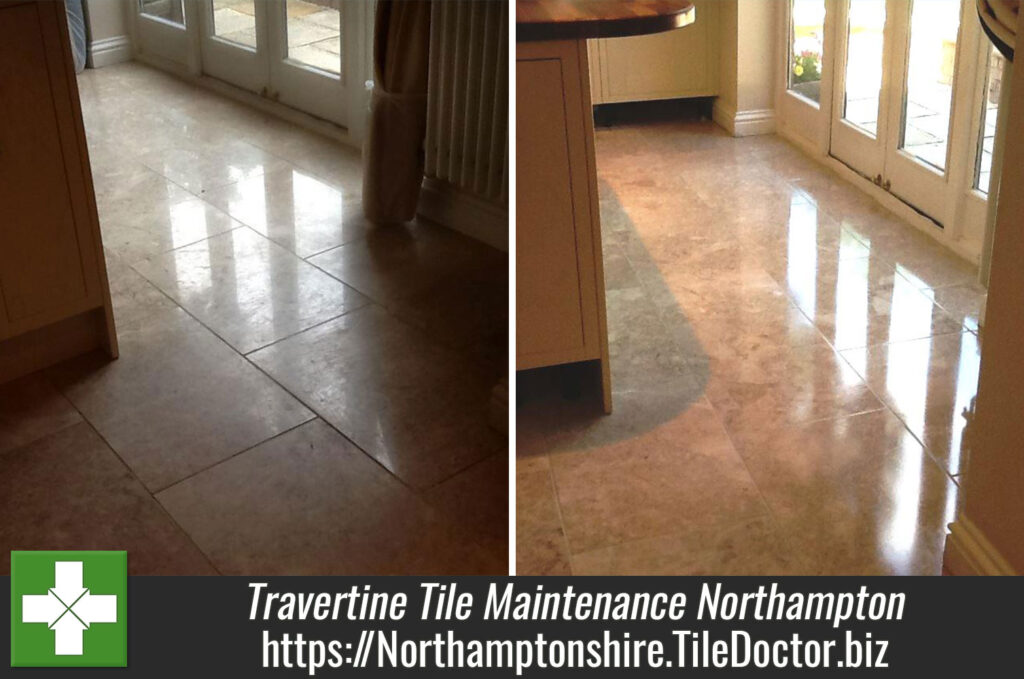
Travertine Tiles After Cleaning Polishing in Northampton

Polished Travertine Tile Maintenanced in Northampton

Polished stone floors such as Travertine need to be regularly maintained correctly or will lose their sheen over time, additionally grout lines can fill with dirt and light scratches can quickly dull down Travertine and attract yet more soil. This was the case with this Travertine tiled floor in Northampton which had been left too long between deep cleans and now the protective sealer had worn off and were badly scratched and soiled.

Travertine Tiles Before Cleaning Polishing in Northampton

Burnishing Polished Travertine Tiles

To get the surface back to a condition where it can be polished again it’s necessary to burnish the Travertine using a set of diamond encrusted floor pads. The pads come in a set of four and you start with the coarse pad which together with a little water cuts through and removes grime and sealers from the tile. This take a bit of time to get around the whole floor and then you rinse it down to remove any slurry and start again with the medium pad which is of a higher grade and is the first step in the polishing process. Again the floor is rinsed before moving on to the third pad which is a fine grade and is the second step in bringing the polish back.

By this time it was getting late so the floor was given another rinse and I came back the next day to apply the final pad in the set of four which is a super fine pad that is run over the floor and puts the final shine on the polished Travertine. The floor was given another rinse and left to dry so it could be sealed later that afternoon.

Sealing Polished Travertine Tiles

There are a number of sealers that you can use on Travertine and in this case I chose Tile Doctor Colour Grow which in an impregnating sealer that occupies the pores in the stone to prevent contaminates lodging there and also does well to bring out the natural colours in the stone.

Travertine Tiles After Cleaning Polishing in Northampton
All in the job took two days and I’m happy to report the customer was very happy with the results.

Cleaning and Polishing Travertine Tiled floor in Northamptonshire

Polished Travertine Tile Maintenanced in Northampton Read More »

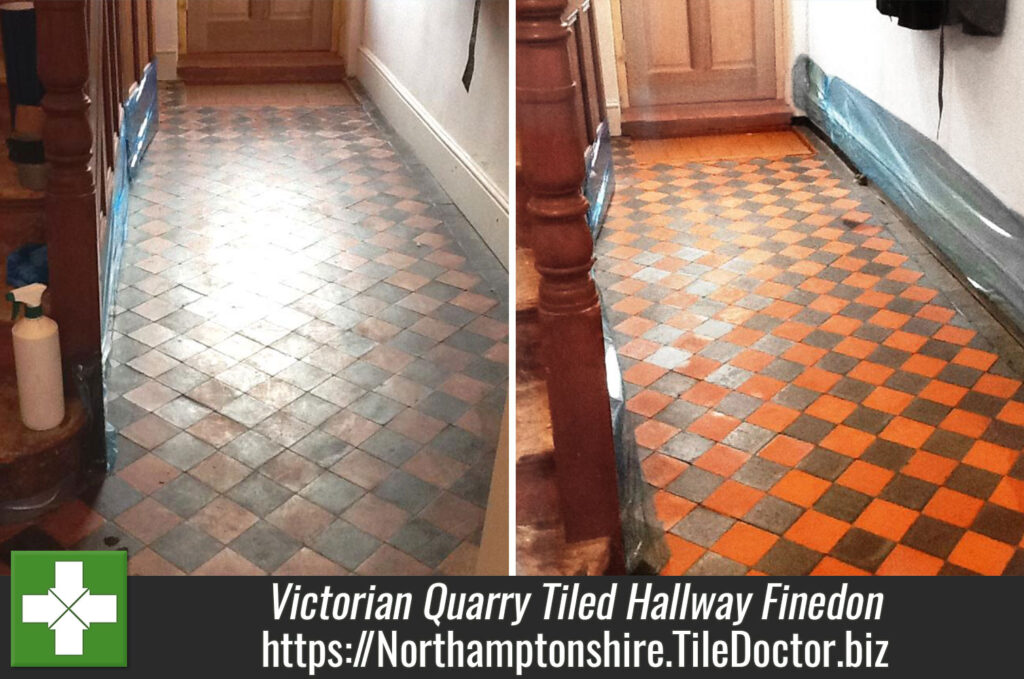
Victorian Quarry Tiled Floor Finedon After

Restoring a Victorian Quarry Tiled Hallway in Finedon

The following photos are from a property in Finedon, Wellingborough where like so many of my customers it seems the owner was in the middle of a full property restoration which included plans to bring the original Victorian hallway Quarry tiles back to life. Tile Doctor restores hundreds of Victorian floors across the UK every year so she gave us a call. I came round to take a look at the tiles and could see that the floor had been covered with Linoleum for many years which had been fixed with adhesive we was still evident on the tiles along with old wax based sealers which would need to be stripped off. In general the floor was now looking very dull and uncared for.

Victorian Quarry Tiled Floor Finedon Before

Cleaning Victorian Quarry Tiles

To remove the glue and restore the tiles a dilution of Tile Doctor Remove and Go was left to soak into the pores of the tile for twenty minutes before being brushed in with a rotary machine fitted with a black stripping pad. Once done the floor was rinsed down thoroughly with water and the remaining solution removed with a wet vacuum, this revealed a few areas that needed re-treating so the whole process was repeated until I was happy that the glue and old sealers were gone and the tile and grout was as clean as I could get it. This process took up much of the day and after using the wet vacuum again to get the floor as dry as possible I left a couple of fan dryers in place to assist with the drying.

Sealing Victorian Quarry Tiles

The floor was left for a few days so it could dry out thoroughly and then checked for dampness and remaining staining, the floor was dry but there were a few areas that needed further attention which were spot treated and then dried out with a hand drier. To protect it and make it easier to clean in the future the floor was then sealed by applying a number of coats of Tile Doctor Seal and Gof which added a nice light sheen finish to the look of the tile.

Victorian Quarry Tiled Floor Finedon After
 

Victorian Quarry Tile Restoration in Finedon, Northamptonshire

Restoring a Victorian Quarry Tiled Hallway in Finedon Read More »

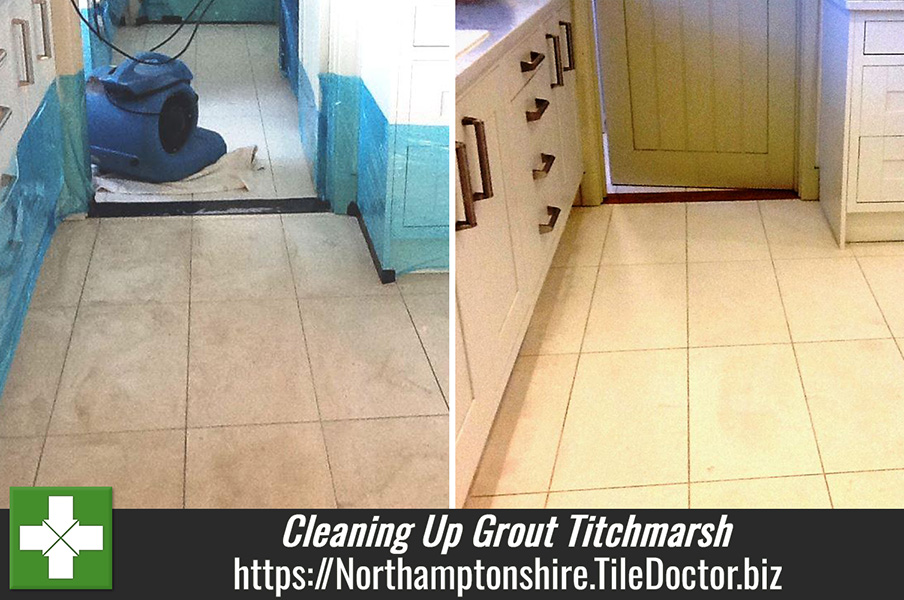
Dirty Grout in Titchmarsh Kitchen After Cleaning

Cleaning up newly installed Grout in Titchmarsh

This customer from Titchmarsh near Kettering was unhappy that the Porcelain floor tiles that were installed in her kitchen six months prior were proving difficult to clean and that the grout line had turned from a grey to black and whatever she tried she just could not keep this floor clean. On inspection I soon discovered that no or very little sealer had been applied to the Porcelain which is not unusual as most Porcelain does not require a sealer however Micro Porous Porcelain does and she should have been advised by the shop that sold her the tiles that this was the case. A quote was given which she was happy with and I returned the following week to sort the problem out.

Deep Cleaning Porcelain Tile and Grout

To protect the kitchen units I covered them in a plastic and then moved onto to deep cleaning the tiles with a dilution of Tile doctor Pro Clean which was applied and left to soak in for a while before hand scrubbing the floor on my hands and knees with stiff brushes. This did made an improvement but something stronger was required to get the grout looking better so it was back down to the floor with hand brushes again but this time I used Tile Doctor Grout Clean-Up which is an acid that can remove grout smears and mineral deposits, in the end I actually used two litres of Grout Clean-Up to restore the grout to about 95% of its correct appearance and once done I gave the floor a thorough wash down to remove any trace of product.

Dirty Grout in Titchmarsh Kitchen During Cleaning

Sealing Porcelain Tile and Grout

This grout should have been correctly sealed from day one and luckily for the client it came up to her satisfaction otherwise the only other option would have been to use a Grout Colourant which would have been more costly but cheaper than replacing the grout altogether. Had the grout been much older this may have been the best option as I suspect the result from cleaning would have been less effective. The last step was to seal the tiles and grout using Tile Doctor Ultra Seal which is a natural look sealer that provides maximum stain protection and is recommended for use in kitchens. Before leaving I gave the client written instructions on maintenance which she found very helpful.

Dirty Grout in Titchmarsh Kitchen After Cleaning
 

Cleaning and Sealing Porcelain Tile and Grout in a Northamptonshire Kitchen

Cleaning up newly installed Grout in Titchmarsh Read More »

Swimming Pool Tile Cleaning Naseby

Removing Rust Stains from Anti-Slip Swimming Pool tiles in Naseby

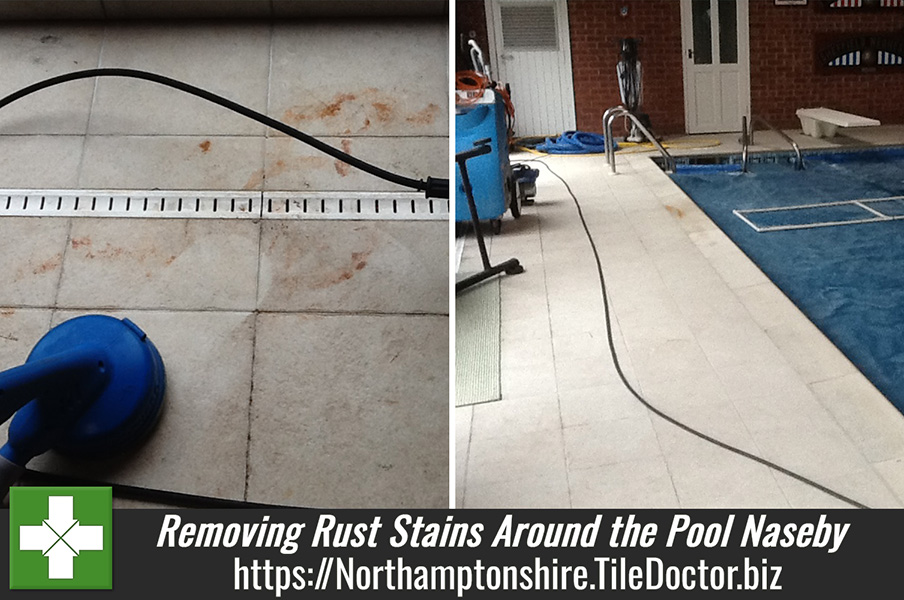
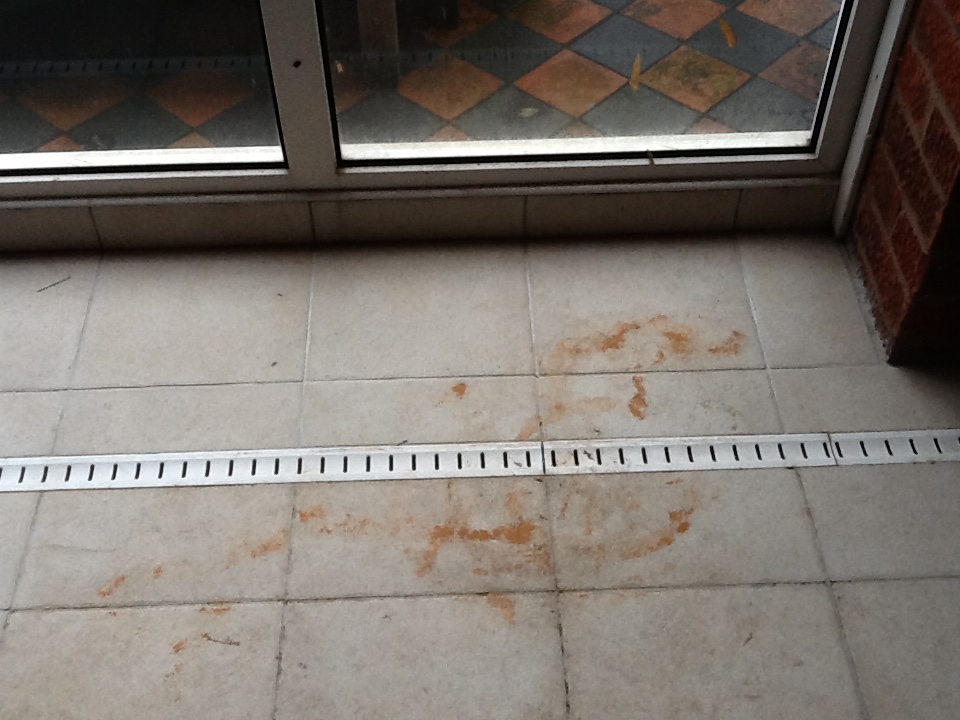
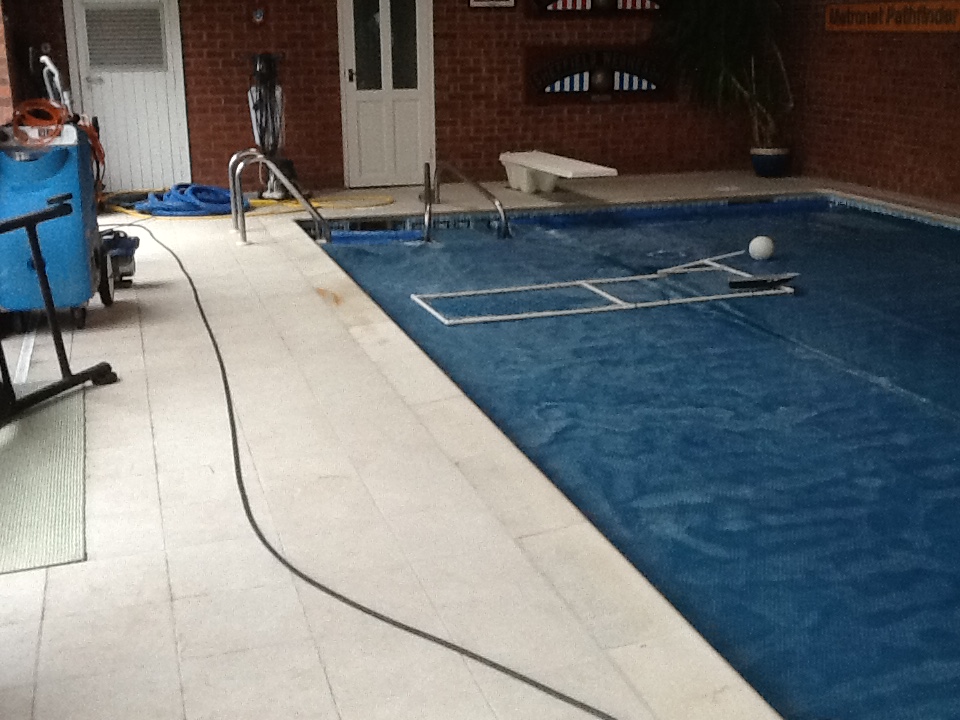
The photographs below were taken at a privately owned swimming pool in the historic village of Naseby an area famous for the civil war battle that tool place there in 1645. The pool was surrounded by Anti-Slip safety tiles which have a roughened texture to improve traction around the water’s edge, this does have the side effect however that they trap dirt more easily. The tiles were overdue a deep clean and had become very dirty and additionally there were rust marks from metal furniture and blackish grout lines.

Rust Stains on Swimming Pool Tile Cleaning Naseby

Cleaning Pool Tiles and Removing Rust Stains

Working one area at a time and taking care not to contaminate the swimming pool a dilution of Tile Doctor Pro-Clean was applied to the tiles and then worked into the tile, especially the rust stains before being washed off using a Rotovac machine which applies hot water at high pressure and then removes it to a remove tank using suction. It’s an ideal machine for this sort of job as it’s very self-contained.

Stubborn areas were treated with Tile Doctor Remove and Go which is a powerful product designed to deal with sealers and other surface coatings. Once done another rinse with the Rotovac ensured the soiled cleaning solution and any trace of cleaning product is removed from the surface.

Rust Stains on Swimming Pool Tile Cleaning Naseby

Sealing Ant-Slip Porcelain tiles

Once the tile and grout was clean it was left to dry so it could be sealed which will prevent the tile and grout becoming dirty so quickly. For this we used Tile Doctor Pro-Seal which is a no-sheen, natural look, water based penetrating sealer.

Swimming Pool Tile Cleaning Naseby
It makes a significant difference if you have the right tools for the job and this resulted in the tiles looking as good as new in no time.

Deep cleaning pool surround tiles in Naseby, Northampton

Removing Rust Stains from Anti-Slip Swimming Pool tiles in Naseby Read More »

Terracotta tiles Cleaned and Sealed in Holcot Village

Kitchen Terracotta Tile Cleaning and Sealing in Holcot

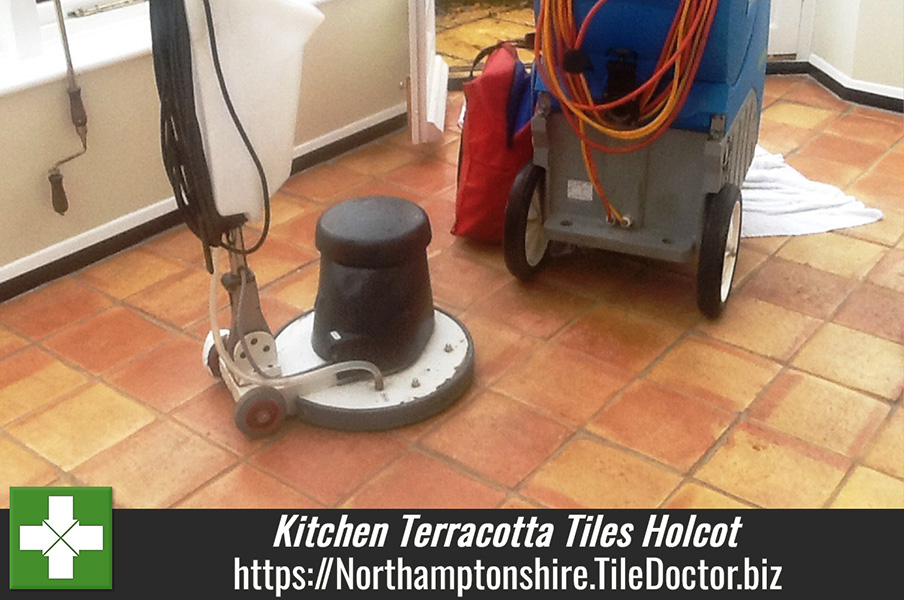
The photographs below show a Terracotta Tiled floor we maintained that was installed in the kitchen and conservatory of a house in the Northamptonshire village of Holcot. The tile and grout was in good physical condition but had become ingrained with dirt and were now in need of a deep clean and reseal.

Terracotta tiles Before Cleaning in Holcot Village

Cleaning Terracotta Tiles

First job was to protect the kitchen units, doors and skirting boards during the cleaning process for which I used blue plastic sheeting. Next a strong dilution of Tile Doctor Pro-Clean which is an industrial strength alkaline cleaning product that’s safe to use on tile and stone was applied to the floor using a mop. The solution was left it to dwell on the floor for twenty minutes in order for it to soak into the tile and get to work on the dirt. It was then worked into the floor using a rotary machine fitted with a black scrubbing pad and stiff hand brushes were along the grout lines where the pad struggled to reach.

The soiled solution was picked up using our large wet and dry vacuum and the floor was then rinsed with clean water to neutralise the tile and allow us to see which areas need further attention. The process was repeated until I was happy that any old sealer and all the dirt had been removed and then the floor was given a final rinse, wet vacuum and then left to dry overnight ready for sealing the next day.

Terracotta tiles Being Cleaned in Holcot Village

Sealing Terracotta Tiles

When I returned the next day I checked the floor had dried using a damp meter which it was and so proceeded to seal the Terracotta tiles with seven coats of Tile Doctor Seal and Go which will protect the tiles from staining and also add a nice subtle shine to the floor. Terracotta is a clay based product and so naturally quite porous.

Terracotta tiles Cleaned and Sealed in Holcot Village
 

Terracotta Tile Maintenance in a Holcot Kitchen

Kitchen Terracotta Tile Cleaning and Sealing in Holcot Read More »

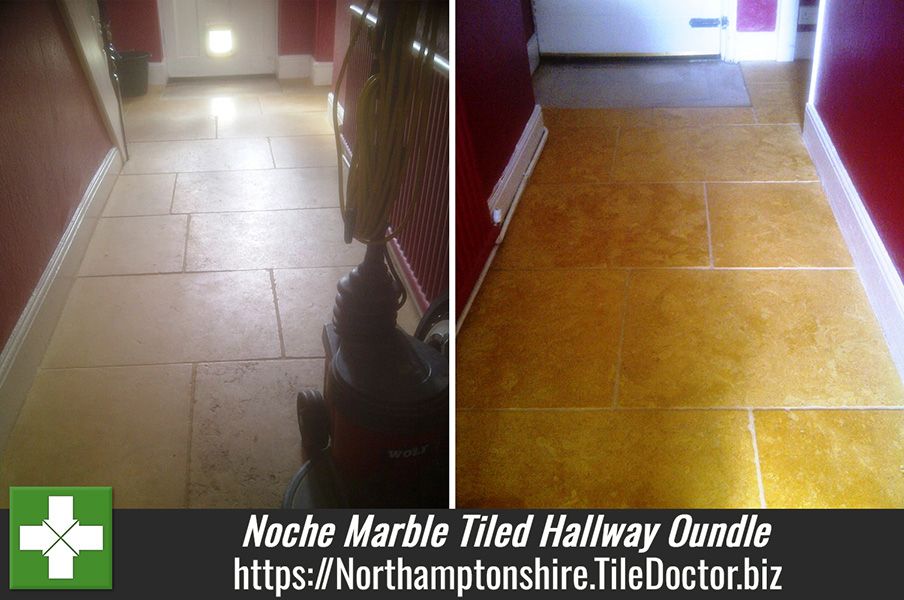
Noce Marble During Sealing Oundle

Cleaning and Sealing Noche Marble Tiled Hallway in Oundle

These Noche Marble tiles installed in the hallway of this house in Oundle are a premium product with a warm antique look however like any natural stone tile it needs to be sealed in order to prevent dirt becoming ingrained in the pores of the stone. In this case the sealer had worn off and was the floor was now difficult to keep clean so we were called into the deep clean the tile and grout and then re-seal. Sealers can last a few years depending on wear.

Noce Marble Before Cleaning Oundle Noce Marble Before Cleaning Oundle

Cleaning Noche Marble Tiles

To deep clean the tile and grout and remove any remaining sealer I combined a strong dilution of Tile Doctor Pro-Clean 50/50 with NanoTech UltraClean. The UltraClean adds tiny abrasive particles which make a more effective cleaning product, both products are safe to use on natural stone floors. It’s best to let the solution soak into the tile for ten to twenty minutes before being scrubbed in with a rotary machine fitted with a scrubbing brush or black scrubbing pad. The rotary pads can struggle to get into the grout lines so it’s best to use a stiff brush along those.

Noce Marble During Grout Cleaning Oundle
To remove the soiled cleaning solution and rinse the tiles I use a high pressure spinner tool which is a brilliant machine for tile cleaning as it deploys water under high pressure water whilst extracting the dirty water back to a container in the van.

Noce Marble After Cleaning Oundle Noce Marble After Cleaning Oundle

Sealing Noche Marble Tiles

The floor was left to dry out for a few days and we returned the following week to seal the tiles using a damp meter first to verify the floor was indeed dry which it was so we proceeded to seal the tiles using two coats of Tile Doctor Colour Grow.

Noce Marble During Sealing Oundle
Colour grow was chosen as it’s an impregnating sealer the soaks into the pores of the tile bringing out and enhancing the natural colours in the stone in the process.

Noce Marble After Sealing Oundle Noce Marble After Sealing Oundle

I took lots of photographs so you should be able to see how much cleaner the floor now looks, especially the grout and how the colour has been restored to the Marble.

Noche Marble Floor Tiles Cleaned and Sealed in Northamptonshire

Cleaning and Sealing Noche Marble Tiled Hallway in Oundle Read More »

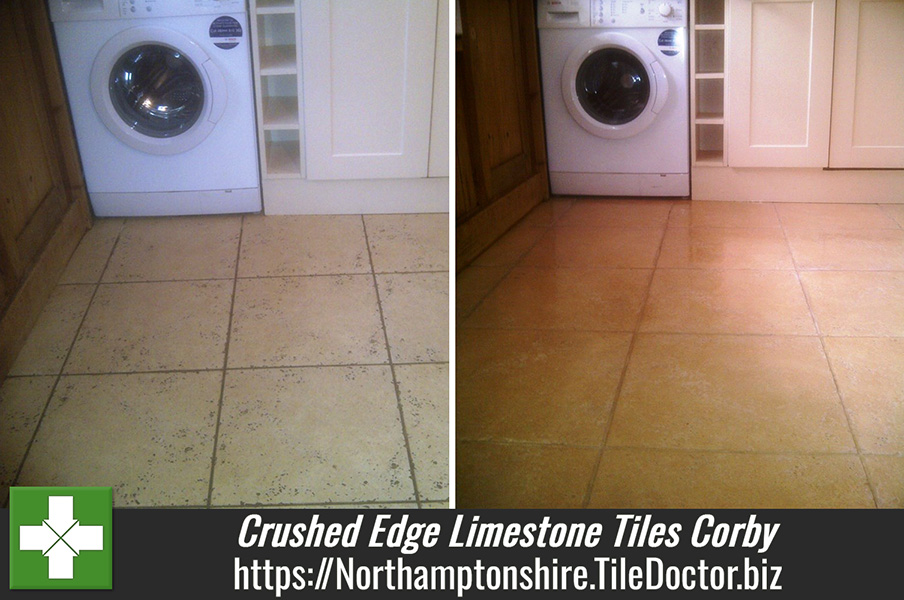
Crushed Edge Limestone Corby After

Removing ingrained dirt from Crushed Edge Limestone tiles in Corby

Limestone is a natural stone with a lot of unique character and surface features with each tile being uniquely different from the last. These surface characteristics however can however make a stone very difficult to clean and unless sealed can result in dirt becoming trapped and ingrained. These particular Limestone tiles installed throughout the downstairs floor of a house in Corby are known as Crushed Edge Limestone and have an increased susceptibility to this issue. As you can see from the photographs below the crevices in the tile have become black with trapped dirt which has proved very difficult to clean.

Crushed Edge Limestone Corby Before Crushed Edge Limestone Corby Before

Cleaning Crushed Edge Limestone

Limestone is a very hard surface that has to be burnished with diamond encrusted pads to restore the finish so we set about this task using a set of Tile Doctor Burnishing Pads. Before starting however we soaked the floor in Tile Doctor Pro-Clean and scrubbed this into the tile surface spending particular attention on the grout lines; this process gets a head start on the cleaning and also remove any grit etc. that might cause problems before burnishing. The soiled solution was then rinsed away using water and all was removed using a wet vacuum.

Burnishing Crushed Edge Limestone

The burnishing pads come in a set of four, you start with the coarse pad together with a little water and this cut’s through and removes surface grime and any remaining surface sealer. The resultant slurry is washed away and you then progress through the other finer pads one by one until you get to the final polishing pad which provides a nice shine. You need to rinse the tiles in-between and use a wet vacuum to remove the slurry.

Sealing Crushed Edge Limestone

When we came back the next day we tested a few areas for dampness before starting to seal the floor, this is an important step for this type of tile as it can easily trap dirt. We chose Tile Doctor Ultra-Seal for this, it’s a natural look impregnating sealer that occupies the tiny pores in the stone preventing dirt and other contaminates from becoming ingrained, two coats were sufficient. Once the sealer had fully dried we went over it with a white buffing pad to finish.

Crushed Edge Limestone Corby After Crushed Edge Limestone Corby After


Cleaning Limestone Tiles in Northamptonshire

Removing ingrained dirt from Crushed Edge Limestone tiles in Corby Read More »

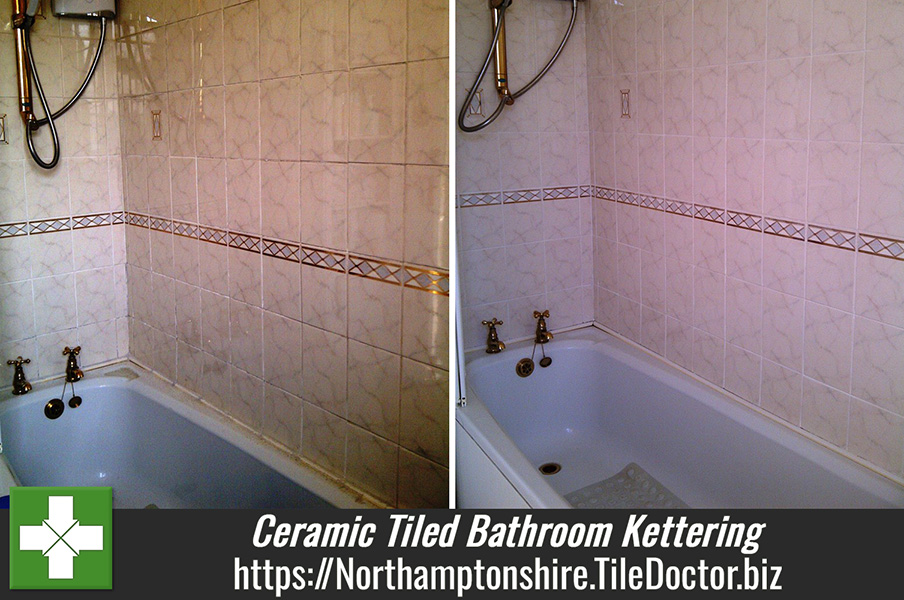
Ceramic Bathroom Tiles After Cleaning Kettering

Ceramic Tiled Bathroom Refreshed in Kettering

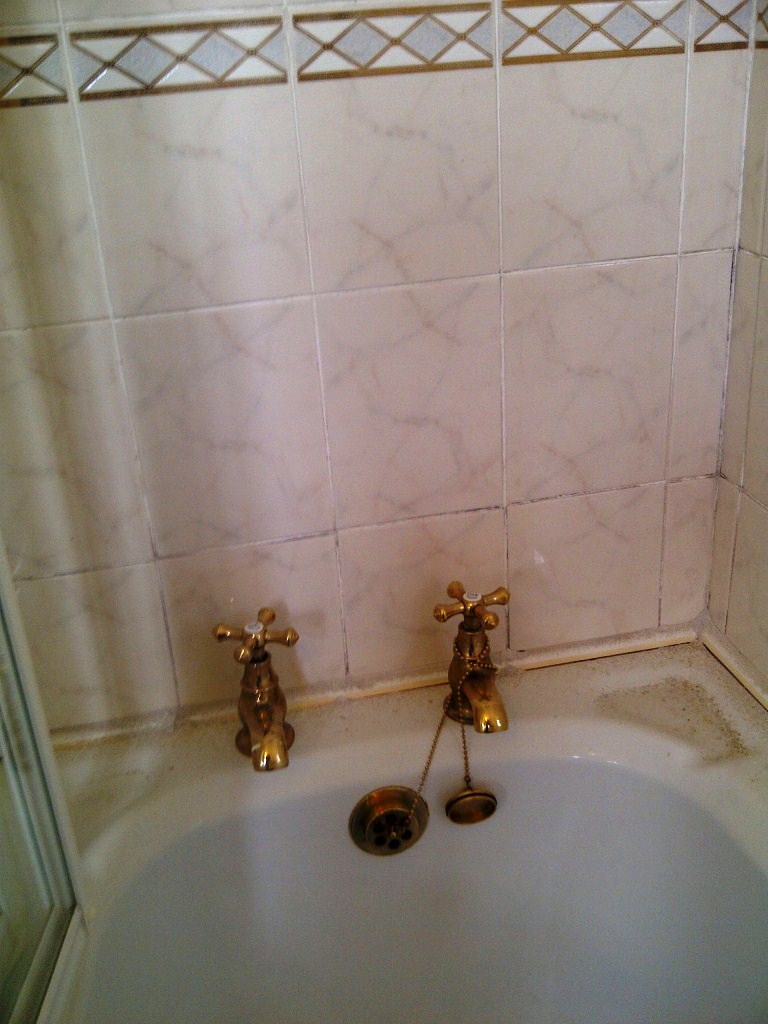
This was a straight forward request to rejuvenate the ceramic tile and grout around the bath at a house in the town Kettering. The glazed ceramic tiles where in good condition but the grout and seal around the bath had become quite grubby and stained with dyes from shampoos, soaps and had gone dark in some areas where mould had started to get a foothold.

Ceramic Bathroom Tiles Before Cleaning Kettering Ceramic Bathroom Tiles Before Cleaning Kettering

Cleaning Ceramic Tile and Grout

We started by spraying the tiles with Tile Doctor Oxy-Pro which is a strong high-alkaline cleaner especially formulated and packaged for cleaning showers. The spray delivery is important as mixing the cleaning product with air makes it lighter and helps it cling to the tile and grout. The Oxy-Pro was left to soak in for around 15 minutes before being scrubbed into the tile and grout using a stiff grout brush. This action cleaned up the grout and tile nicely removing stains from shampoos and soaps etc.

Removing Mould from Grout

The grout was looking much improved but there was however some evidence of mould remaining which needed dealing with. To tackle this we used Tile Doctor Mould Away which is designed to remove mould off Silicone and Grout. It’s very easy to use, you simply spray the Silicone or Grout to be treated with Mould Away then leave to soak in for twenty minutes and then scrub with a brush and rinse with water repeating the process until the mould has disappeared, in extreme cases you can leave it for a few hours but we didn’t need to do that.

Ceramic Bathroom Tiles After Cleaning Kettering Ceramic Bathroom Tiles After Cleaning Kettering

I was unable to use any tools on this job so it took a fair amount of manual effort but the results were well worth it as you can see.

Refreshing a Ceramic Tiled Bath in Kettering

Ceramic Tiled Bathroom Refreshed in Kettering Read More »

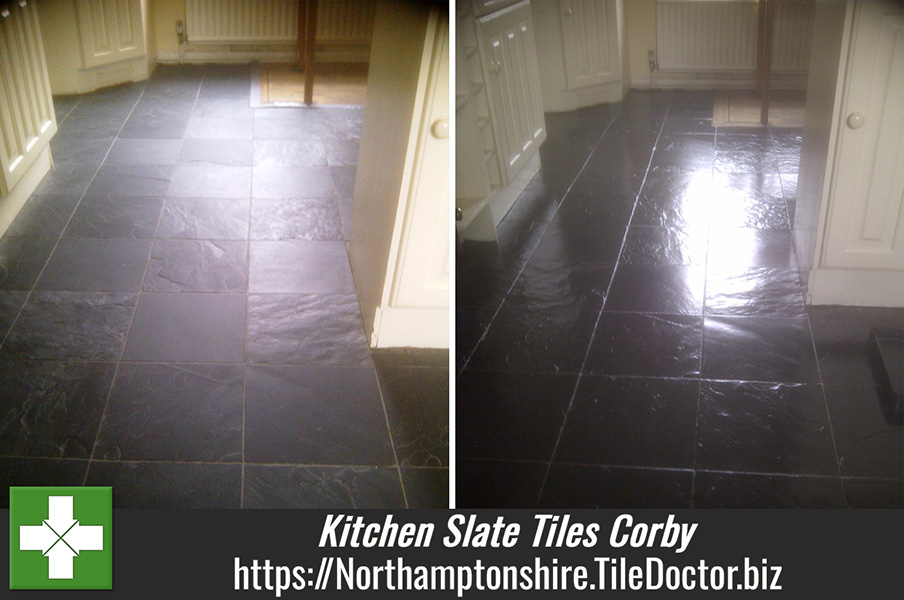
Slate floor during sealing Corby

Cleaning and Sealing Kitchen Slate Tiles in Corby

Another example of a tired Slate Tiled floor that was in need of a clean and seal, this time in the industrial town of Corby famous for its iron and steel works.

Slate floor before cleaning Corby Slate floor before cleaning Corby

Cleaning Slate Kitchen Tiles

To get the Slate tile and grout clean the a dilution of Tile Doctor Pro-Clean was applied which was left to soak into the tile for ten minutes before scrubbing it in with a rotary machine fitted with a black scrubbing pad and then using a stiff grout brush to clean along the grout lines.

Slate floor during cleaning Corby Slate floor during cleaning Corby

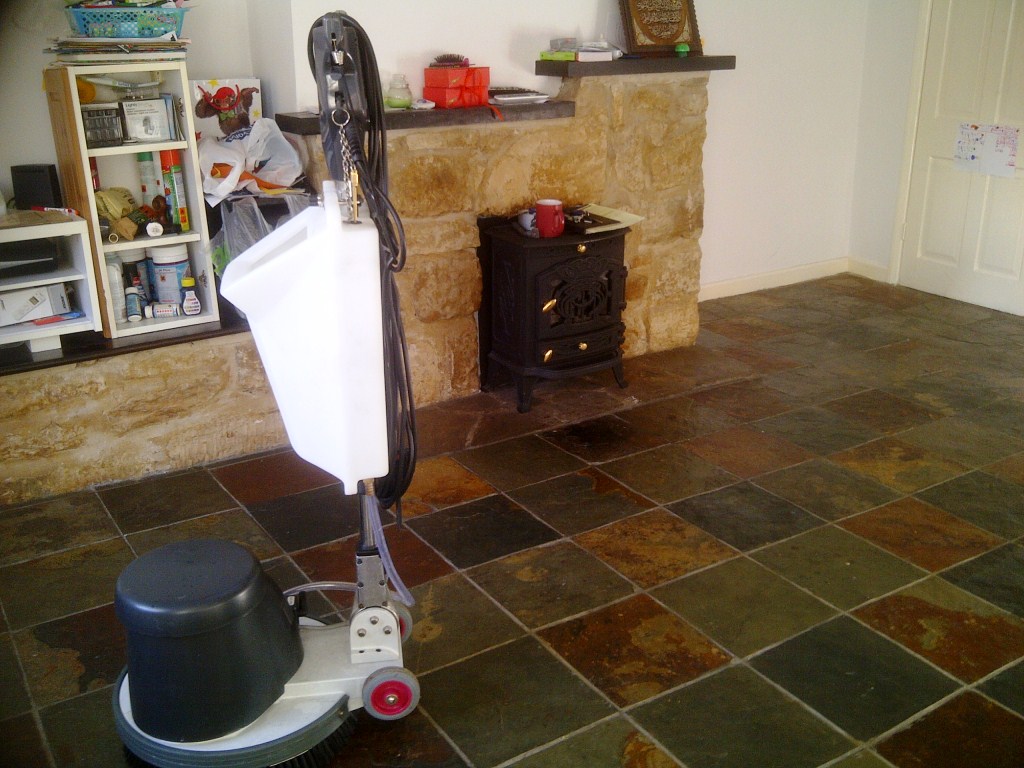
The floor was then thoroughly rinsed using clean water which was then removed using a wet vacuum; there were a few stubborn areas that needed further attention which were re-treated. The last step of the cleaning process was to use a high pressure cleaning tool that extracts as well as washes, we normally use this tool for cleaning carpets but it also does a great job of giving a hard floor a thorough rinse to remove any trace of cleaning product before sealing.

Slate floor during cleaning Corby Slate floor during cleaning Corby

Sealing the Slate Tiled Floor

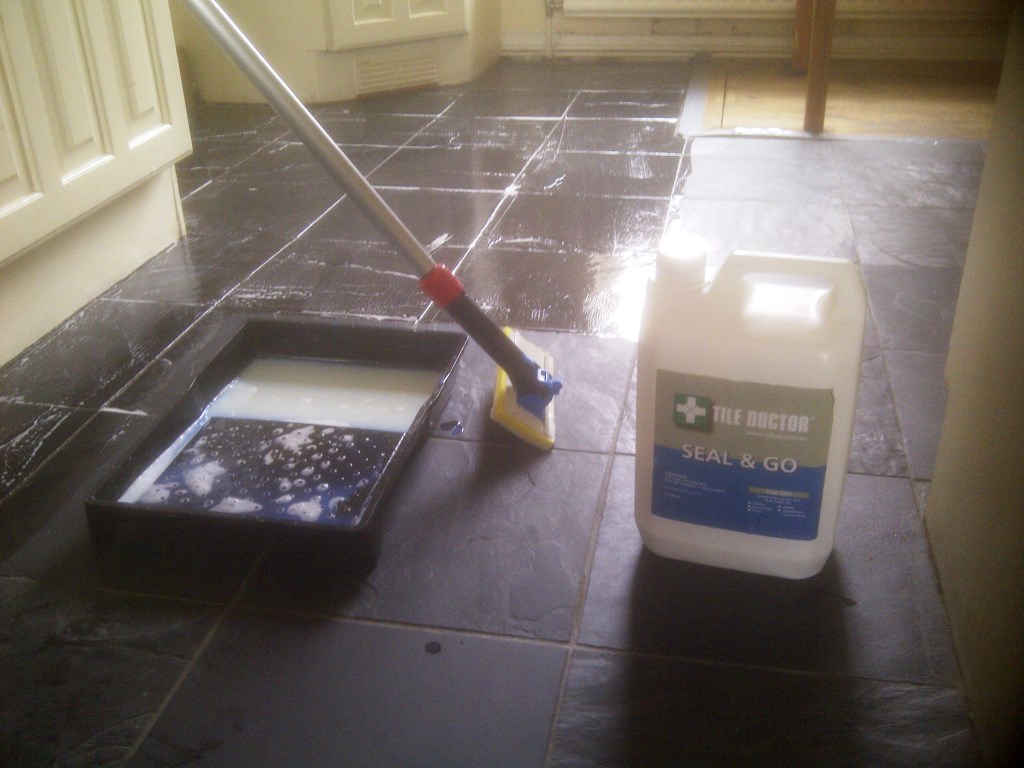
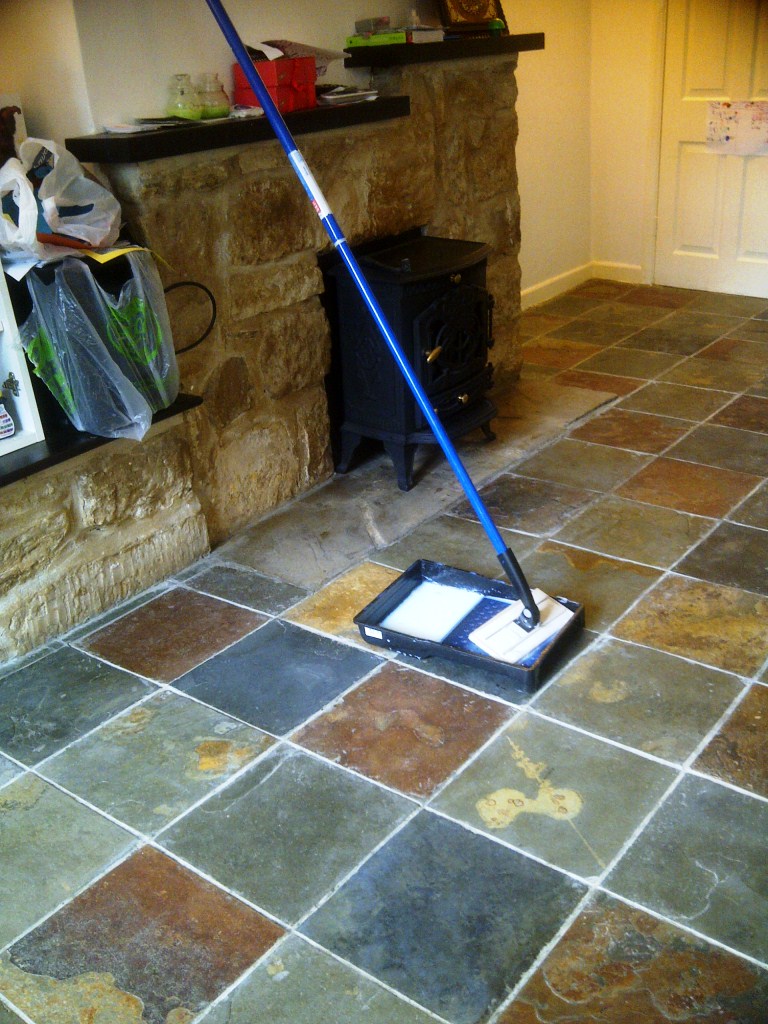
The floor was left to dry and we came back the next day to seal the slate using five coats of Tile Doctor Seal and Go applied using a paint pad applicator. I usually use Seal and Go for slate tiles as it provides good stain protection with adds a nice sheen finish that adds to the look of the floor.

Slate floor during sealing Corby
The job took two days and the floor now looks transformed.

Slate floor after sealing Corby Slate floor after sealing Corby


Cleaning and Sealing a Slate Tiled Floor in Northamptonshire

Cleaning and Sealing Kitchen Slate Tiles in Corby Read More »

Slate Tiles Towcester Scrubbing

Cleaning and Sealing Kitchen Slate Tiles in Towcester

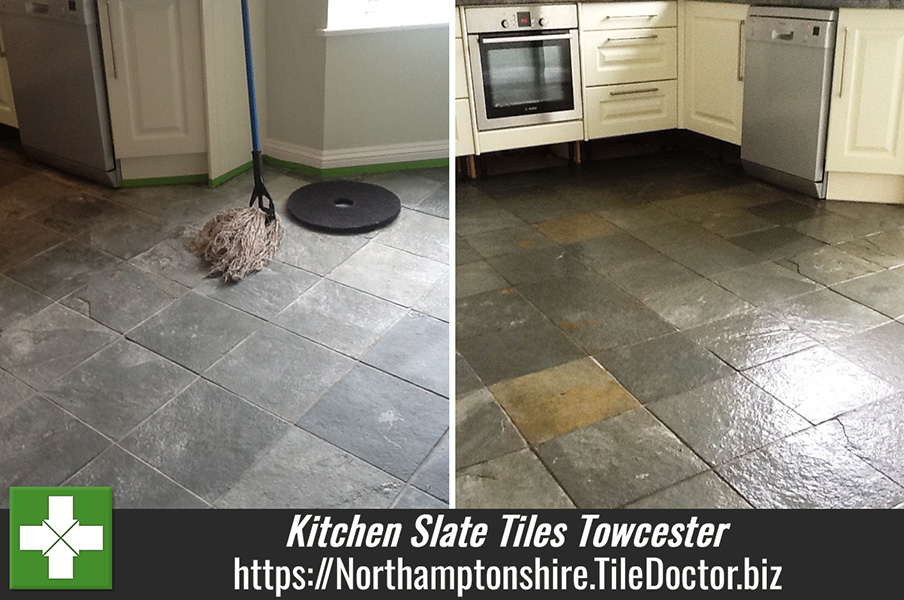
These photographs of a Slate tiled floor were taken in the Kitchen of a house in Towcester where the slate was looking rather dull and had lost its appeal. This does happen with natural stone floor where the sealer which can add a shine to the stone becomes worn down and ineffective.

Towcester Slate Tiles Before Cleaning Slate Tiles Towcester Before Cleaning

Cleaning Chinese Slate Tiles

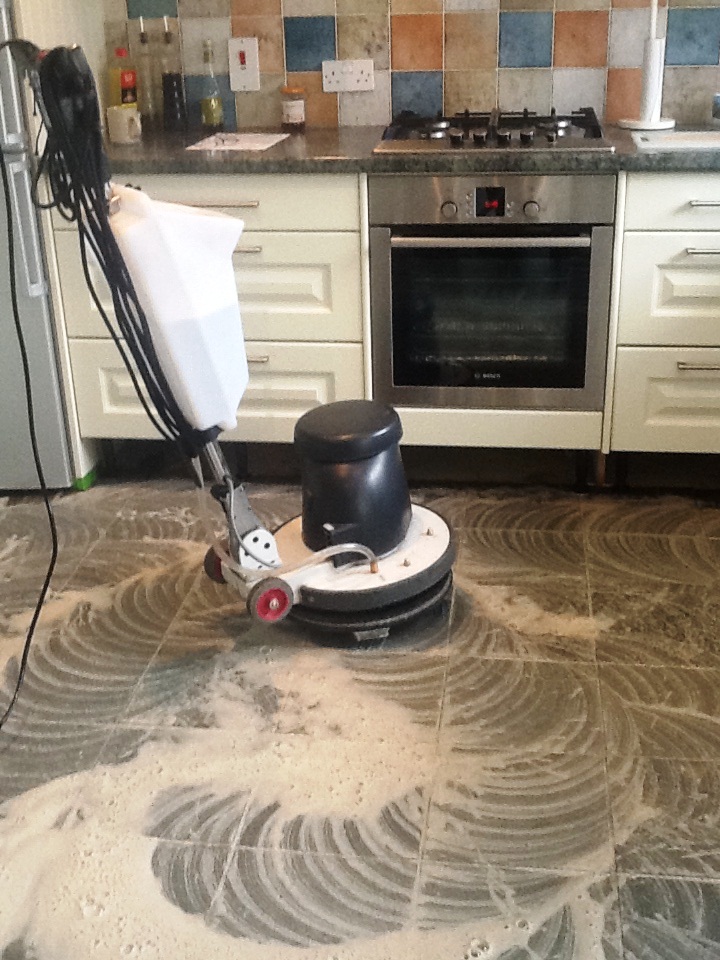
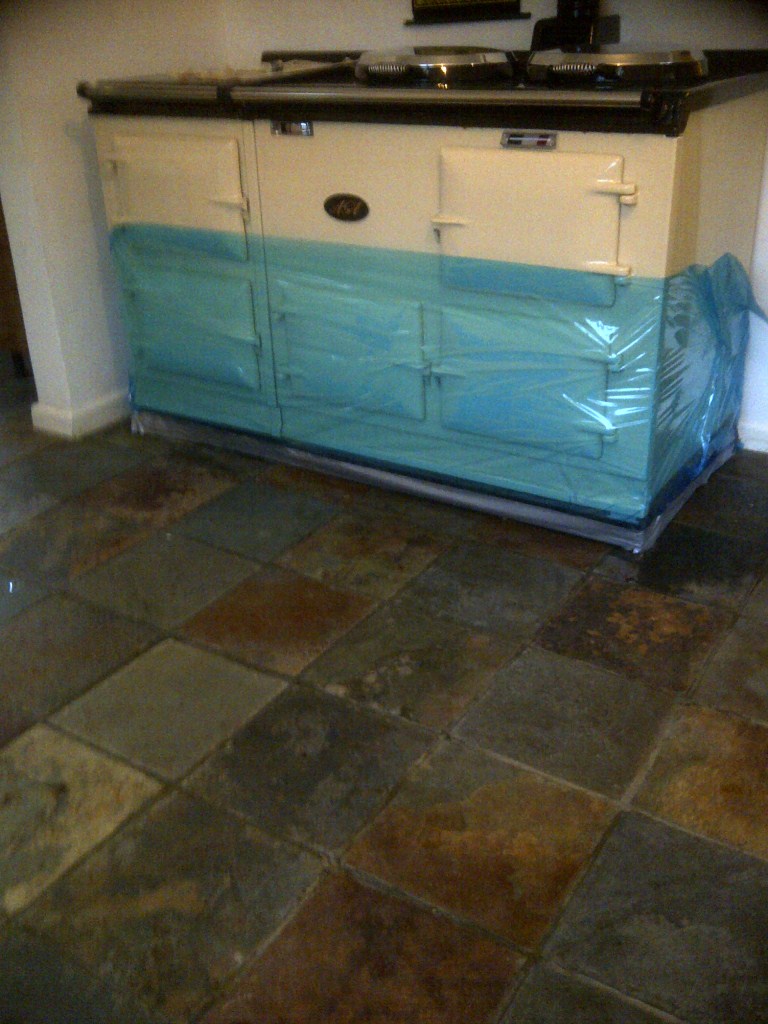
We removed the kickboards from the kitchen units and lined the skirting boards with green Frog tape in order to protect them from cleaning fluids. The next step was to soak the floor in a dilution of Tile Doctor Pro-Clean which we let soak into the tile for 10-15 minutes before scrubbing it in with a rotary machine fitted with a black pad and then using a stiff grout brush to clean out the grout lines.

Slate Tiles Towcester Scrubbing Slate Tiles Towcester Scrubbing

The floor was then thoroughly rinsed using clean water which was then removed using a wet vacuum. The floor was now free of sealers etc. and this showed up a few stubborn areas that needed to be retreated and washed down again. It’s important to give the floor a good rinse to ensure it’s free of any cleaning products as they can upset the sealer.

Slate Tiles Towcester After Cleaning Towcester Slate Tiles After Cleaning

Sealing the Slate Tiled Floor

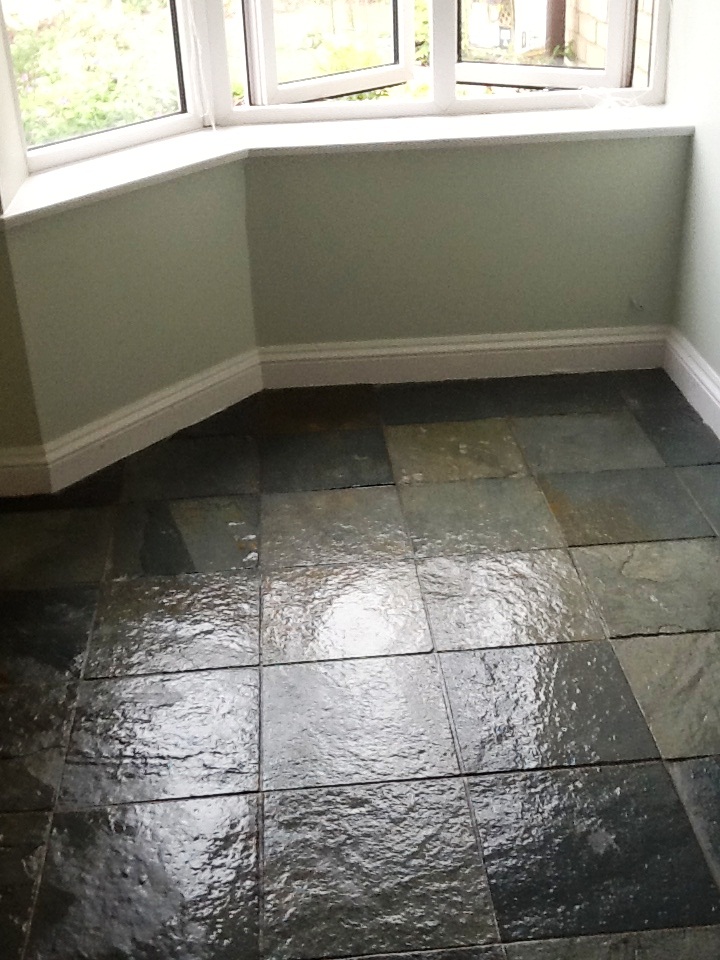
The floor was left to dry and we came back the next day to seal the slate using five coats of Tile Doctor Seal and Go applied using a paint pad applicator. I usually use Seal and Go for slate tiles as it provides good stain protection with adds a nice sheen finish that adds to the look of the floor.

Slate Tiles Towcester After Sealing Slate Tiles Towcester After Sealing

The job took two days and the floor now looks much better and much easier to clean, certainly the customer was very pleased and left the following message on our feedback system.

Phil is extremely professional and provided excellent customer service. He explained the process in detail and did a thorough job and worked extremely hard. The job was completed in the time proposed with a brilliant result. We have no hesitation in recommending Phil to others. Thank you.
Pete and Angie, Towcester

Cleaning and Sealing a Slate Tiled Floor in Northamptonshire

Cleaning and Sealing Kitchen Slate Tiles in Towcester Read More »

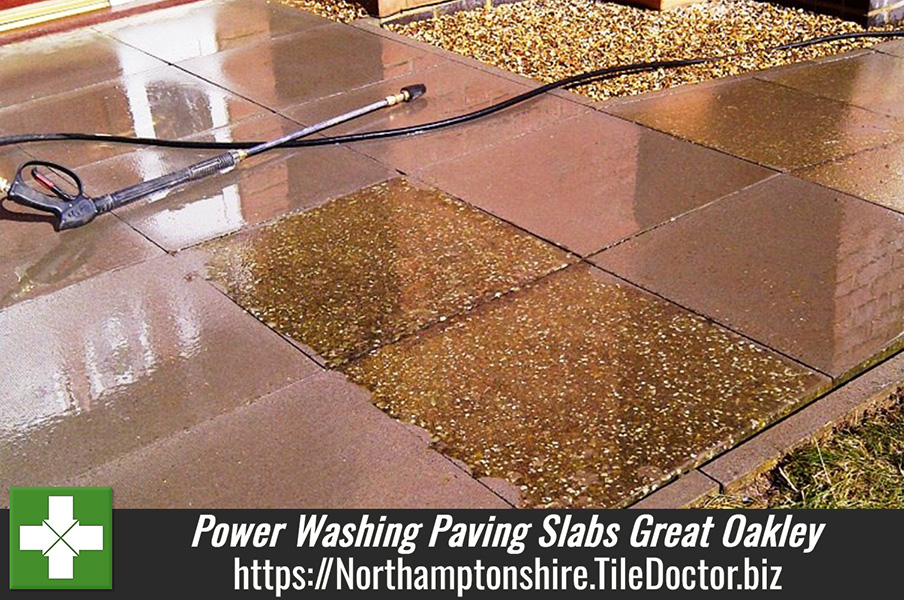
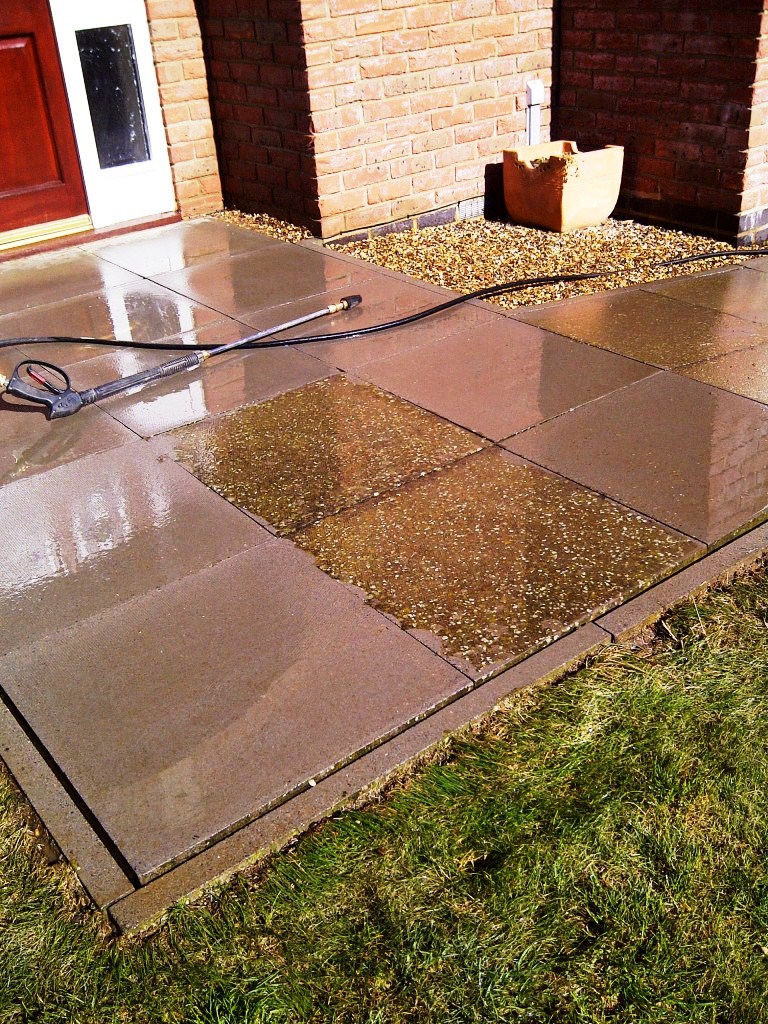
Cleaning Paving Slabs in Great Oakley

Power Washing Paving Slabs in Great Oakley

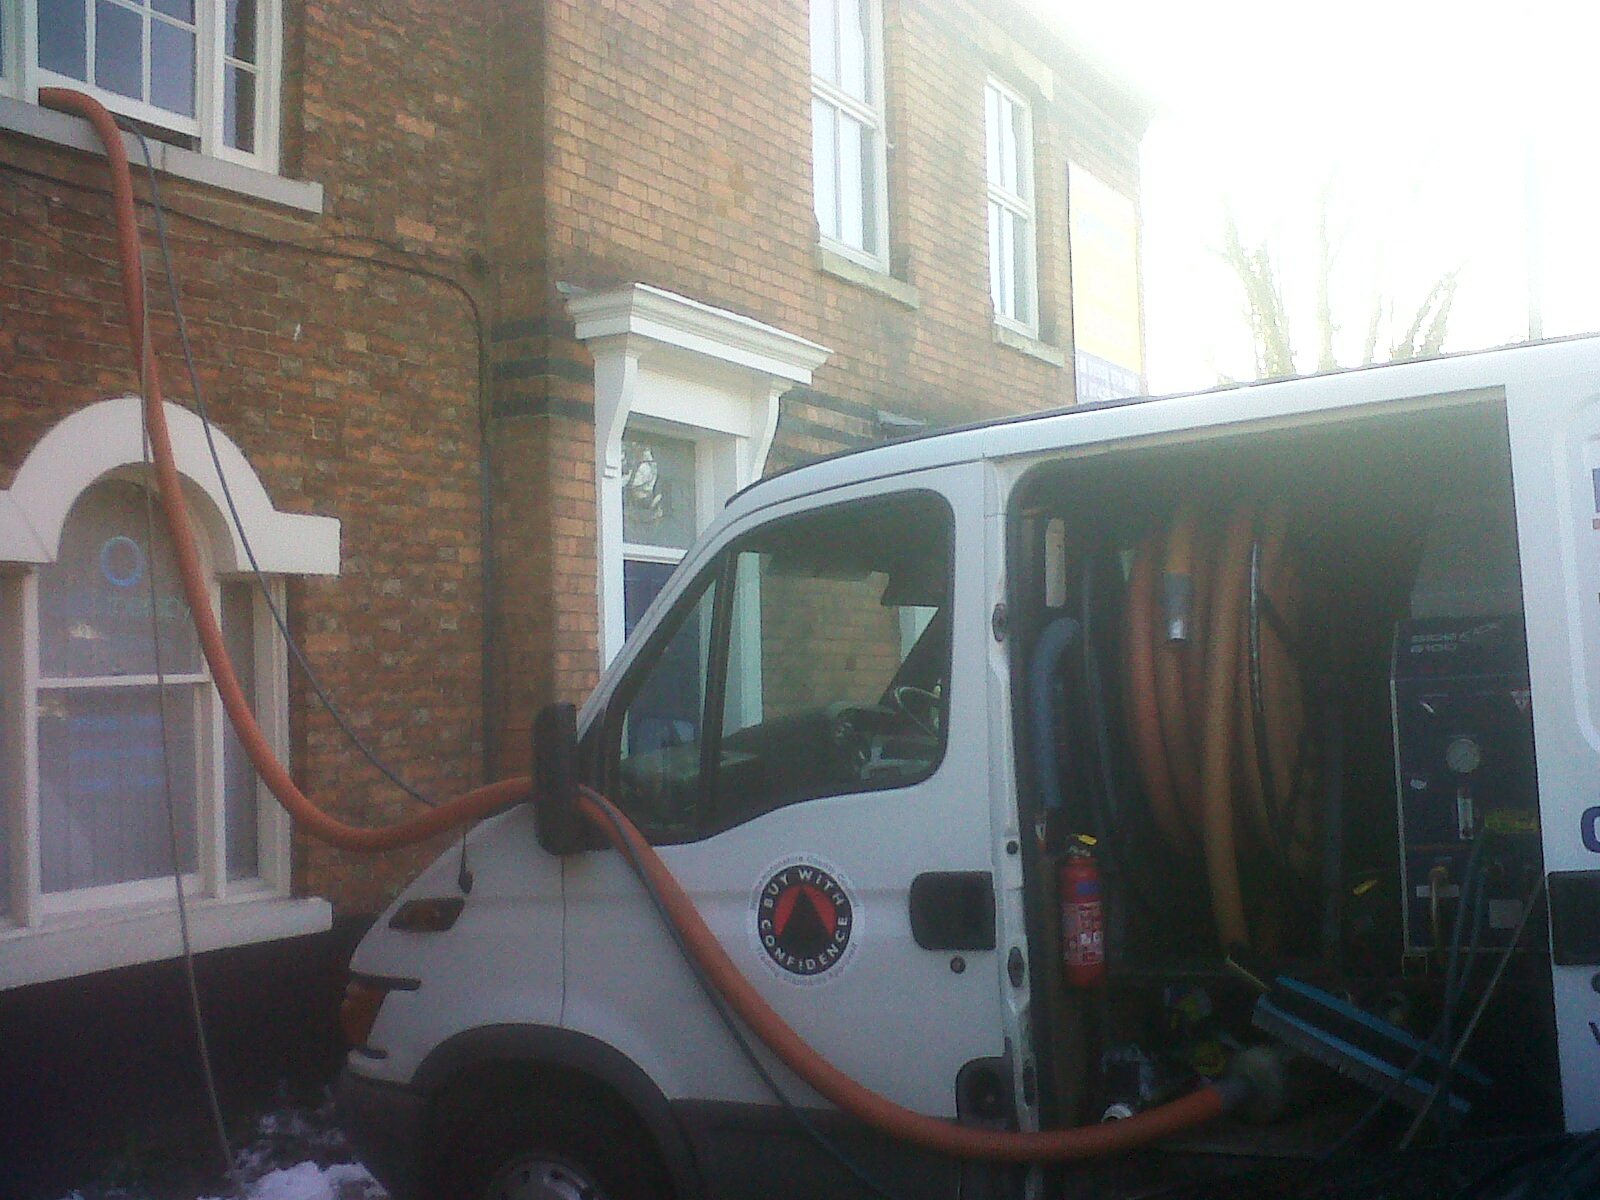
This was a straight forward request to Power Wash Paving Slabs outside a house in Great Oakley. I wouldn’t normally add this to my blog however it occurred to me that a lot of my customers don’t realise Tile Doctor’s have invested in high pressure equipment that can be used externally as well as internally. In the photograph below you will see a picture of our van which contains a very high pressure truck mounted cleaning system which can generates pressures far in excess of a domestic system.

Tile Doctor Northamptonshire Truck Mounted Pressure Cleaning

Cleaning Paving Slabs

You can see from the photographs below that we were able to cut through the soil and grime built up on the surface of the tiles without too much trouble, fortunately these were large slabs as you do have to be careful around the joints where too much power can dislodge the mortar in-between the slabs. Also working outside does have the added advantage that there is a lot less preparation to do to protect other surfaces. It wasn’t necessary in this case but if you do struggle to clean paving slabs yourself you should apply a strong dilution of Tile Doctor Pro-Clean first and then let it soak in before scrubbing it in with a stiff brush, brick acid cleaners that you can buy in the DIY stores are very strong and you have to be very careful with them where as Pro-Clean is an alkaline product.

Cleaning Paving Slabs in Great Oakley Cleaning Paving Slabs in Great Oakley


Patio Cleaning in Northamptonshire

Power Washing Paving Slabs in Great Oakley Read More »

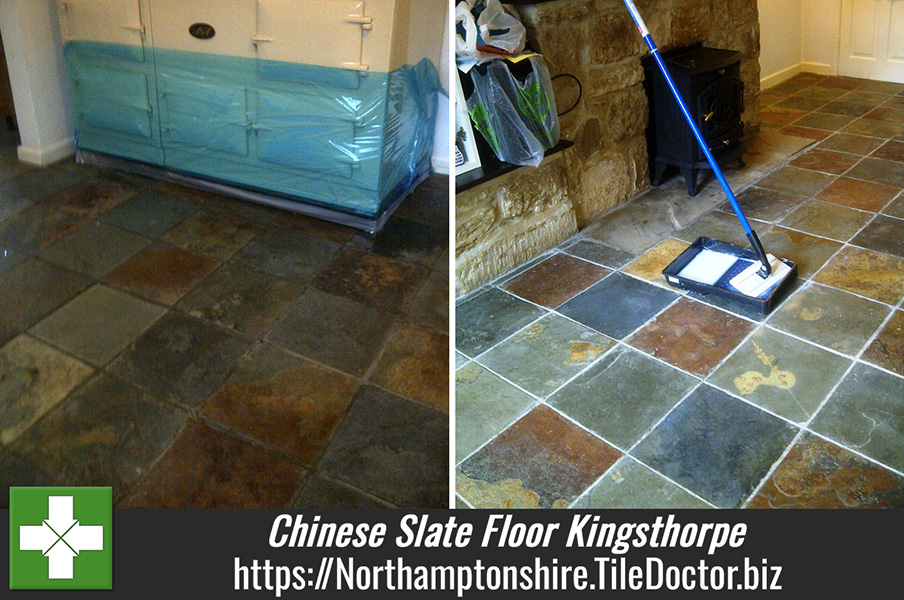
Chinese Slate Tile Sealing Lounge

Cleaning and Sealing Chinese Slate Floor in Kingsthorpe

On this page you will find a good selection of photographs taken during the cleaning and sealing of a Chinese Slate tiled floor in the village of Kingsthorpe, Northampton. The floor had been installed in the kitchen and the lounge and both the slate and the grout was in need of a deep clean.

Chinese Slate Tile Before Kitchen

Cleaning Chinese Slate Tiles

The first thing we do is to protect anything that can’t by moved by wrapping it in a plastic sheet once this was done we set about scrubbing the slate tiled floor with Tile Doctor Pro-Clean and a rotary machine fitted with a black pad, we used a grout brush to clean out the grout lines and then rinsed the floor thoroughly with clean water.

Chinese Slate Tile Cleaning Kitchen Chinese Slate Tile Cleaning Lounge

It’s not until the floor has been washed down that you can spot any stubborn or missed areas so it’s not usual to have to repeat this process until a satisfactory result is obtained. We had both the kitchen and lounge to do and this took most of the day, before leaving for the evening we switched on an air blower to help the floor to dry.

Chinese Slate Tile Lounge Drying

Sealing the Slate Tiled Floor

We came back the next day and checked the floor was dry, fortunately the air blower had done its job and we were able to get on with the sealing the floor.

To seal the floor five coats of Tile Doctor Seal and Go were applied using a paint pad applicator. Seal and Go is recommended for Slate tiles and provides good stain protection with a low sheen finish that really does bring the floor alive.

Chinese Slate Tile Sealing Lounge Chinese Slate Tile Lounge After


Cleaning and Sealing a Slate Tiled Floor in Northamptonshire

Cleaning and Sealing Chinese Slate Floor in Kingsthorpe Read More »

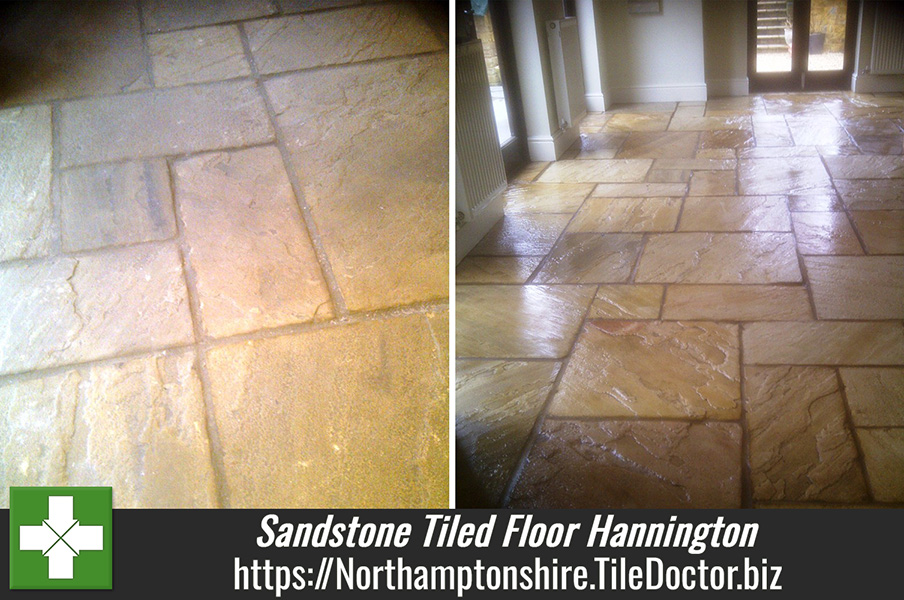
Sandstone Hannington After Sealing

Cleaning and Sealing a dirty Sandstone Tiled Floor in Hannington

This customer in Hannington had a badly soiled and stained rough sandstone tiled floor which they were finding extremely difficult to keep clean. It was apparent that the previous sealer was no longer working well and so the only solution was to strip and clean the floor then re-seal.

Sandstone Hannington Before Cleaning

Cleaning a Rough Sandstone Tiled Floor

I stripped the floor using a strong dilution of Tile Doctor Pro-Clean combined 50/50 with NanoTech UltraClean to produce a strong stripper and cleaning solution that is safe to use on natural stone. This was worked into the tile using a rotary machine fitted with a scrubbing brush rather than a pad to cope better with the uneven finish of the rough Sandstone.

This activity was then followed with a high pressure spinning tool operating at (1200psi) in four to five metre square sections. The spinner tool washes the tile surface with high pressure water and also extracts the water from the surface simultaneously which dislodges and loosens built up ingrained grim from the tiles and grout.

The floor was now clean and free of old sealer and was left to dry for a couple of day aided by turbo fans and dehumidifiers which we left at the property.

Sandstone Hannington After Cleaning Sandstone Hannington After Cleaning

Sealing a Rough Sandstone Tiled Floor

When we came back we first tested the floor with a damp meter in a few different locations to make sure no dampness remained in the stone, fortunately the machines we had left behind had done their job and the floor was completely dry so we started to seal the floor. For this the customer had chosen Tile Doctor Seal and Go which adds a high gloss finish as well as lifting the natural colour in the stone.

Sandstone Hannington After Sealing Sandstone Hannington After Sealing


Sandstone Floor Cleaned and Sealed in Northamptonshire

Cleaning and Sealing a dirty Sandstone Tiled Floor in Hannington Read More »
Scroll to Top