Daventry

Travertine Tiled Hallway and Kitchen Floor Renovated Welton Daventry

Dirty Tumbled Travertine Floor Renovated in Welton near Daventry

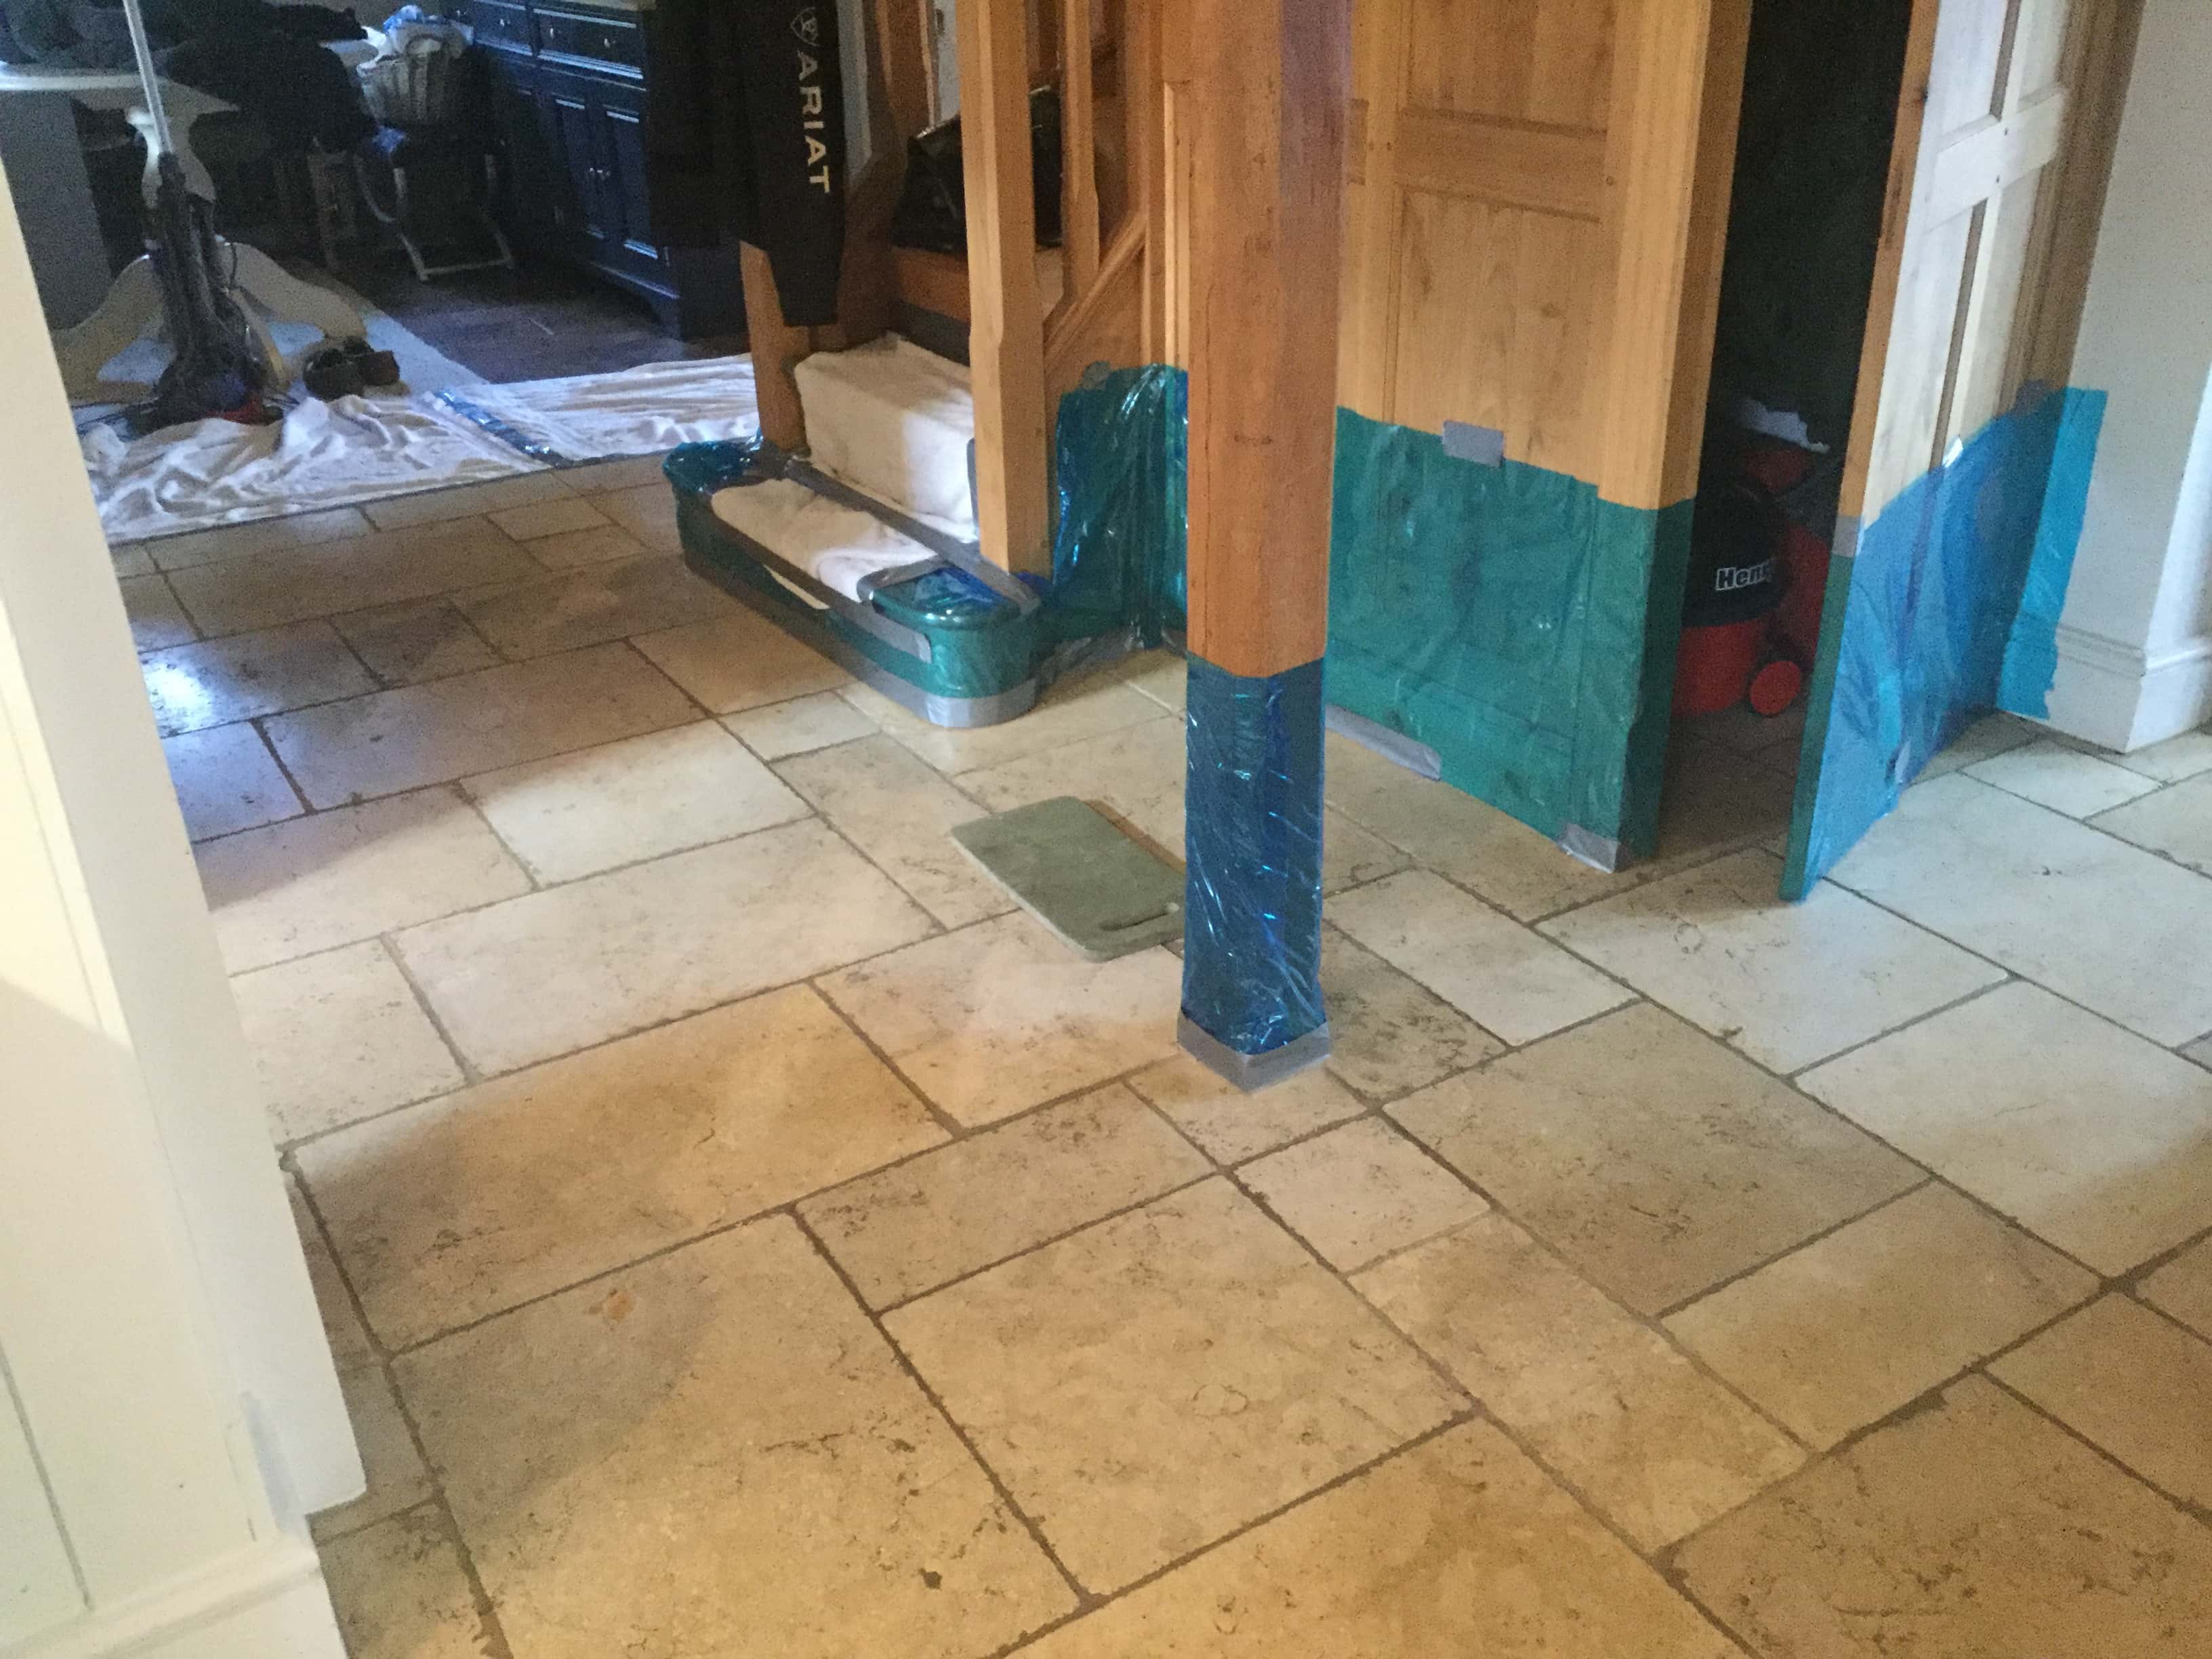
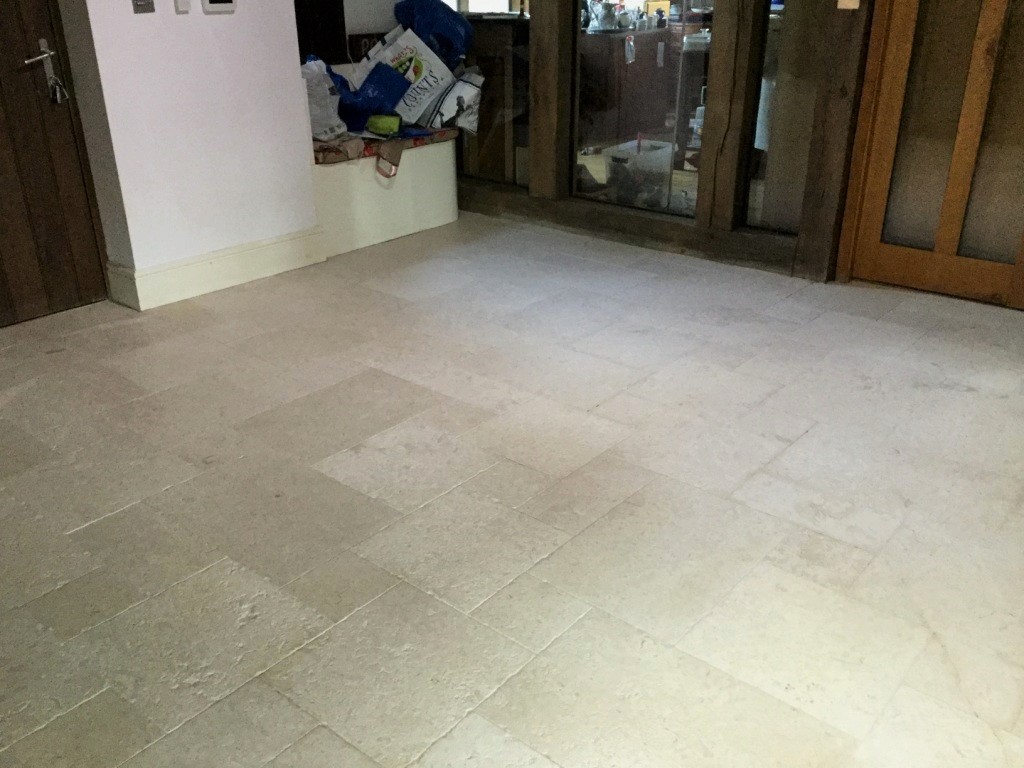
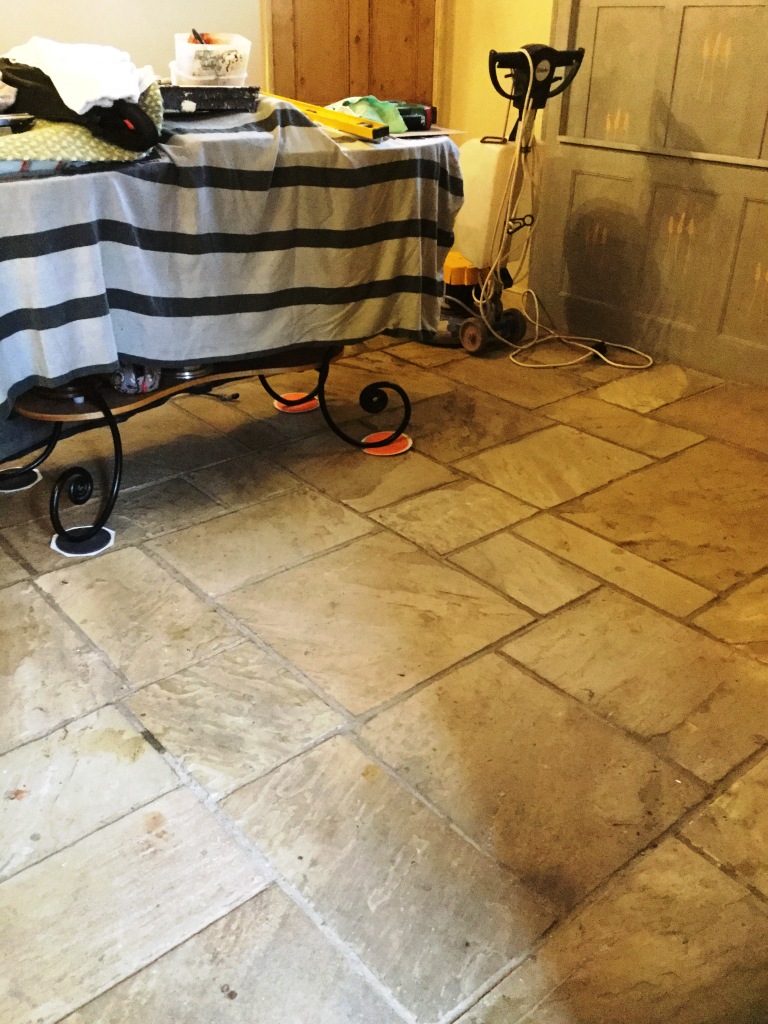
This is a Tumbled Travertine floor with a Honed finish that was installed some years prior in the hallway and kitchen of a house in the village of Welton near Daventry. Kitchens and hallways have the highest foot traffic of any room in a house and without regular maintenance the sealer started to wear down allowing dirt and staining to reach the pores of the tile and grout lines. Travertine is known for its small depressions known as pitting and without the protection of the sealer those areas became heavily soiled. The grout had also darkened with ingrained dirt turning what was a light grey colour into a contrasting black.

Tumbled Honed Travertine Welton Before Cleaning

After visiting the property and surveying the floor I recommended burnishing the floor with a set of abrasive pads to remove the dirt and then resealing with a more durable product. To prove my point, I ran a small test clean on the floor so they could see the potential difference this could make. Happy with the result they asked for a quote which was accepted, and the job was booked in.

Cleaning a Tumbled Travertine Tiled Kitchen Floor

I started the cleaning process by sweeping and vacuuming the floor to remove any grit and other debris. Then it was cleaned with a 3:1 dilution of Tile Doctor Pro-Clean, spraying it onto the floor and allowing it to dwell and make a start breaking down the soiling. The product was then worked into the floor using a stiff brush paying particular attention to the pitted areas and along the grout lines to get them clean. This was followed by rinsing the floor with more water and extracting the soiling with a wet pick-up machine.

The next step was to use the burnishing pad system starting with the coarse pad fitted to a rotary machine and worked into the tiles with a small amount of water for lubrication. The set of pads come in various grits and are actually made from industrial diamonds.

This first 400-grit pad cleans the tiles and removes any remaining sealant that may have been present on the tiles. This was continued with the finer 800-grit pad, again using nothing but water and then rinsing the floor of any slurry generated by the process after each pad.

When the floor had dried, I applied a fine 1500-grit pad to bring up the polish on the Travertine until it had a silky honed finish. There is a fourth 3000-grit pad in the system that brings up the polish even further to achieve a high shine finish, but my client didn’t want that look.

Tumbled Honed Travertine Welton During Cleaning

Sealing a Tumbled Travertine Tiled Kitchen Floor

To protect the travertine, it was sealed using three coats of Tile Doctor Ultra-Seal sealant which is an impregnating invisible sealer resulting in a very natural finish. Once dry the floor was buffed using a soft white buffing pad.

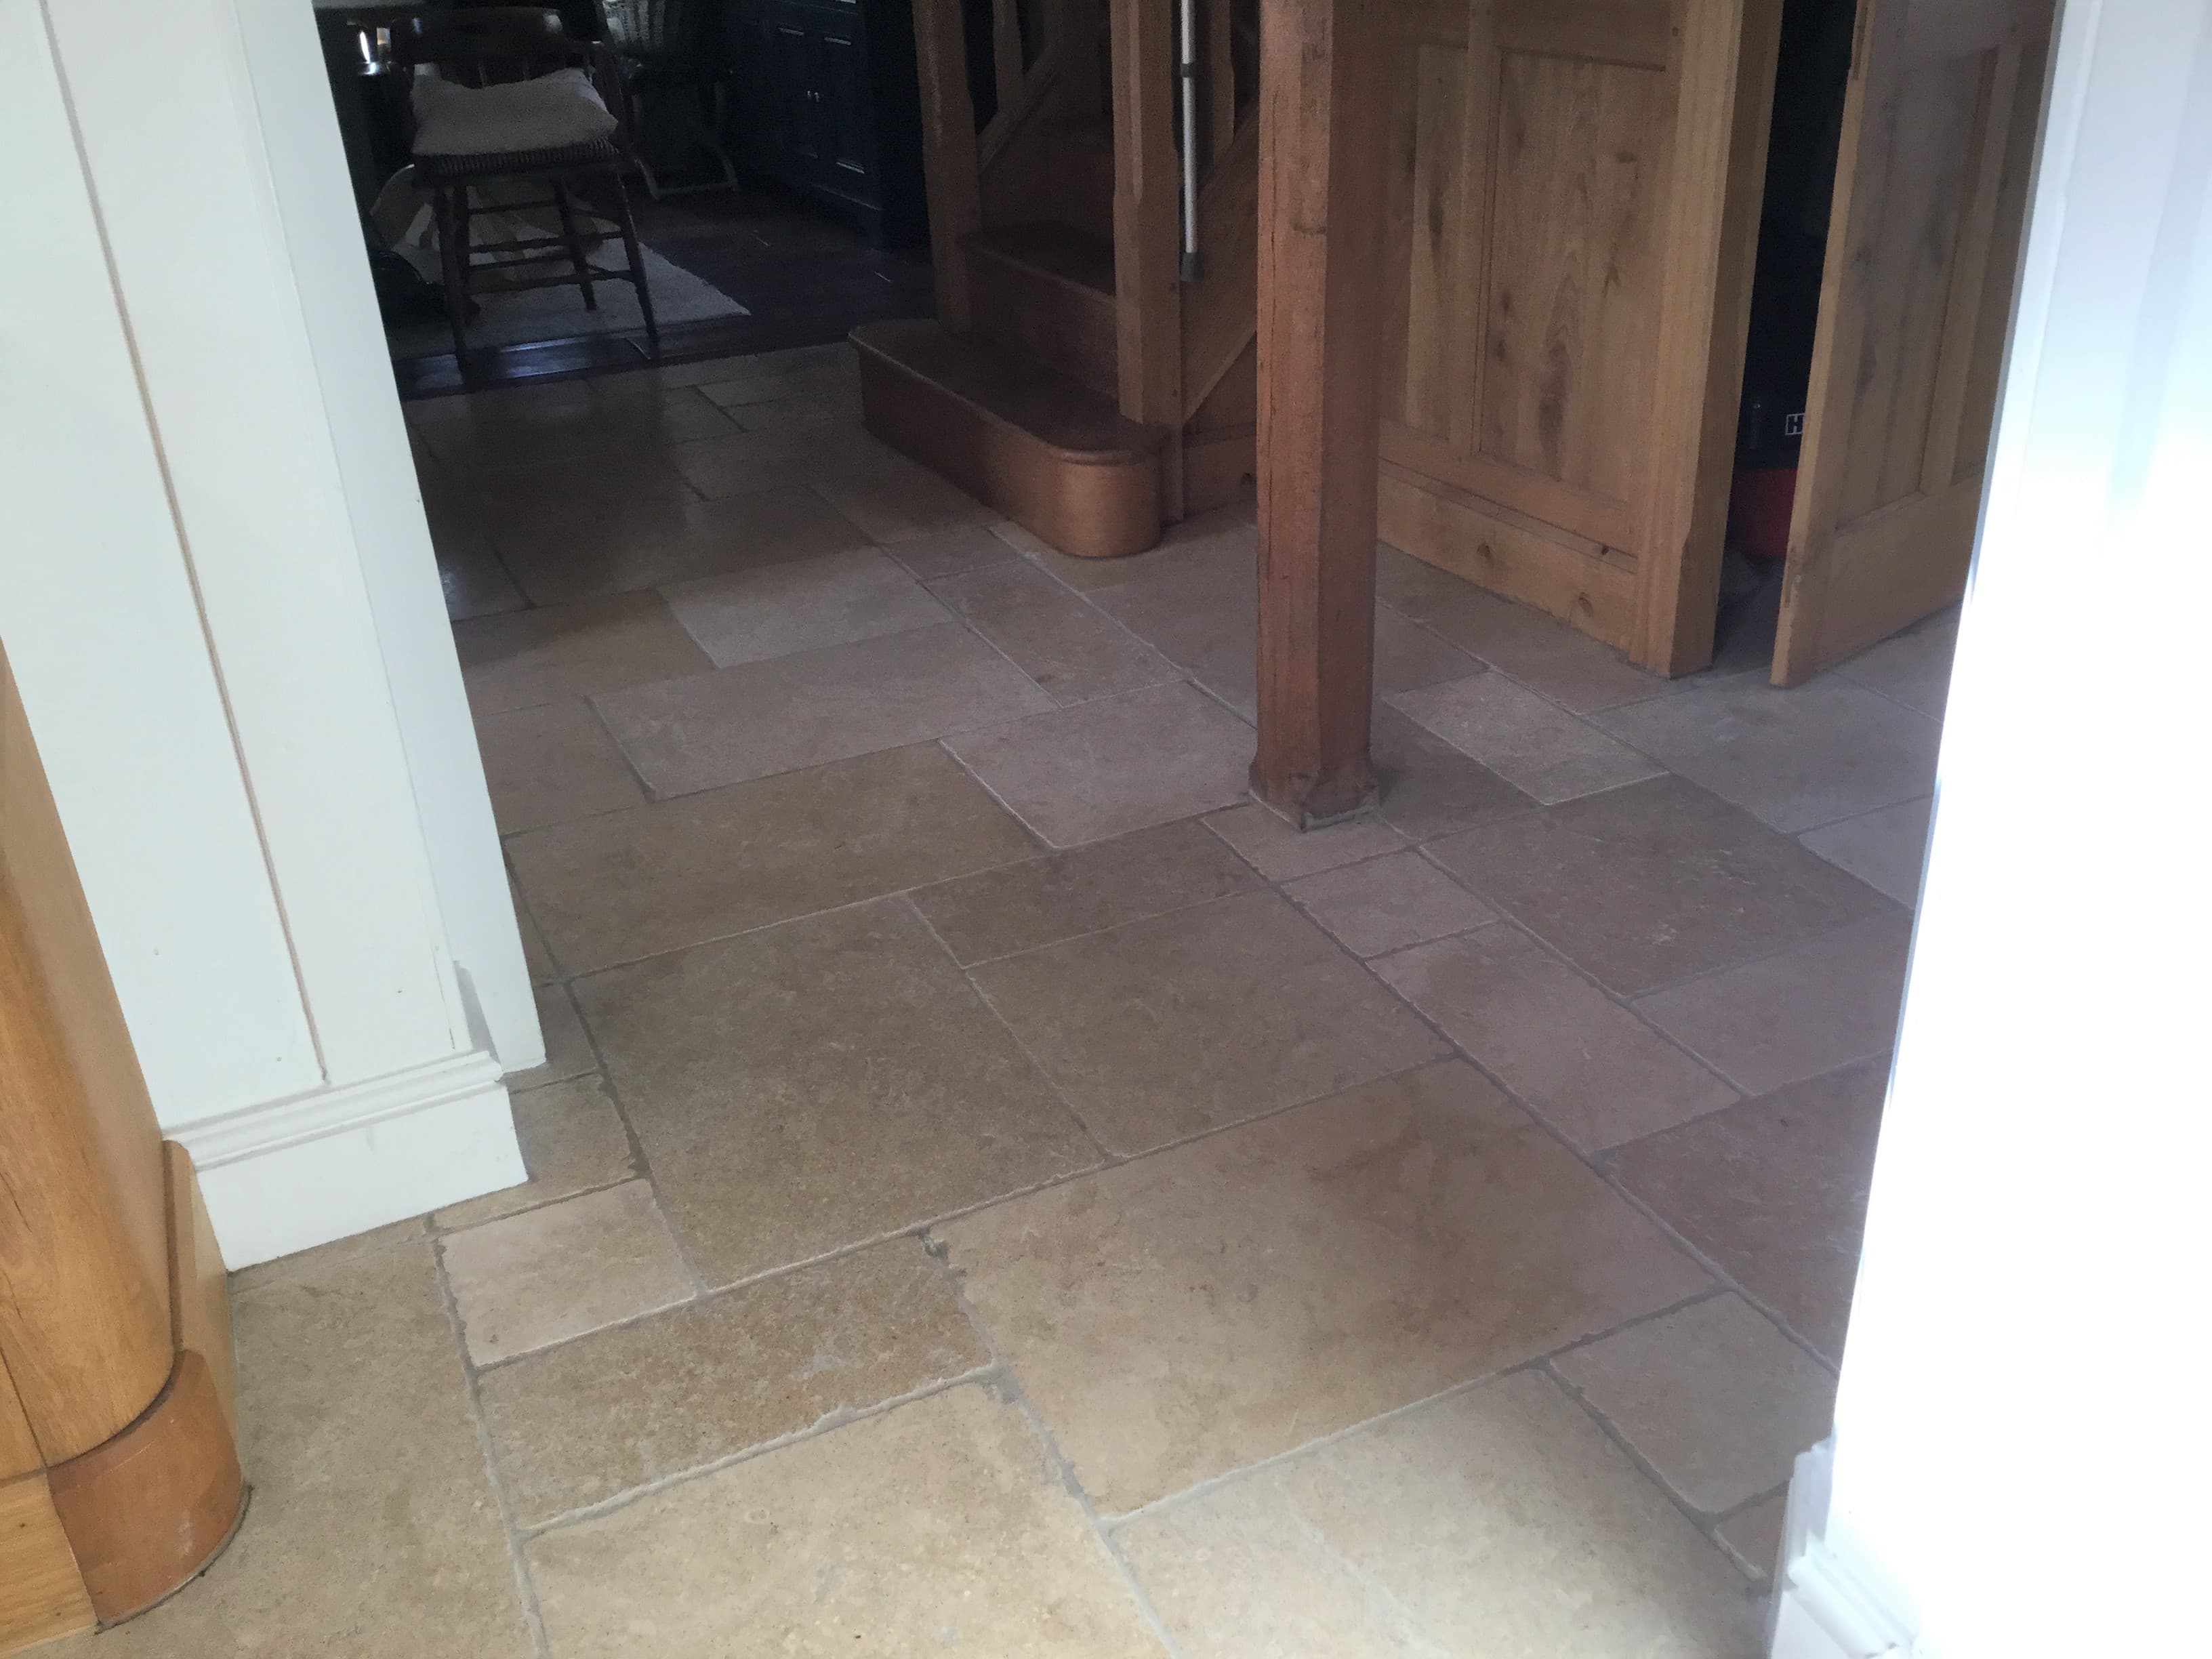
Tumbled Honed Travertine Welton After Cleaning

You can see from the photos how much cleaner and lighter the Travertine tiles look and that the light grey colour of the grout has been restored. The new sealer will make it much easier to maintain now and with the correct cleaning regime in place the sealer should last a long time. My client was very happy with the work and left the following feedback for me:

“Really happy with our new floor. The service was professional and thorough – definitely worth the money.”

For the regular cleaning of a floor like this I recommend Tile Doctor Stone Soap which is a mild cleaning product that’s designed for use on sealed and polished stone. You must be especially careful when choosing a cleaning product for sealed tiles as many of the products you find in supermarkets are simply too strong and can degrade the sealer prematurely.

Tumbled Honed Travertine Welton After Cleaning


Professional Restoration of a Travertine Tiled Floor in Northamptonshire

Dirty Tumbled Travertine Floor Renovated in Welton near Daventry Read More »

Terracotta Tiled Floor Before After Renovation Flore Village

Terracotta Floor Renovation Prior to Kitchen Installation at Flore Village

The following photos are of a Terracotta floor restoration I carried out in the picturesque village of Flore, situated between Northampton and Daventry. I was asked to assess the potential of the Terracotta floor in an old cottage, the clients had always liked the floor but didn’t want the bad condition of the tiles to detract from the effect of the beautiful new kitchen they were planning to install. They needed reassuring that it would be possible to restore the floor to a good standard and thereby enhance the final look of the new kitchen before they went to the expense of replacing the entire floor.

Whilst I was there, I carried out a test clean to a small area of floor, stripping off all old the sealers to expose the natural blemish free face of the tile. Having worked out a process for restoring the floor I was also able to come up with an accurate price for completing the floor. I left the quote with the customer and was pleased to hear back from them a few days later to let me know they had decided to go ahead with the restoration of their floor.

Terracotta Tiled Floor Before Restoration Flore Village Terracotta Tiled Floor During Restoration Flore Village Terracotta Tiled Floor After Restoration Flore Village

Before being able to set a date for my return I had to liaise with for the kitchen company to agree a date them to come and remove the old kitchen and install the new. I would slot in-between the two dates.

Stripping Terracotta Kitchen Floor Tiles

When returned to the do the work the kitchen had been stripped out as promised and with no kitchen units etc. to protect from splashing, I was able to get straight on with the cleaning of the floor using Tile Doctor Oxy-Pro alkaline tile cleaner.

Terracotta Tiled Floor During Restoration Flore Village

Oxy-Pro is a gel and doesn’t require a lot of water to activate it, my concern was Terracotta tiles are very porous and it helps the drying process if you keep the moisture down to a minimum, especially as this work was carried out in November. The product was scrubbed into the Terracotta tiles using a stiff brush tool attached to rotary machine. I also used grout brushes on the wide grout lines working in small sections at a time and clearing the resulting slurry with a wet vacuum as I went.

Terracotta Tiled Floor During Restoration Flore Village

Once the cleaning process was completed across all the Terracotta, I spot treated the many stubborn stains with Tile Doctor Acid Gel, especially along the grout lines. This was brushed in, left to dwell, scrubbed and then removed with a wet vacuum. The stone was then mopped with plain water to neutralise and remove any trace of cleaning products. I then installed a fan to dry the entire area as quickly as possible.

Terracotta Tiled Floor During Restoration Flore Village

Sealing Terracotta Floor Tiles

As the customer was not using the kitchen it provided time to leave the floor for a few days to fully dry out with a small dehumidifier left on site to assist with the drying process. I returned later to seal the floor and started by taking a damp meter reading so I could be sure the Terracotta was completely dry.

Terracotta Tiled Floor During Restoration Flore Village

The results were good, and I was able to go ahead and seal the Terracotta using several coats of Tile Doctor Seal & Go Extra for a silk finish. Once of the reasons I picked this sealer is its breathable so it will cope with any moisture rising through the tile from the subfloor which is an important consideration on old floors which have no damp proof course.

Terracotta Tiled Floor After Restoration Flore Village

Although I never got to see the new kitchen installed my customer was very pleased with the transformation of the floor and left the following testimonial on the Tile Doctor feedback system.

Philip did a fantastic job restoring the terracotta tiles in our kitchen. They are good as new! Philip was hardworking and excellent at communicating with us and planning the best time to do the work around our new kitchen being fitted. Highly recommend! Ayesha D.

Terracotta Tiled Floor After Restoration Flore Village


Professional Restoration of a Terracotta Tiled Kitchen Floor in Northamptonshire

Terracotta Floor Renovation Prior to Kitchen Installation at Flore Village Read More »

Limestone Tiled Floor Before After Cleaning and polishing Yelvertoft

12-Year-Old Limestone Floor Renovation in Yelvertoft

I was called in to look at this Limestone tiled kitchen and hallway floor that had been installed 12 years prior at a small cottage in Yelvertoft. Yelvertoft is a small village with a population of less than a 1000 people near Daventry, with the Grand Union Canal passing close by.

I always like to do a site visit to survey the floor before recommending a solution, photographs help but you can never be certain until you have had chance to run some tests and discussed the history of the floor with the owner. As it turns out the stone had not been professionally cleaned and sealed since it was installed and was now in a bad state. So much so that my client was concerned it was beyond restoration and had considered replacing the floor.

Limestone Kitchen Floor Before Renovation Yelvertoft

I carried out a cleaning test on a small area and although it was very badly soiled, I found the Limestone responded well to our cleaning processes. The client was quite surprised as they had almost given up on it! We discussed the process involved, which would take two days and worked out a cost for the works. Confident I would do the job well my quote was accepted, and a date set for my return.

Limestone Kitchen Floor Before Renovation Yelvertoft

Cleaning a Limestone Tiled Kitchen and Hallway Floor

Arriving on the first day, we noted that there was a fairly new oak stairway and beam that had been fitted. I protected these and the kitchen units with a protective wrap to prevent any splashes from the cleaning process.

To restore the appearance of the Limestone I started with the application of a set of Tile Doctor Burnishing pads beginning with a very coarse 200-grit pad instead of the usual 400-grit. I reasoned that with the Stone being in such bad condition it could benefit from the coarser pad which gives a very deep clean, removing light and medium scratches by resurfacing the top of the tile. The pads are applied with water to lubricate and the fine slurry generated is rinsed off afterwards with more water and then extracted with a wet vacuum. After applying the 200-grit pad this process is repeated with increasingly higher grit pads to further hone the stone and eventually finishing with a very fine 3000 grit pad to achieve a polished finish.

Once I was satisfied with the Limestone tiles a strong dilution of Tile Doctor Pro-Clean and Grout Clean-Up was used to remove the stubborn staining from the grout lines. The floor was given a final rinse and extraction and you could see a huge improvement in the floor which looked lighter and much cleaner.

Sealing a Limestone Tiled Kitchen and Hallway Floor

I allowed the floors to dry off overnight and returned the next day to apply a sealer first checking for moisture with a damp meter to ensure the floor was dry and ready for sealing.

To seal the Limestone, I chose Tile Doctor Ultra Seal Sealant which is a no-sheen, natural-look, penetrating sealer that is formulated to provide maximum stain protection, especially in food preparation areas like the kitchen. It is also an excellent grout sealer, but mainly it gives a lovely natural finish allowing the variations in the natural Limestone to shine through.

Limestone Kitchen Floor After Renovation Yelvertoft

The pictures and clients’ testimonial really do speak for themselves; I was really pleased that she was so satisfied with the result and had saved a fortune in relaying the floor.

“I was about to replace my Limestone 12 year old floor … then Phil the Tile Doctor worked his magic… I now have a good as new lovely floor, I am absolutely delighted. Thanks, so much Phil.” Louise O, Yelvertoft

Limestone Kitchen Floor After Renovation Yelvertoft


Limestone Tiled Floor Professionally Cleaned and Polished in Northamptonshire

12-Year-Old Limestone Floor Renovation in Yelvertoft Read More »

Flagstone Tile and Grout Before After Cleaning Long Buckby

Clean and Seal a Flagstone Floor in Long Buckby

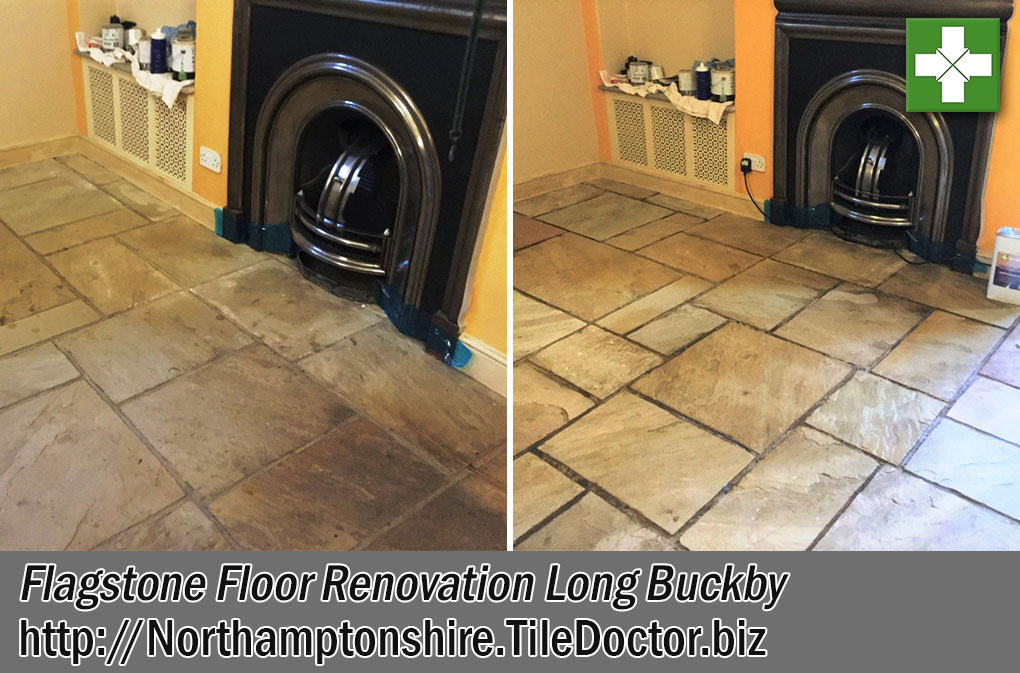
A client in the village of Long Buckby called us out to look at her Flagstone floor that needed some love and attention. As you can see in the pictures the floor was looking very dull which was due to dirt becoming ingrained in the pores of the stone.

The Flagstone tiles were installed in the dining room and well suited the look of the period property. Long Buckby is a small village with a long history that dates to the Vikings and is situated midway between Rugby and Northampton, so not too far from my base over in Rushden.

Flagstone Floor Before Cleaning Long Buckby

I went over to inspect the floor and could see the Flagstone and grout was in need of deep clean to extract the dirt. It looked as if they had never been sealed since installation which according to the owner was many years ago. With no sealer to protect the pores of the stone it wouldn’t have been long before the build-up of dirt had become unsightly in the high traffic areas. I discussed with the client the best way to clean the floor and we agreed a price for the work to be done, booking it in for the following week.

Flagstone Floor Before Cleaning Long Buckby

Cleaning and Restoring a Flagstone Tiled Dining Room Floor

To start I decided to apply a dedicated cleaning agent, Tile Doctor Pro-Clean. The cleaning solution was sprayed onto the floor and then left to soak in for about twenty minutes. It was then agitated with a buffing machine fitted with a black scrubbing pad and also with stiff brushes run along the grout lines. The soiled solution was then extracted using a wet vacuum and the floor rinsed with clean water and left to dry.

As the floor dried, we could see that the deep clean was a success and that we had managed to clean the floor and remove all the embedded dirt in one go. This is quite rare, and normally more work is required before it meets the standard we aim for. The floor was left to dry overnight in preparation for the all-important sealing process.

Sealing a Flagstone Tiled Dining Room Floor

Returning the following day, we checked the floor was dry enough to seal with a moisture meter. It met the acceptable level, so we sealed the floor with Tile Doctor Colour Grow which is an impregnating sealer that helps bring out the deep colour from within the flagstone.

Colour Grow also offers superior protection from everyday staining and will prevent dirt from reaching the pores of the stone so it keeps its appearance for some years to come. Another benefit is the sealer is breathable which is useful for older properties with no damp proof course membrane, as the sealer allows the floor to pass moisture from the sub floor. Three coats of sealer were applied, allowing each coat to dry before applying the next.

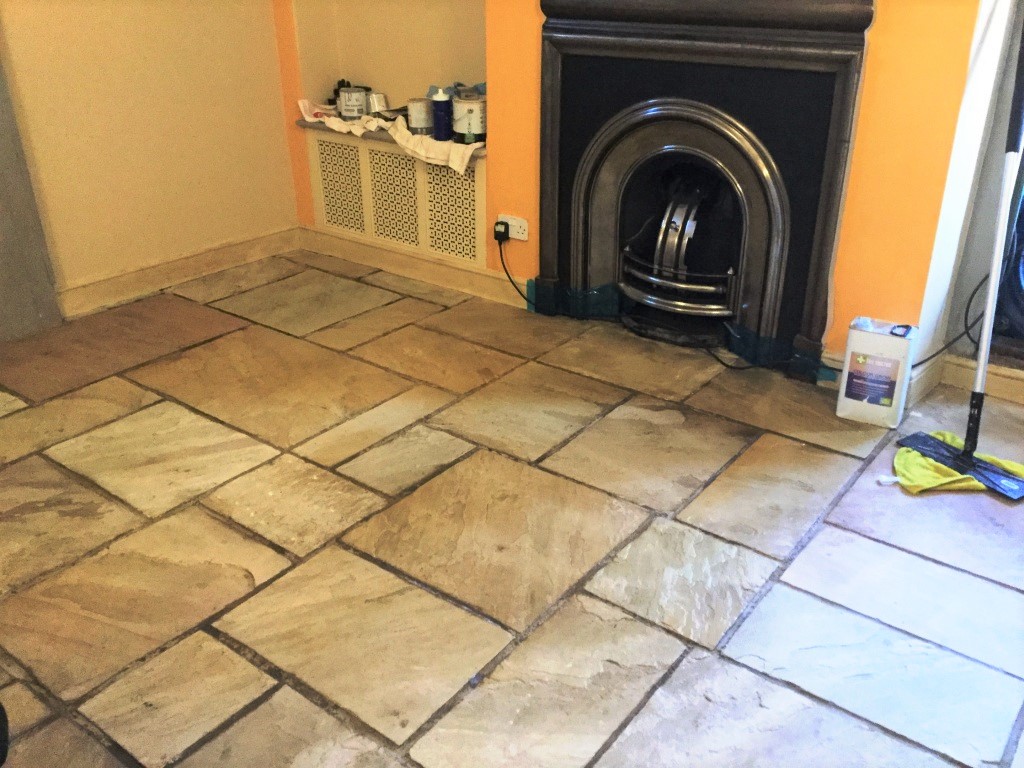
Flagstone Floor After Clean Seal Long Buckby

The client was over the moon with the result, as you can see from the pictures the floor was now looking good and should be easier for them to maintain.

Flagstone Floor After Clean Seal Long Buckby

For general cleaning and to get a longer life out of the sealer we recommended the use of Tile Doctor Neutral Tile Cleaner. It’s super concentrated product so a small amount product goes a long way.


Professional Renovation of Flagstone Tiled Flooring in Northamptonshire

Clean and Seal a Flagstone Floor in Long Buckby Read More »

Limestone Flagstones Before and After Renovation Clipston

Limestone Tiled Floor with Grout Haze Cleaned in Clipston

These photos are of a Limestone tiled floor which was installed in the Kitchen of a property in the small parish of Clipston, which is close to the towns of Market Harborough and Daventry, approximately three years ago. The customer was never very happy with it since it was laid as it never seemed to look clean asked me to cover over and work out what could be done.

On my initial visit I soon realised that the installer had not cleaned off all the grout from the tiles before applying the sealer. This effectively trapped the grout under the sealer and gave the whole floor a dirty appearance, this explained the problem the customer was frustrated with as she could never ever seem to get the floor looking clean.

Limestone Floor With Grout Haze Before Cleaning Clipston
This issue is known as Grout Haze or Grout Smears and is a problem we often come across where the floor has been laid without the excess grout residue being completely polished off the tiles after the grouting. Some manufacturers recommend the tiles are sealed before grouting to make it easier to polish the grout off later. After discussing how we could remedy this I issued a quote which the customer accepted, and we scheduled the work to be done.

Limestone Floor With Grout Haze Before Cleaning Clipston

Removing Grout Haze from Limestone Kitchen Tiles

I arrived on site on the arranged date, as it was a painted kitchen it was not possible to mask up the units, so I used a small hand-held polishing machine fitted with a six inch 400-grit burnishing pad to carefully clean around the edges and break through the sealant. This process was then repeated with a larger seventeen inch 400-grit burnishing pad fitted to a floor polishing machine throughout the rest of the area.

Once the original sealant had been removed using the burnishing pad the next step was to remove the Grout Haze by given the floor an acid wash with Tile Doctor Acid Gel. Being a gel, this product is easier to control than a liquid and sits on the surface where it’s needed to break down the unsightly Grout Haze. It’s left to dwell for a short period before being worked in with a special brush that is designed for this purpose. The resulting slurry is then removed with a professional wet pick up machine and the floor given a rinse with water to remove any trace of the product.

After treating the Grout Haze my next step was to refine the surface of the Limestone using a medium 800-grit and fine 1500-grit diamond encrusted burnishing pad which are applied with water and restore the polished appearance of the stone. The floor is rinsed with more water between the application of each pad to remove the slurry that is generated and then dried with the wet pickup machine.

Sealing a Limestone Tiled Kitchen Floor

I returned the following day to buff the tiles with a white polishing pad as the customer didn’t want a high shine finish which is normally achieved with the 3000-grit diamond burnishing pad, this gave a low sheen honed look as the customer had requested. The floor was then sealed with two coats of Tile Doctor Ultra-Seal which is a natural look sealer that and will protect the newly restored and polished tiles going forward.

Limestone Floor With Grout Haze After Cleaning Clipston
The customer was very happy with the results and has left the following positive feedback on our website.

‘Professional, floor looks much better’ – Vicki S, Clipston

I gave the customer some tips on maintenance and a complimentary bottle of Tile Doctor Stone Soap to enable her to keep the floor looking its best, this product is designed for the regular cleaning of polished stone floors and is pH neutral, so it won’t prematurely degrade the sealer.

Limestone Floor With Grout Haze After Cleaning Clipston
 

Professional Restoration of a Limestone Tiled Kitchen Floor in Northamptonshire

Limestone Tiled Floor with Grout Haze Cleaned in Clipston Read More »

Honed Limestone Floor Before and After Restoration Upper Boddington

Honed Limestone Kitchen Floor Restoration – Upper Boddington, Daventry

The following photos show a recent job we undertook at a timber framed house in the village of Upper Boddington, just south of Daventry. The client was having a new kitchen installed but didn’t want to replace the floor as it was generally in good condition, just dull with some staining and general wear and tear.

As the photos show the kitchen units had already been removed and as the tiles were wall to wall this was an ideal time to have this work carried out as the kitchen was being reconfigured and the customer wanted the floor to look uniform throughout, we also included the hallway in the cleaning process.

Honed Limestone Floor Before Restoration Upper Boddington

Burnishing and Cleaning Polished Limestone Tiles

With tiles made of Limestone, Travertine, Marble and other high quality polished stone, we find that the best way to restore appearance is through a process known as burnishing and in the before photo you will see the specialised grinding and polishing equipment we use to achieve brilliant results and a professional finish.

Honed Limestone Floor Before Restoration Upper Boddington
As the tiles were worn and stained in the high traffic areas we applied Tile Doctor Pro-Clean which had been diluted and decanted into a pump-up sprayer. After leaving it to soak in for ten minutes it was scrubbed into the tile and grout using a rotary floor machine and a stiff brush. This was followed by washing and rinsing of floors with water and extracting the soil with a wet vacuum.

The next step was to apply a full set of Tile Doctor Stone Burnishing pads from 200 grit, 400 grit, 800 grit and finishing with 1500 grit for a honed look. We worked through the pads in 10 metre sections at a time lubricating with water and rinsing with water between each pad.

The kitchen and hallway floors were then allowed to dry out fully overnight.

Sealing Polished Limestone Tiles

The next day I returned to the property and completed the polishing process by applying the very fine 3000 grit burnishing pad with a little water and leaves a high shine finish.

The floor was then sealed with three coats of Tile Doctor Ultra Seal, which is a premium, natural look, impregnating sealer designed to provide maximum stain protection without altering the colour of the stone. The sealer takes an hour to dry and with three coats to apply it took most of the day to finish.

Honed Limestone Floor After Restoration Upper Boddington
The customer was happy with the results and left the following 5-star review on our site.

“Superb Service Chris P, Daventry”

Honed Limestone Floor After Restoration Upper Boddington
 

Professional Cleaning, Polishing and Sealing of a Honed Limestone Floor in Northamptonshire

Honed Limestone Kitchen Floor Restoration – Upper Boddington, Daventry Read More »

Travertine Tiled Kitchen Floor After Polishing Daventry Northants

Badly Stained and Pitted Travertine Kitchen Tiles Restored in Daventry

This Travertine Tiled kitchen floor was in a farmhouse close to the village of Newnham near Daventry. The client had called us in because she was concerned that her floor was becoming increasingly difficult to keep clean which was due to the small holes and pits becoming ingrained with soil and it was becoming difficult to remove as the original sealant had worn off.

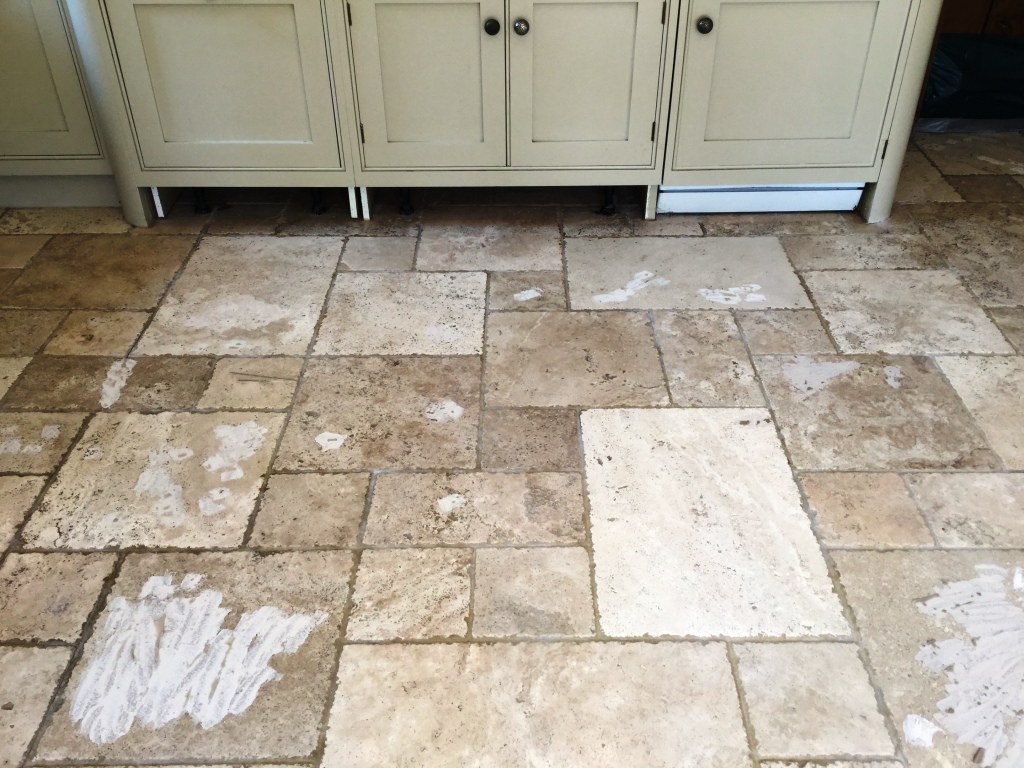
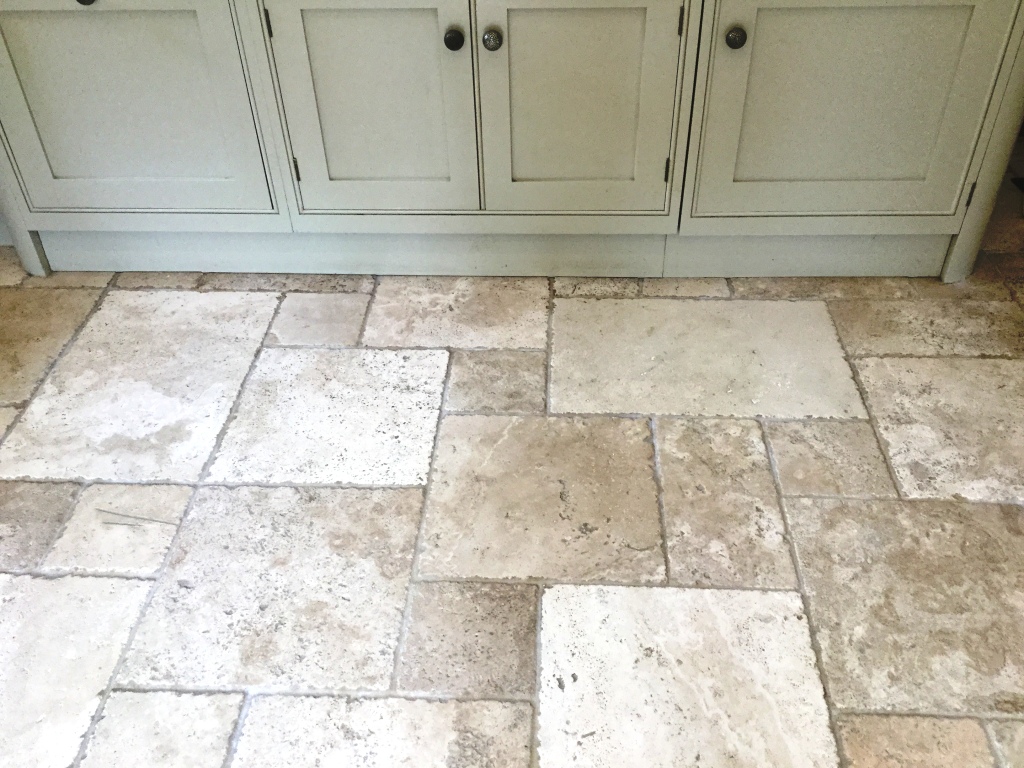
Hopefully you can see from the pictures the results that can be achieved on a badly stained and pitted Travertine floor. The first photo below shows the extent of the problem due to many holes in the floor, this is a characteristic of Travertine and normally these holes are filled in the factory but the filler does come out over time leaving holes.

Travertine Tiled Kitchen Floor Before Cleaning Daventry Northants

Cleaning a Pitted Travertine Tiled Floor

The floor was cleaned using a combination of Tile Doctor Burnishing Pads to re-surface the tile and the application of Tile Doctor Grout Pro-Clean agitated with a stiff brush to clean out embedded soil in the pits and grout lines. The Burnishing pads fit a rotary floor polishing machine and come in a series of different grits which are applied from Coarse through Medium and then Fine and lubricated with a little water.

I also carried out some repairs to the larger holes with a travertine filler that was mixed to match the existing colours. The second picture shows the repairs in progress, the filler is mixed and applied before leaving an hour and then polishing off any excess filler with dry cloth, the floor was then vacuumed and allowed to fully dry overnight allowing the product to harden.

Travertine Tiled Kitchen Floor After Cleaning Daventry Northants

Sealing a Travertine Tiled Floor

The floor was polished and sealed the following day using 2 coats of Tile Doctor Ultra Seal sealant to protect the grout lines and stone from any staining in future, it leaves a no-sheen natural look which worked very well in the kitchen area.

I waited a for the sealant to dry and then carried out a water repellency test to check it was fully sealed before giving the floor a final polish using a Tile Doctor Polishing Pad.

Travertine Tiled Kitchen Floor After Polishing Daventry Northants
 

Professional Travertine Tiled Floor Restoration in Northamptonshire

Badly Stained and Pitted Travertine Kitchen Tiles Restored in Daventry Read More »
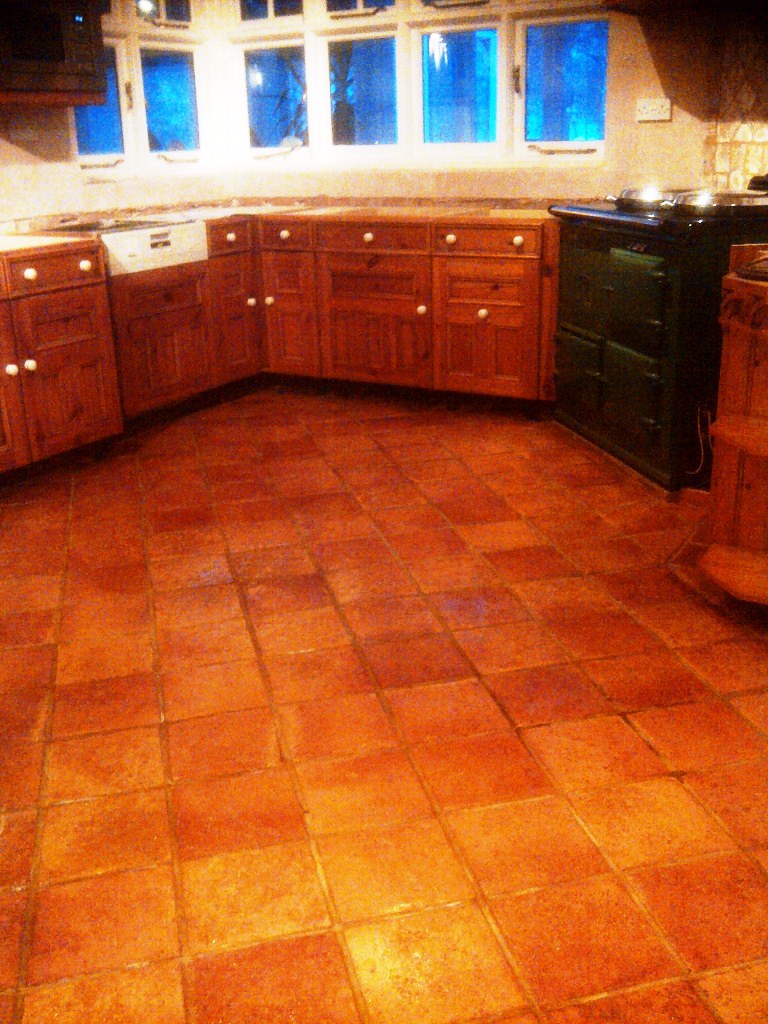
Quarry Tiled Kitchen Floor After Cleaning and Sealing

Kitchen Quarry Tile Cleaning and Sealing in Daventry

Apologies for the poor quality of these grainy Quarry Tile Cleaning photographs taken in the kitchen of a residential property in Daventry but it was the middle of winter and I was using my phone camera which doesn’t have an effective flash. Hopefully you can see from the photograph below how dirt had become ingrained into the tile and stains to the grout.

Quarry Tiled Kitchen Floor Before Cleaning

Cleaning Quarry Tiles

To get the floor clean I removed the kick boards around the base of the kitchen units and applied a dilution of Tile Doctor Pro-Clean mixed with NanoTech Ultraclean which adds tiny abrasive particles to an already powerful alkaline cleaning product that is safe to use on tile and stone. It was applied with a mop and left it to dwell on the floor for twenty minutes first in order to give it chance to soak into the tile and get to work on the dirt. It was then worked into the floor using a rotary machine fitted with a black scrubbing pad, stiff hand brushes were along the grout lines. The soiled solution was picked up with a wet and dry vacuum and the floor was then rinsed with clean water to neutralise the tile and allow us to see which areas need further attention. Once I was happy the floor was given a final rinse and then left to dry overnight ready for sealing the next day.

Quarry Tiled Kitchen Floor During Cleaning

Sealing Quarry Tiles

On my return the floor was checked in a number of places with a damp meter to confirm it had dried which it had and it was then sealed using numerous coats of Tile Doctor Seal and Go which adds a nice shine to the floor as well as providing a surface seal that will help protect the tile from stains going forward. Sealing can take some time as you need to let the first coat dry before starting the second.

Quarry Tiled Kitchen Floor After Cleaning and Sealing
 

Quarry Tile Maintenance in a Daventry Kitchen

Kitchen Quarry Tile Cleaning and Sealing in Daventry Read More »

Scroll to Top