Work by Category

Northamptonshire-Tile-Doctor

Welcome to my Work History archive where you will find detailed examples of Tile, Grout and Stone Cleaning and Renovation work carried out through Northamptonshire.

To make things easier to find I have organised the posts by the most popular types of Tile and Stone. I also renovate other materials so if you’re looking for something else do get in touch as it’s highly likely we have the solution.

Popular requests include Ceramic Tile, Encaustic Cement, Fireplaces, Flagstone Pavers, Grout Cleaning, Limestone, Marble, Porcelain Tile, Quarry Tile, Sandstone, Slate, Terracotta Tile, Terrazzo Floors, Travertine, Victorian Flooring and Vinyl Floors.

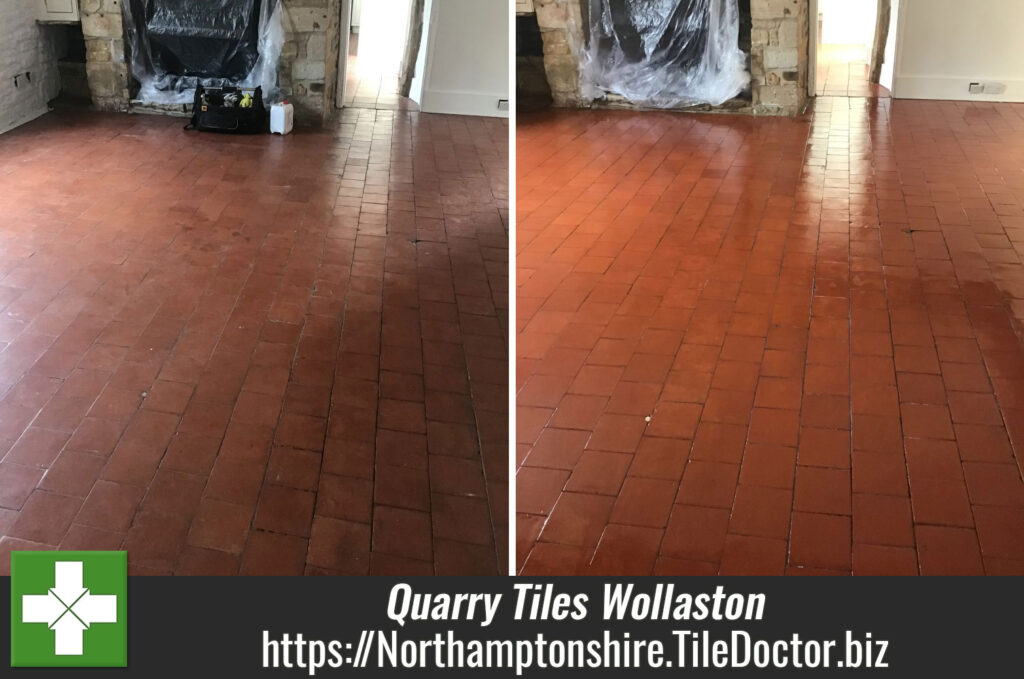
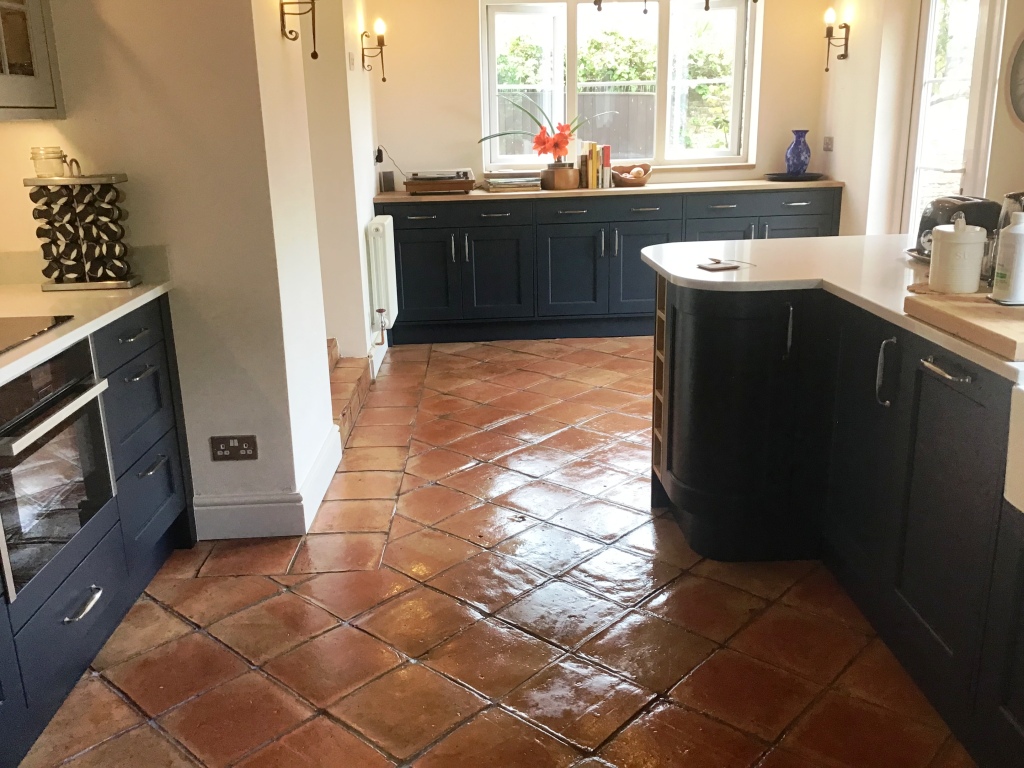
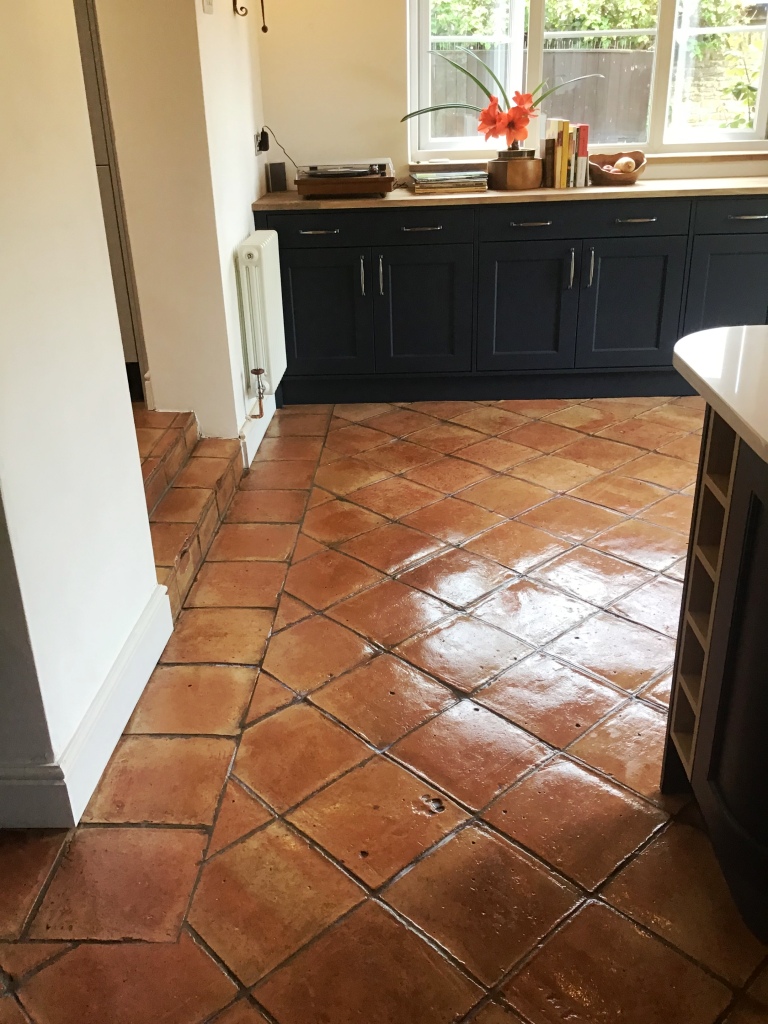
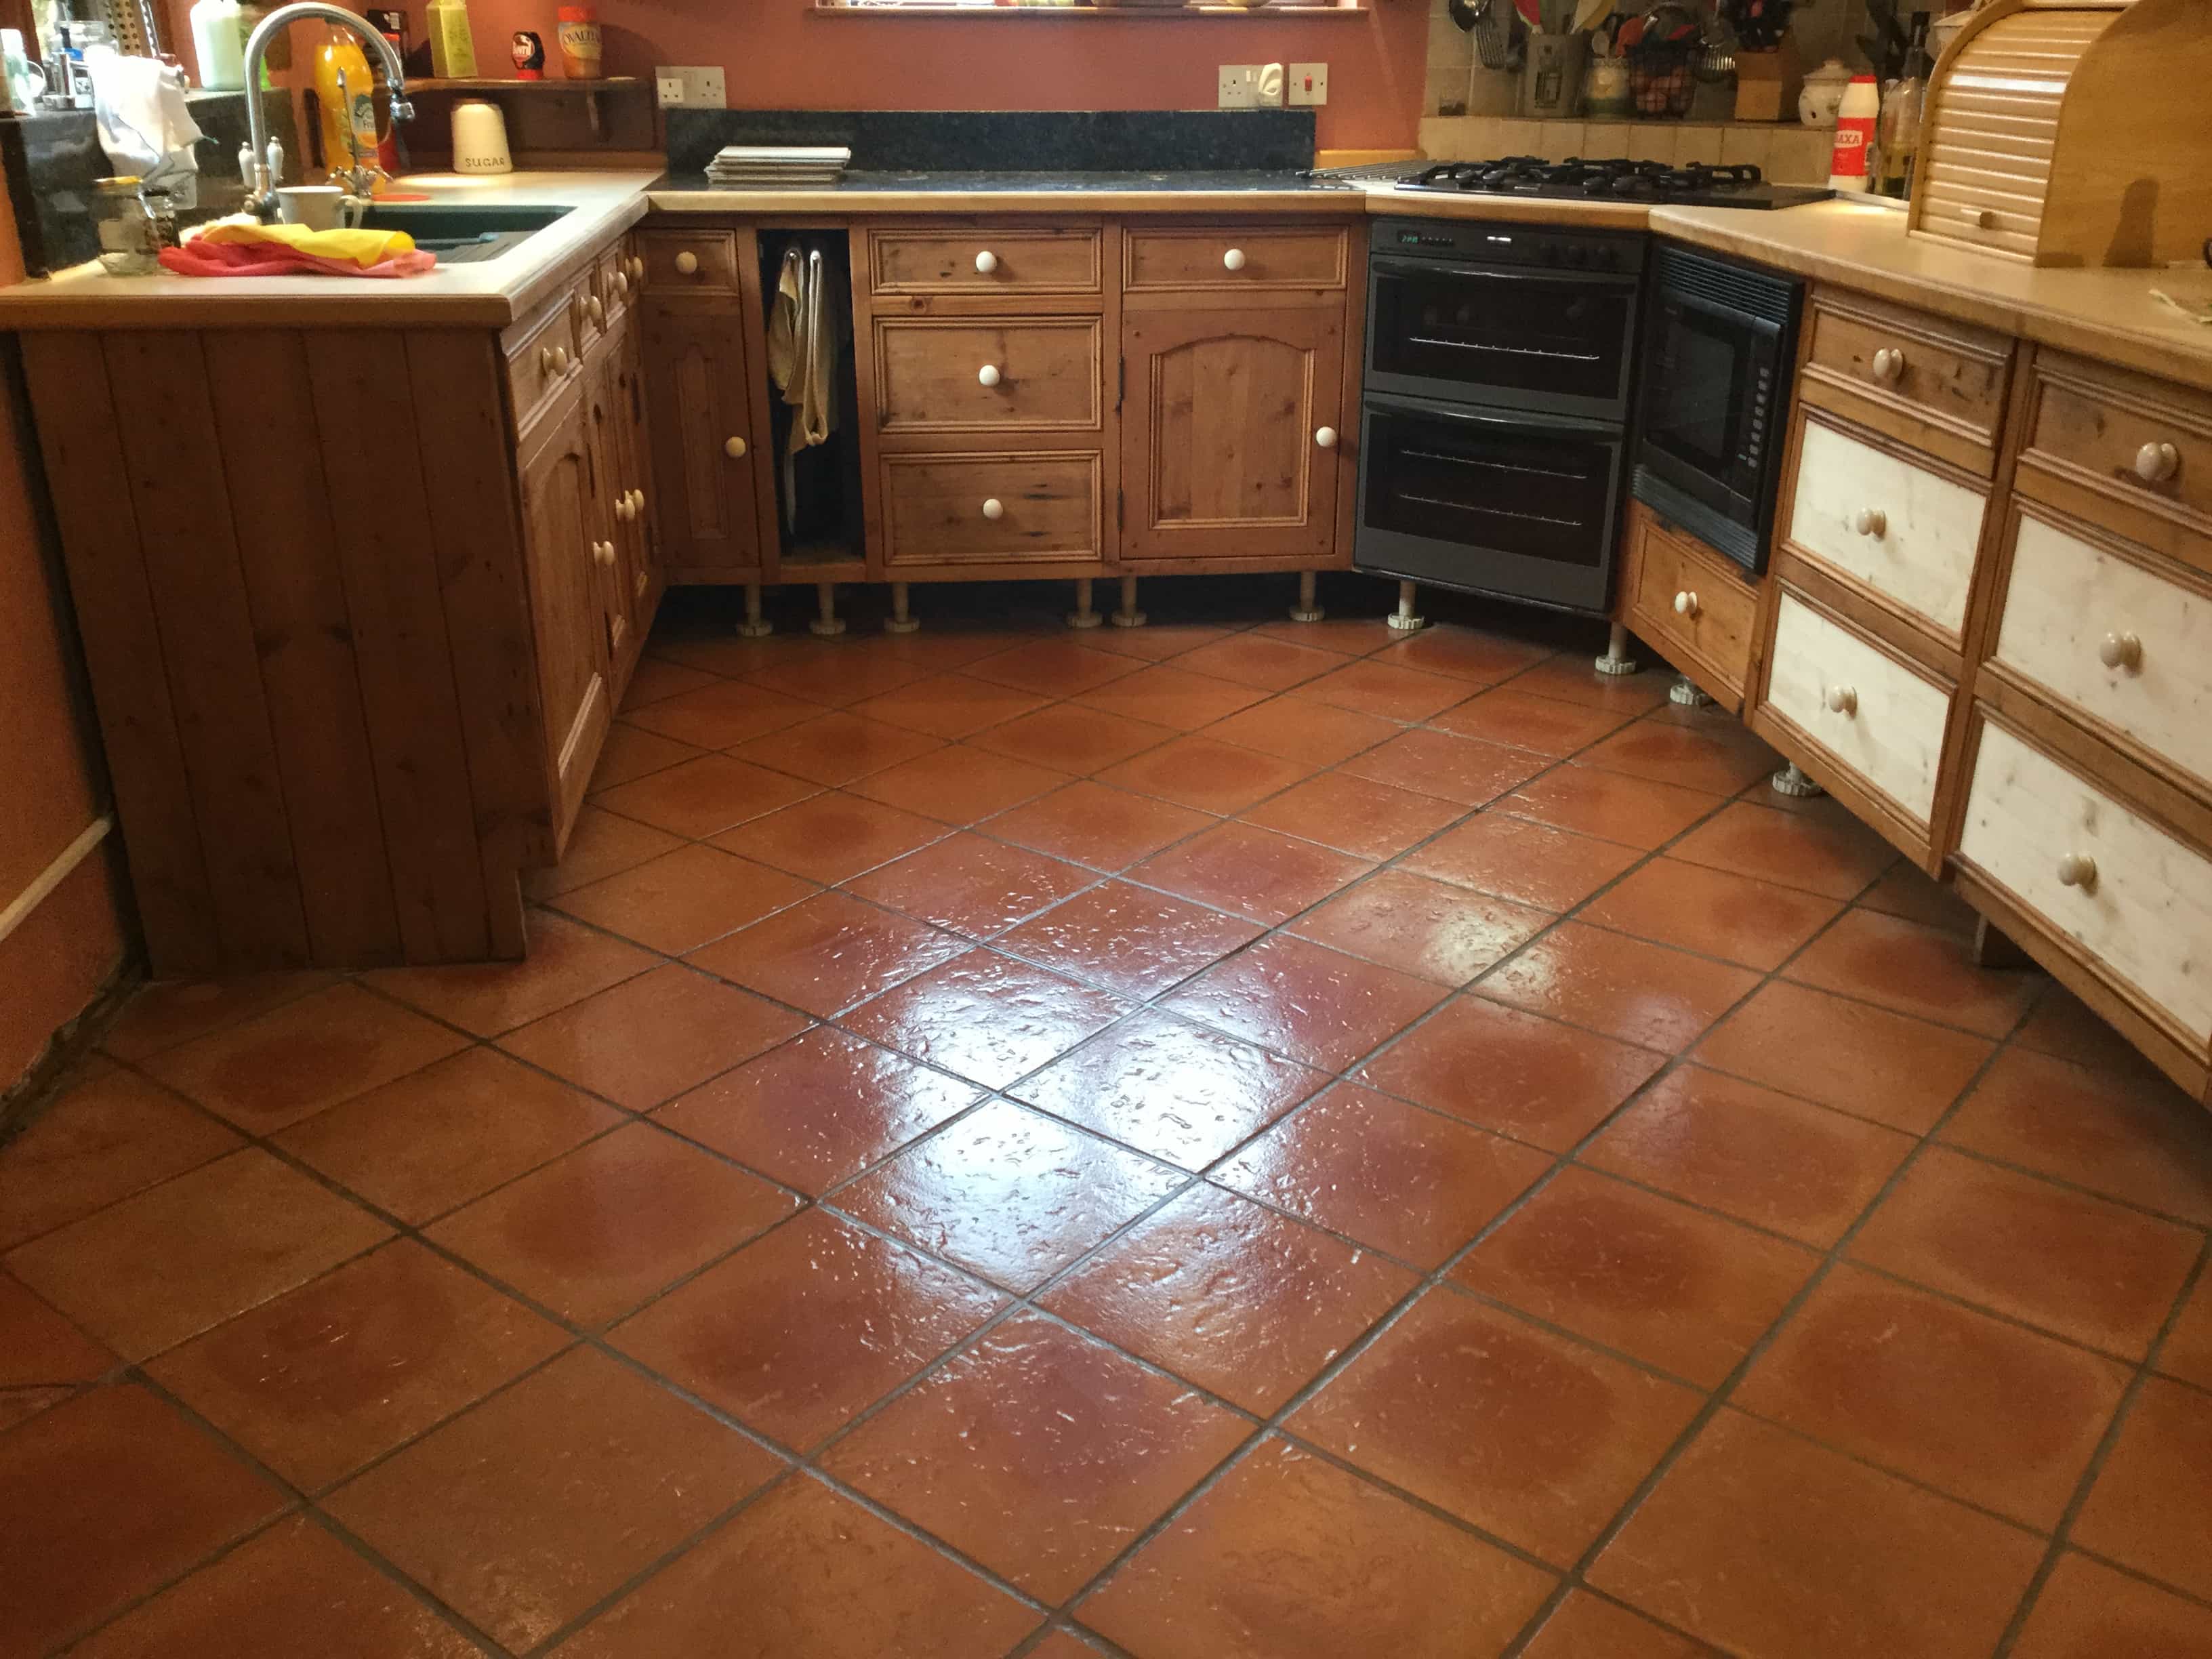
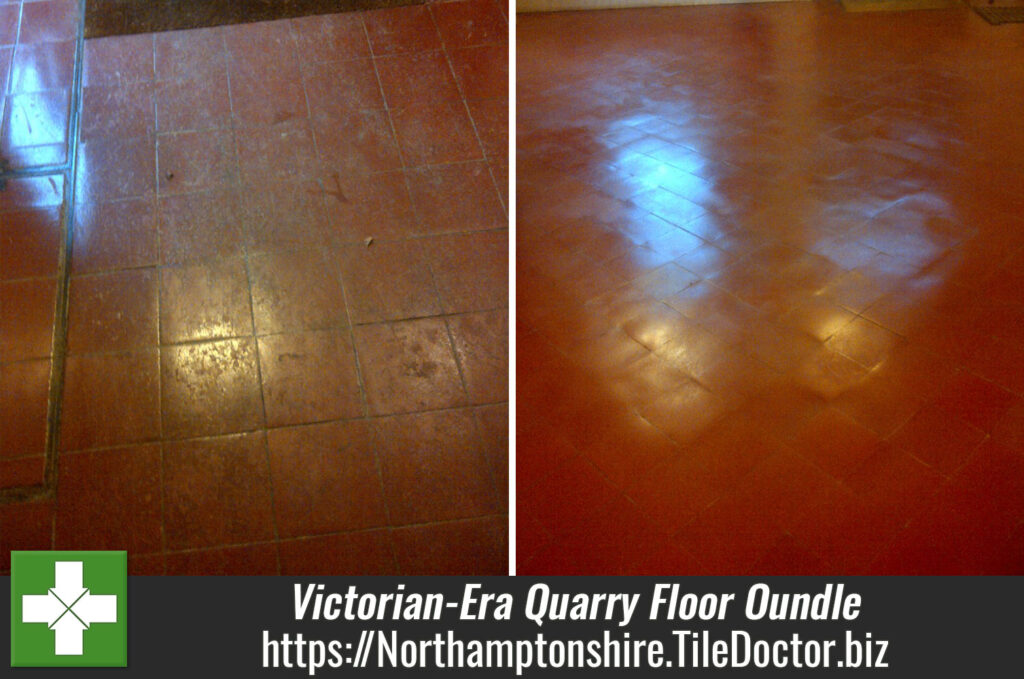
Quarry Tiled Kitchen Floor Renovation Wollaston

Dirty Quarry Tiled Floor Deep Cleaned and Sealed in Wollaston

This client from the village of Wollaston contacted Tile Doctor about cleaning and sealing their Quarry tiled floor. They were refurbishing the house and wanted to keep the original floor tiles as part of the renovation.

The tiles were installed throughout the ground floor, including the kitchen, lounge and hallway. However, as I was to discover myself, they were covered in years of grime, and they were not sure if they could be restored.
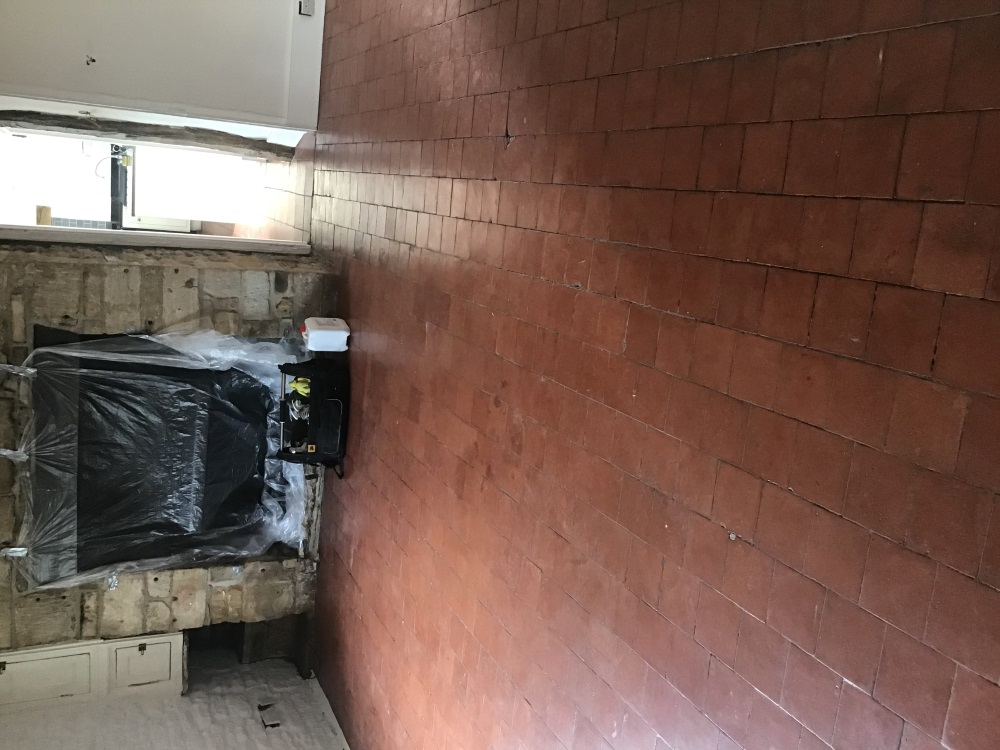
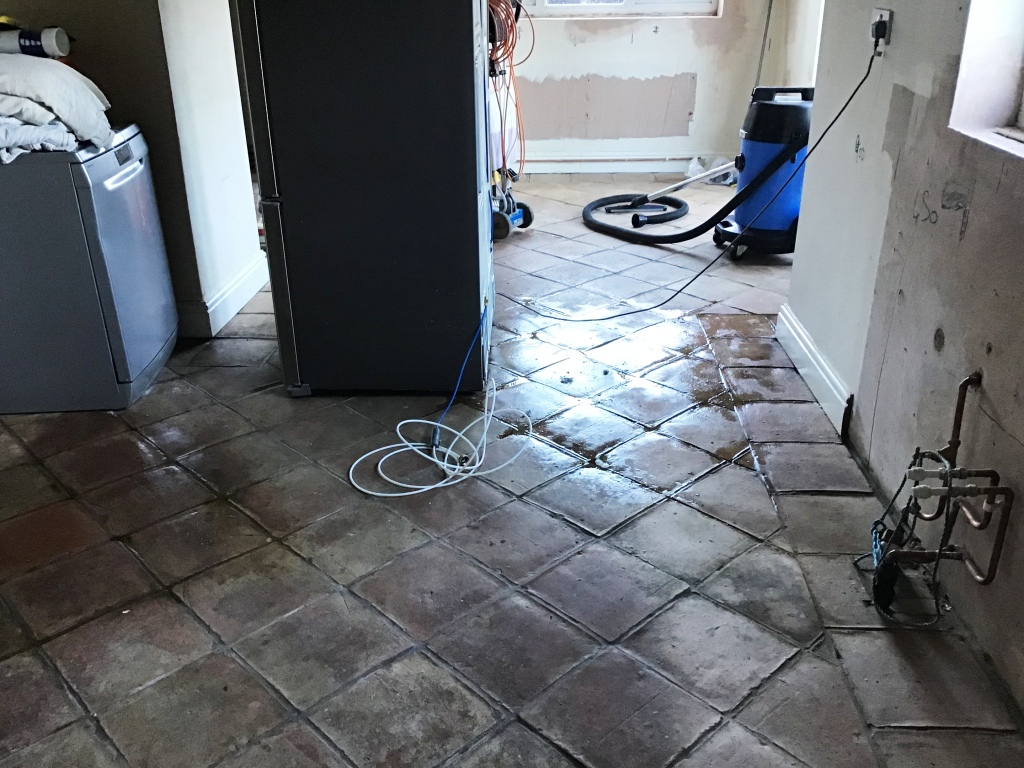
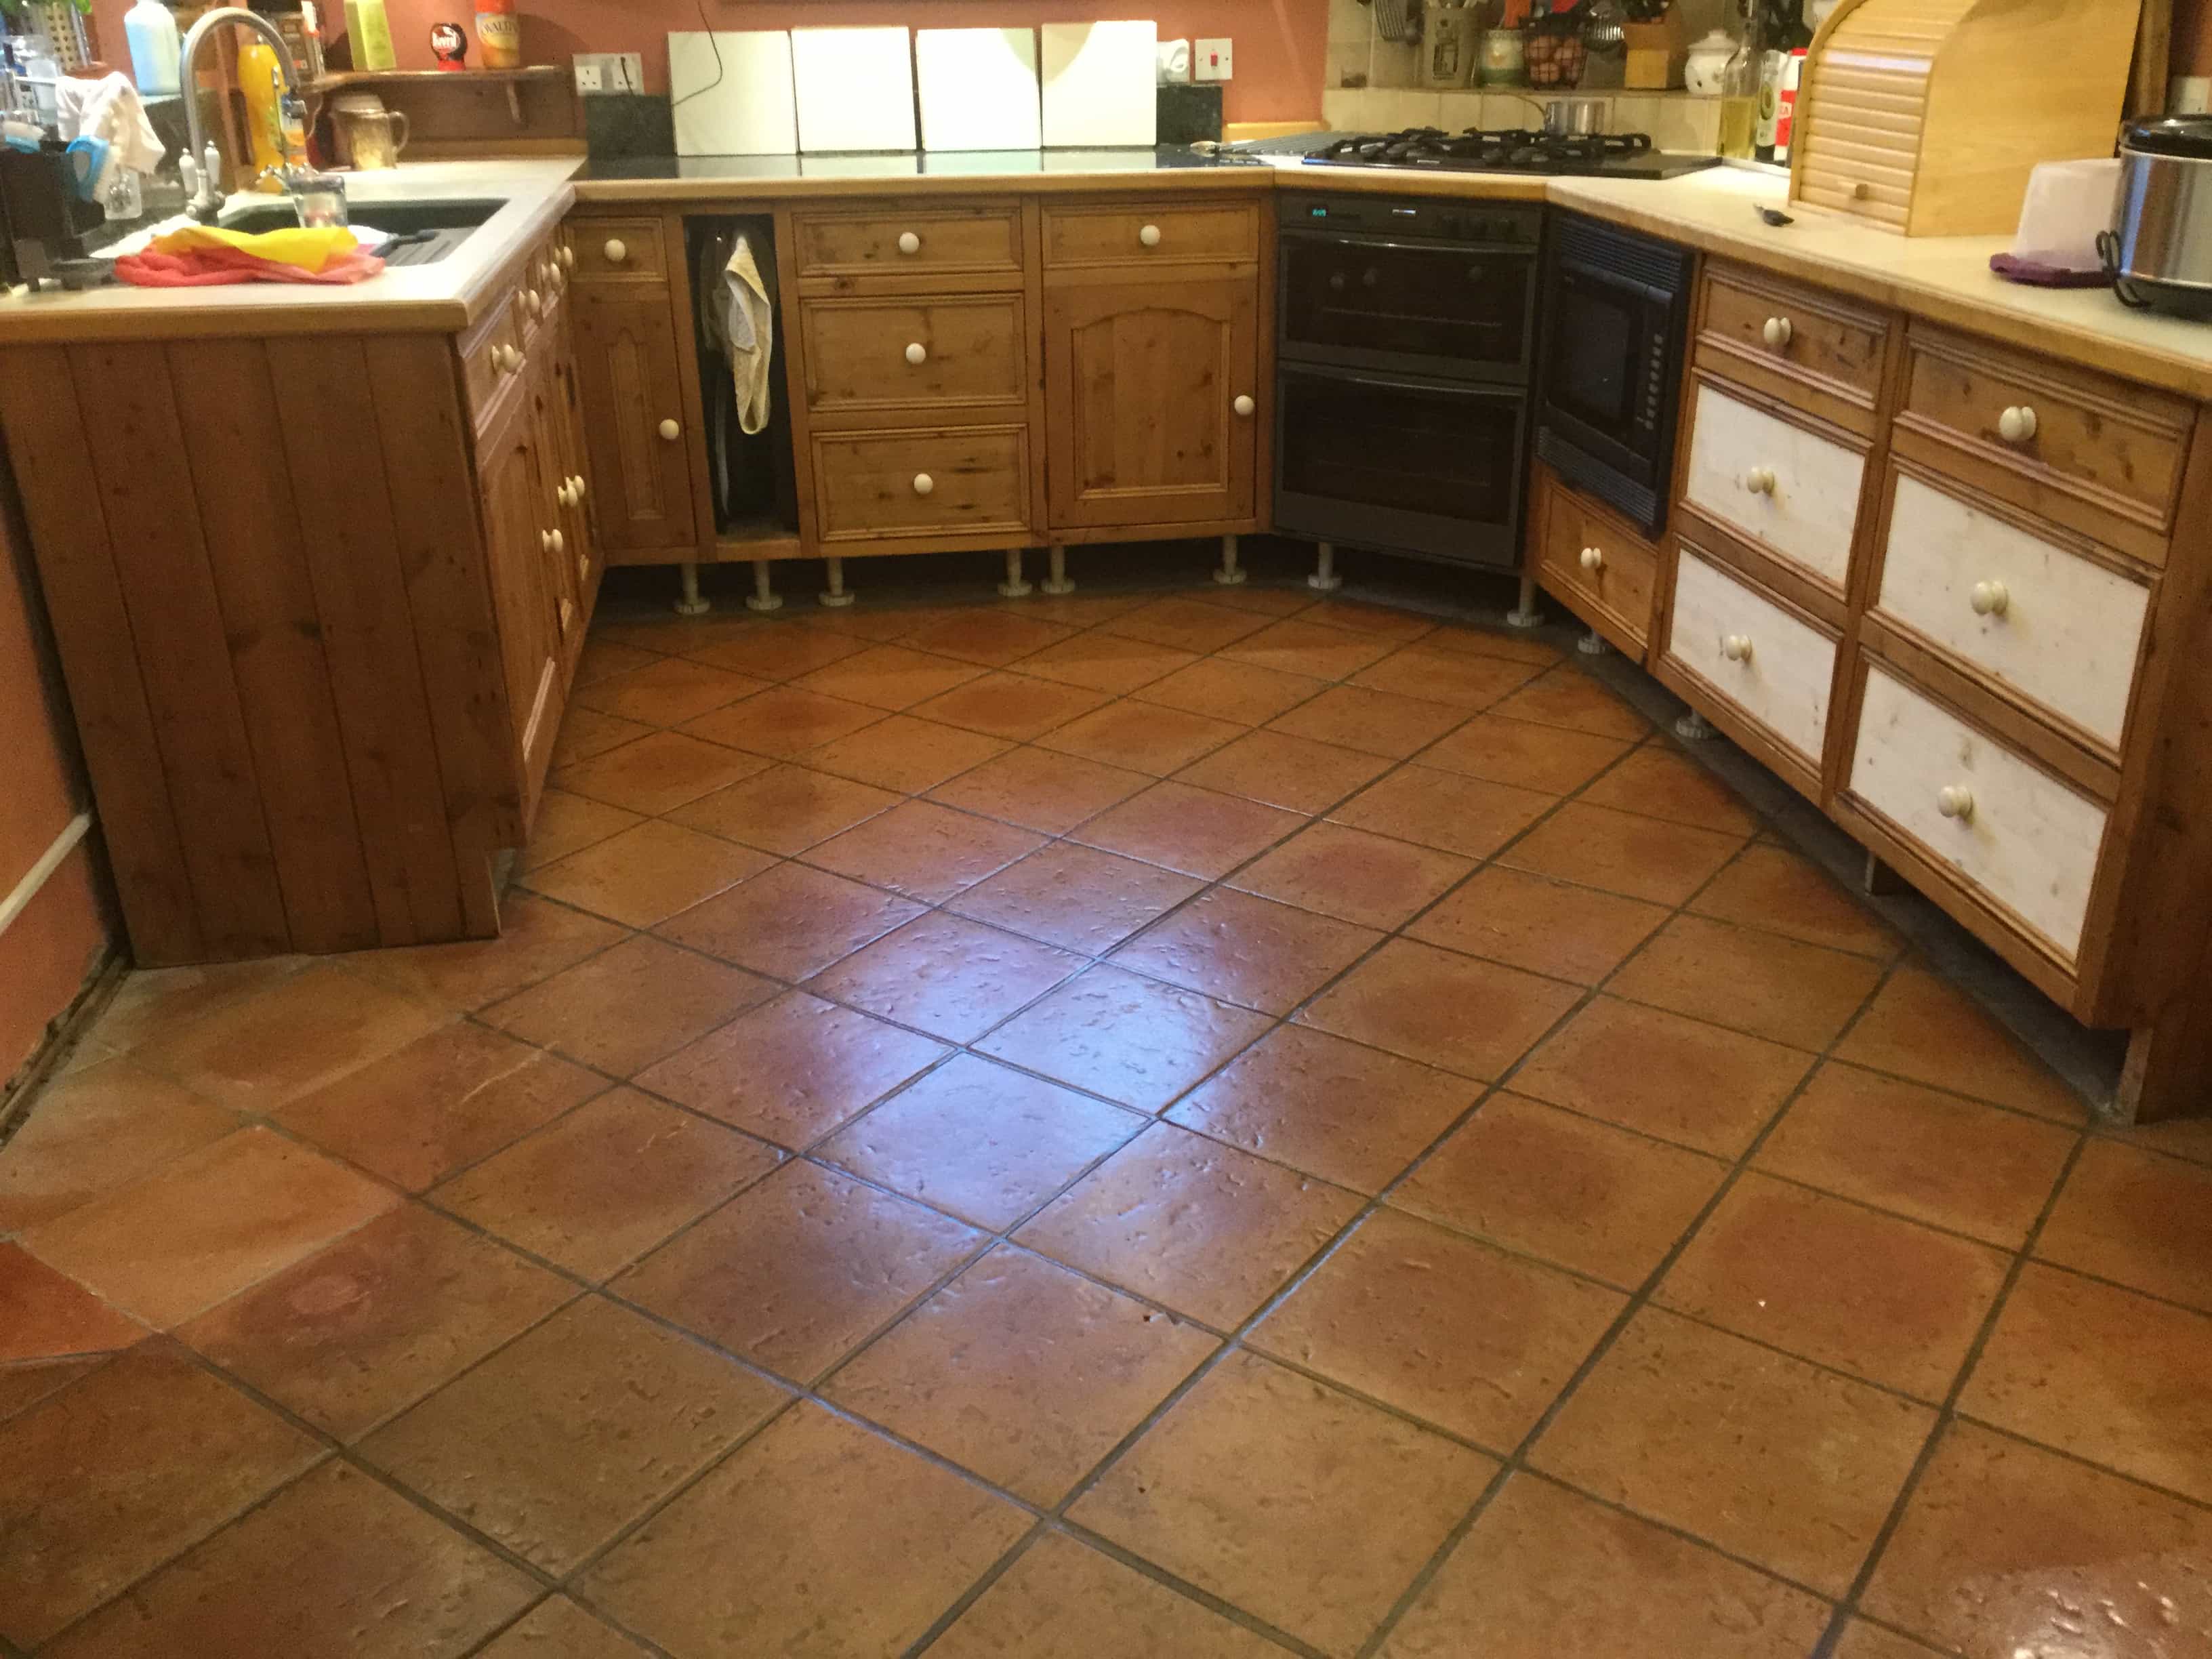
Quarry Tiled Kitchen Floor Before Renovation Wollaston

I went over to survey the floor and could see that any sealer that may have protected the tiles from ingrained dirt had long since worn off and as a result dirt had become ingrained into the pores of the quarry tiles. Once this happens its very difficult to keep clean.
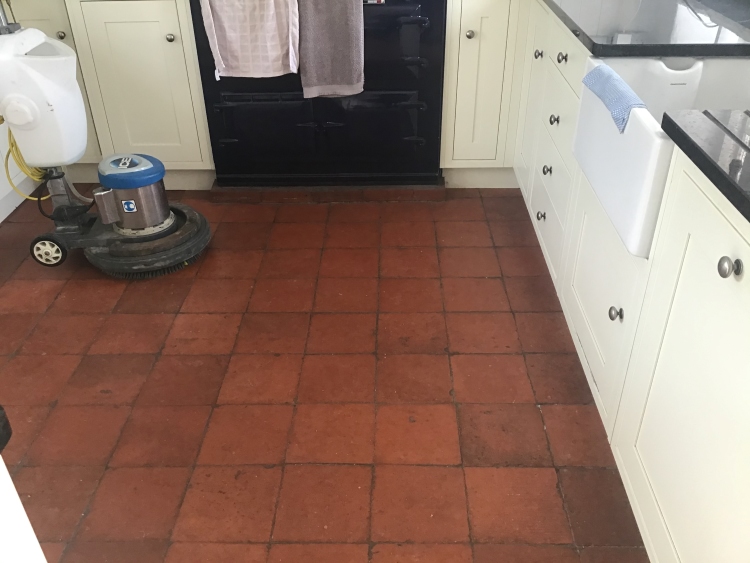
Quarry Tiled Kitchen Floor Before Renovation Wollaston

I had to agree the floor was overdue a deep clean and re-seal and so took some measurements in order to work out a quote for doing the work. The quote was accepted, and a date set for starting the work which would take two days, one to clean and one to seal.

Cleaning a Quarry Tiled Ground Floor

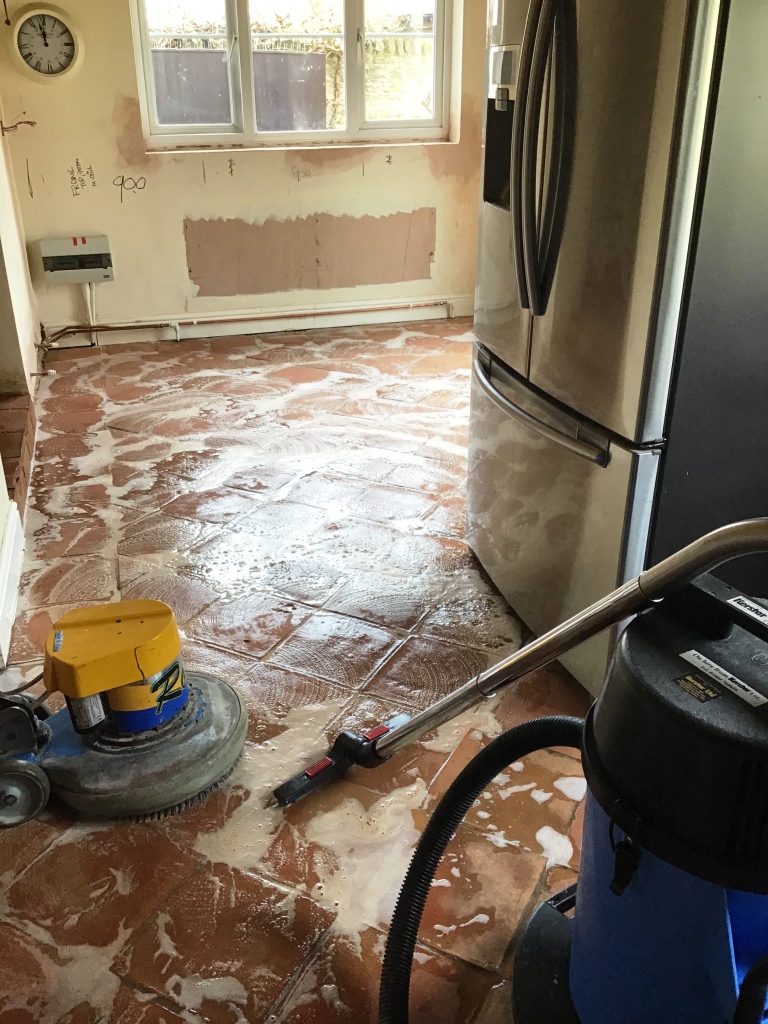
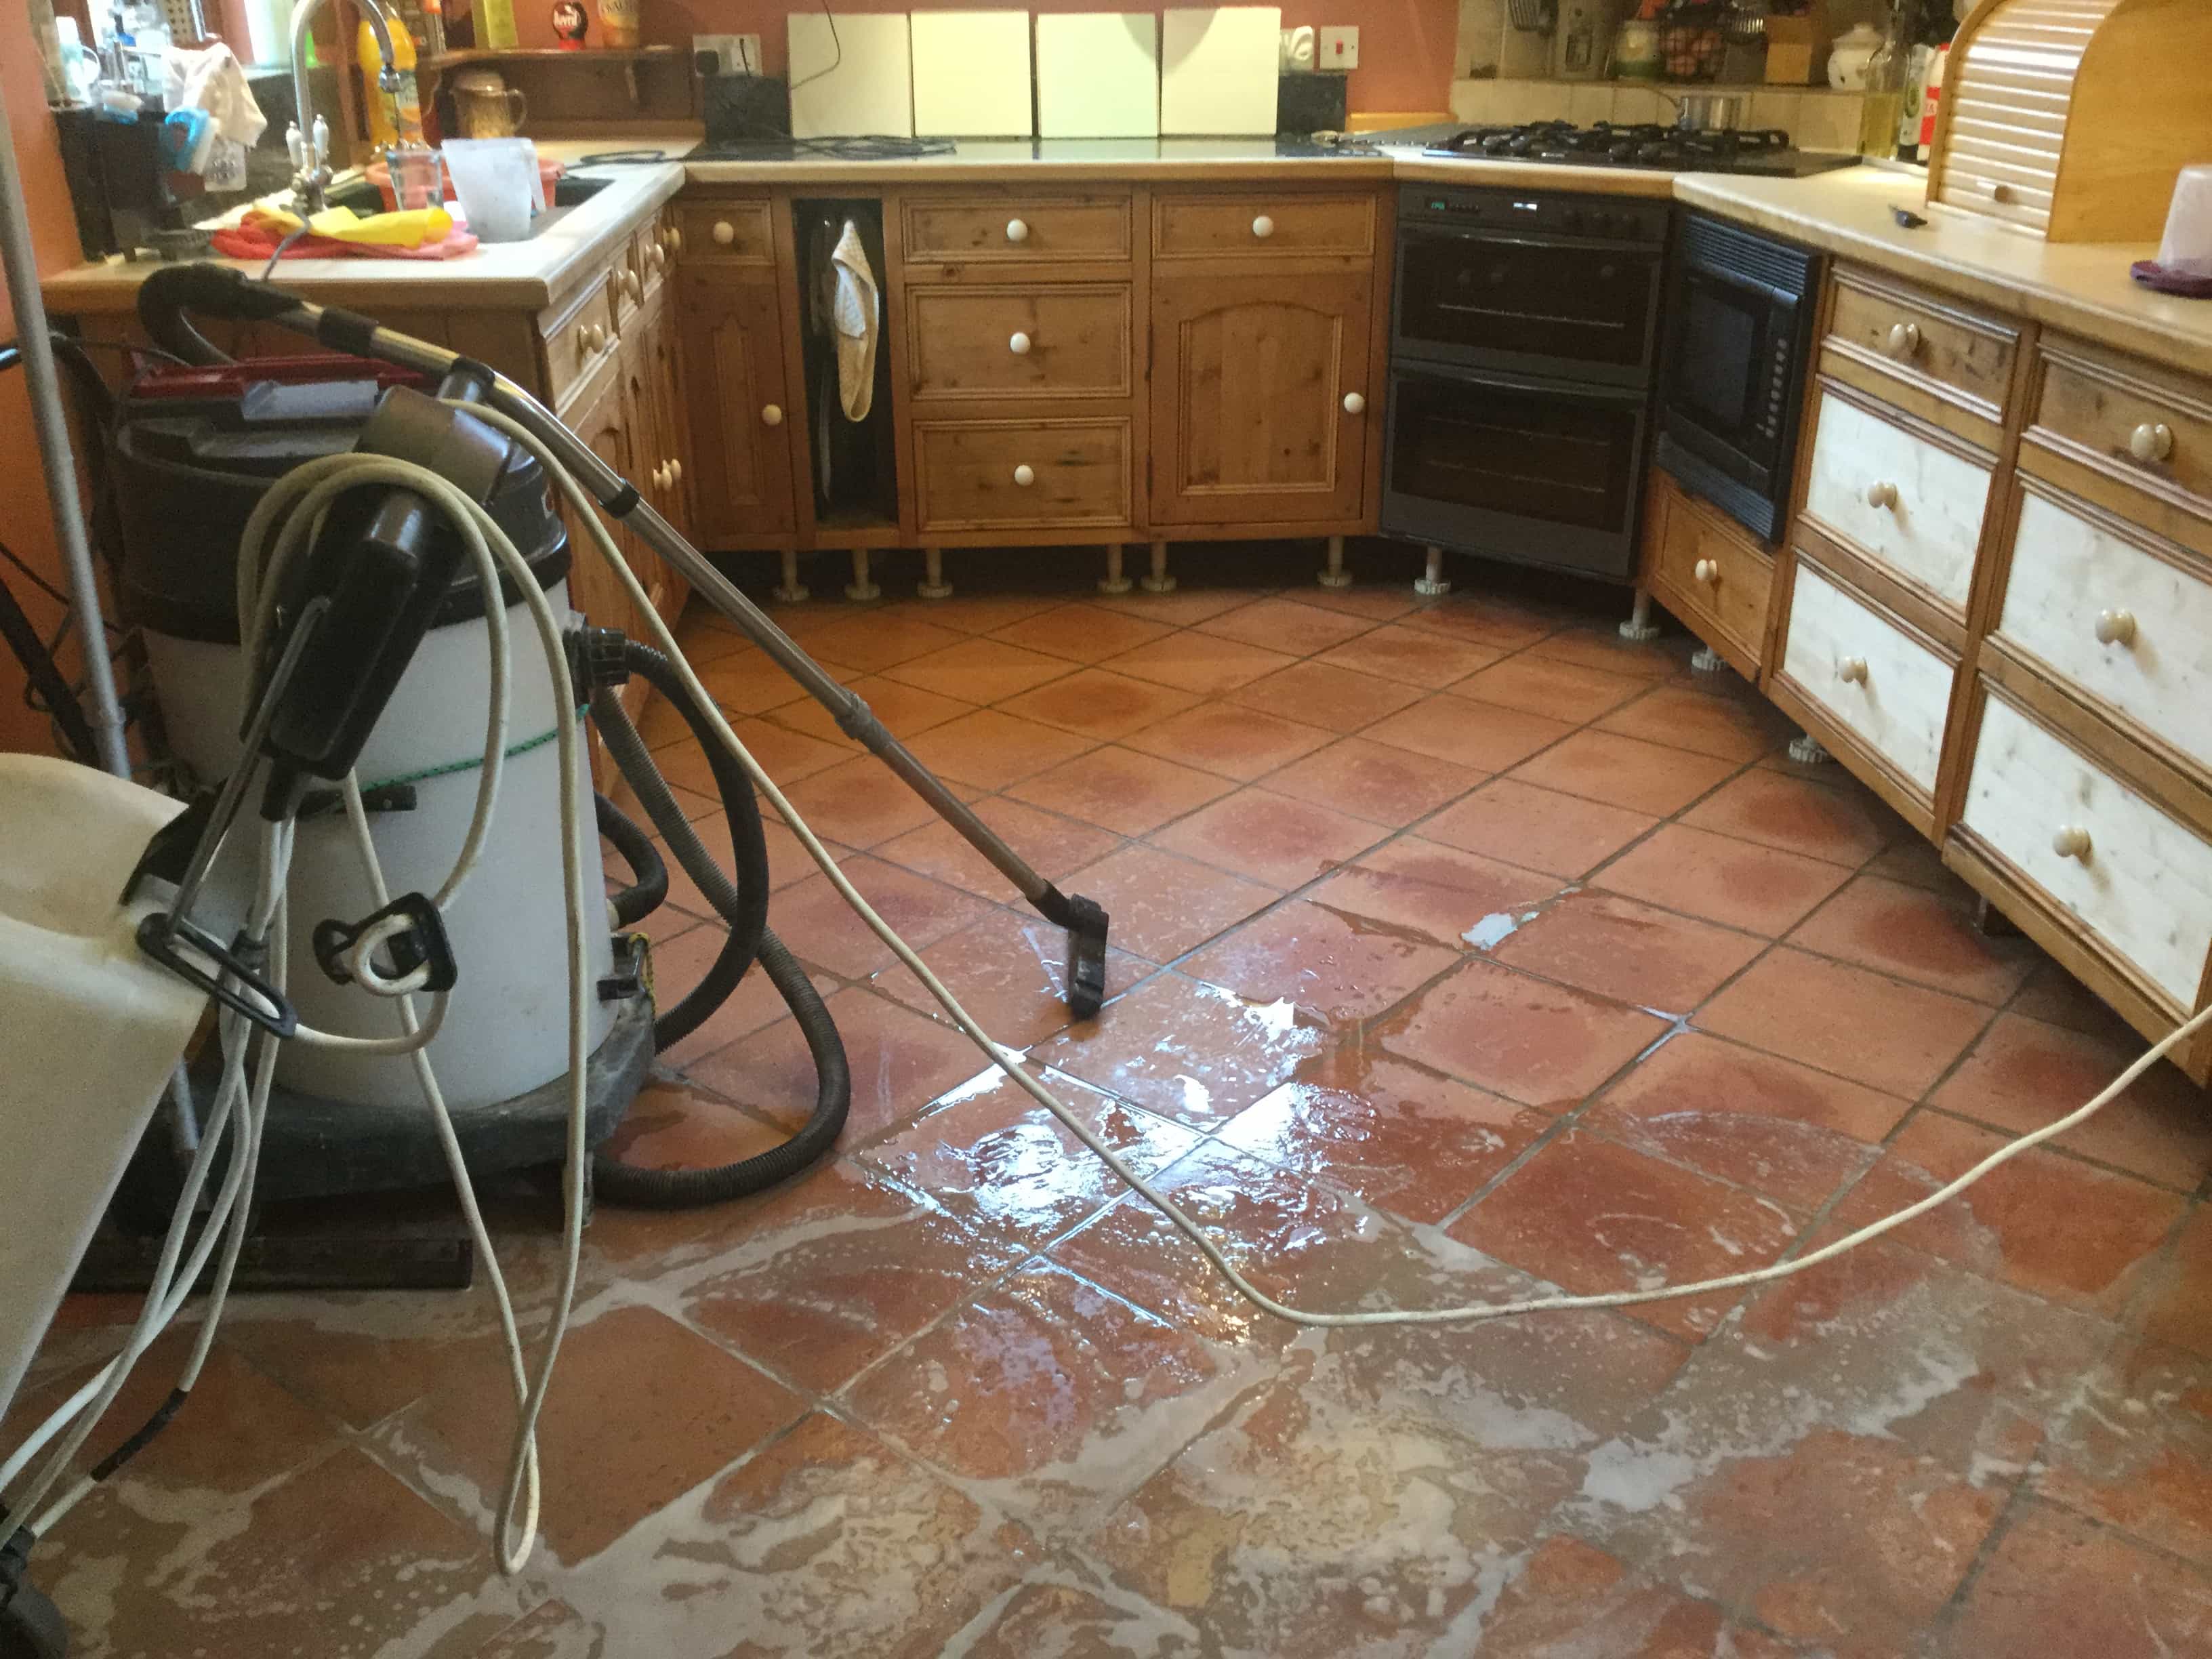
To deep clean the quarry tiles, a strong dilution of Tile Doctor Remove and Go was applied to the floor and left to dwell for a short while. The solution was then scrubbed into the tile using a black scrubbing pad fitted to a rotary machine.

The solution soon turned black with the dirt that was pulled out of the tiles and was rinsed away with water and extracted using a wet vacuum. I inspected the tiles afterwards and could see some paint splashes from years of decorating were still evident, so I re-applied the product and repeated the process to get rid of them.

The grout was then cleaned by hand using Tile Doctor Pro-Clean and a scrubbing brush, again extracting the waste once complete. I find this is the most effective way to clean grout as the pads struggle to reach into the recess of the grout line.

To complete the cleaning process, I then gave the floor an acid rinse with Tile Doctor Grout Clean-up, this was applied to remove old grout smears and further clean up the tiles. All soiling was rinsed off with water and extracted with a wet vacuum. The floor was left to dry off overnight.

Sealing a Quarry Tiled Ground Floor

Returning the following day, the first job was to test the floor with the damp meter to check it was dry. The tiles needed to be dry enough to accept the seal and applying sealer to damp tiles can result in a patchy appearance. This is always worthy checking when cleaning Quarry tiles as that are naturally quite porous so can take some time to dry.

Once satisfied the readings were within the correct range, I was ready to seal. I selected to use Tile Doctor Seal and Go Extra for this, it’s a breathable sealer which is useful for older floors such as this where there is no evidence of a damp proof membrane being installed. Breathable sealers allow for moisture to rise through the tile and evaporate at the surface, without this moisture can build-up under the floor causing it to reach out to the walls where it could cause rising damp.

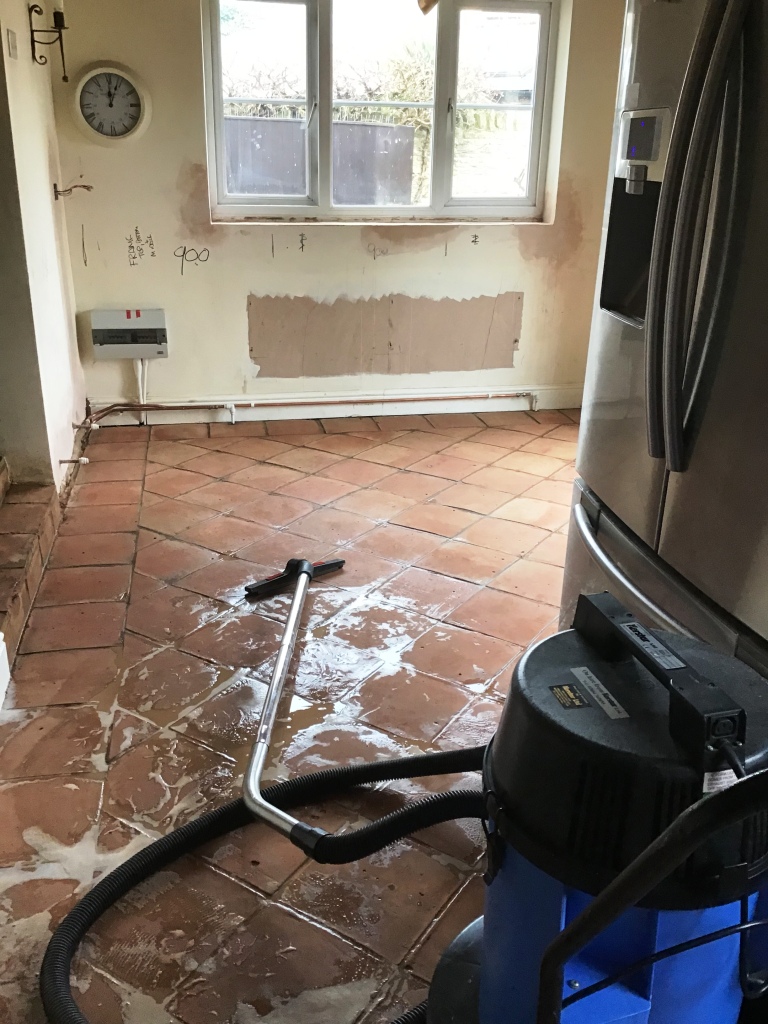
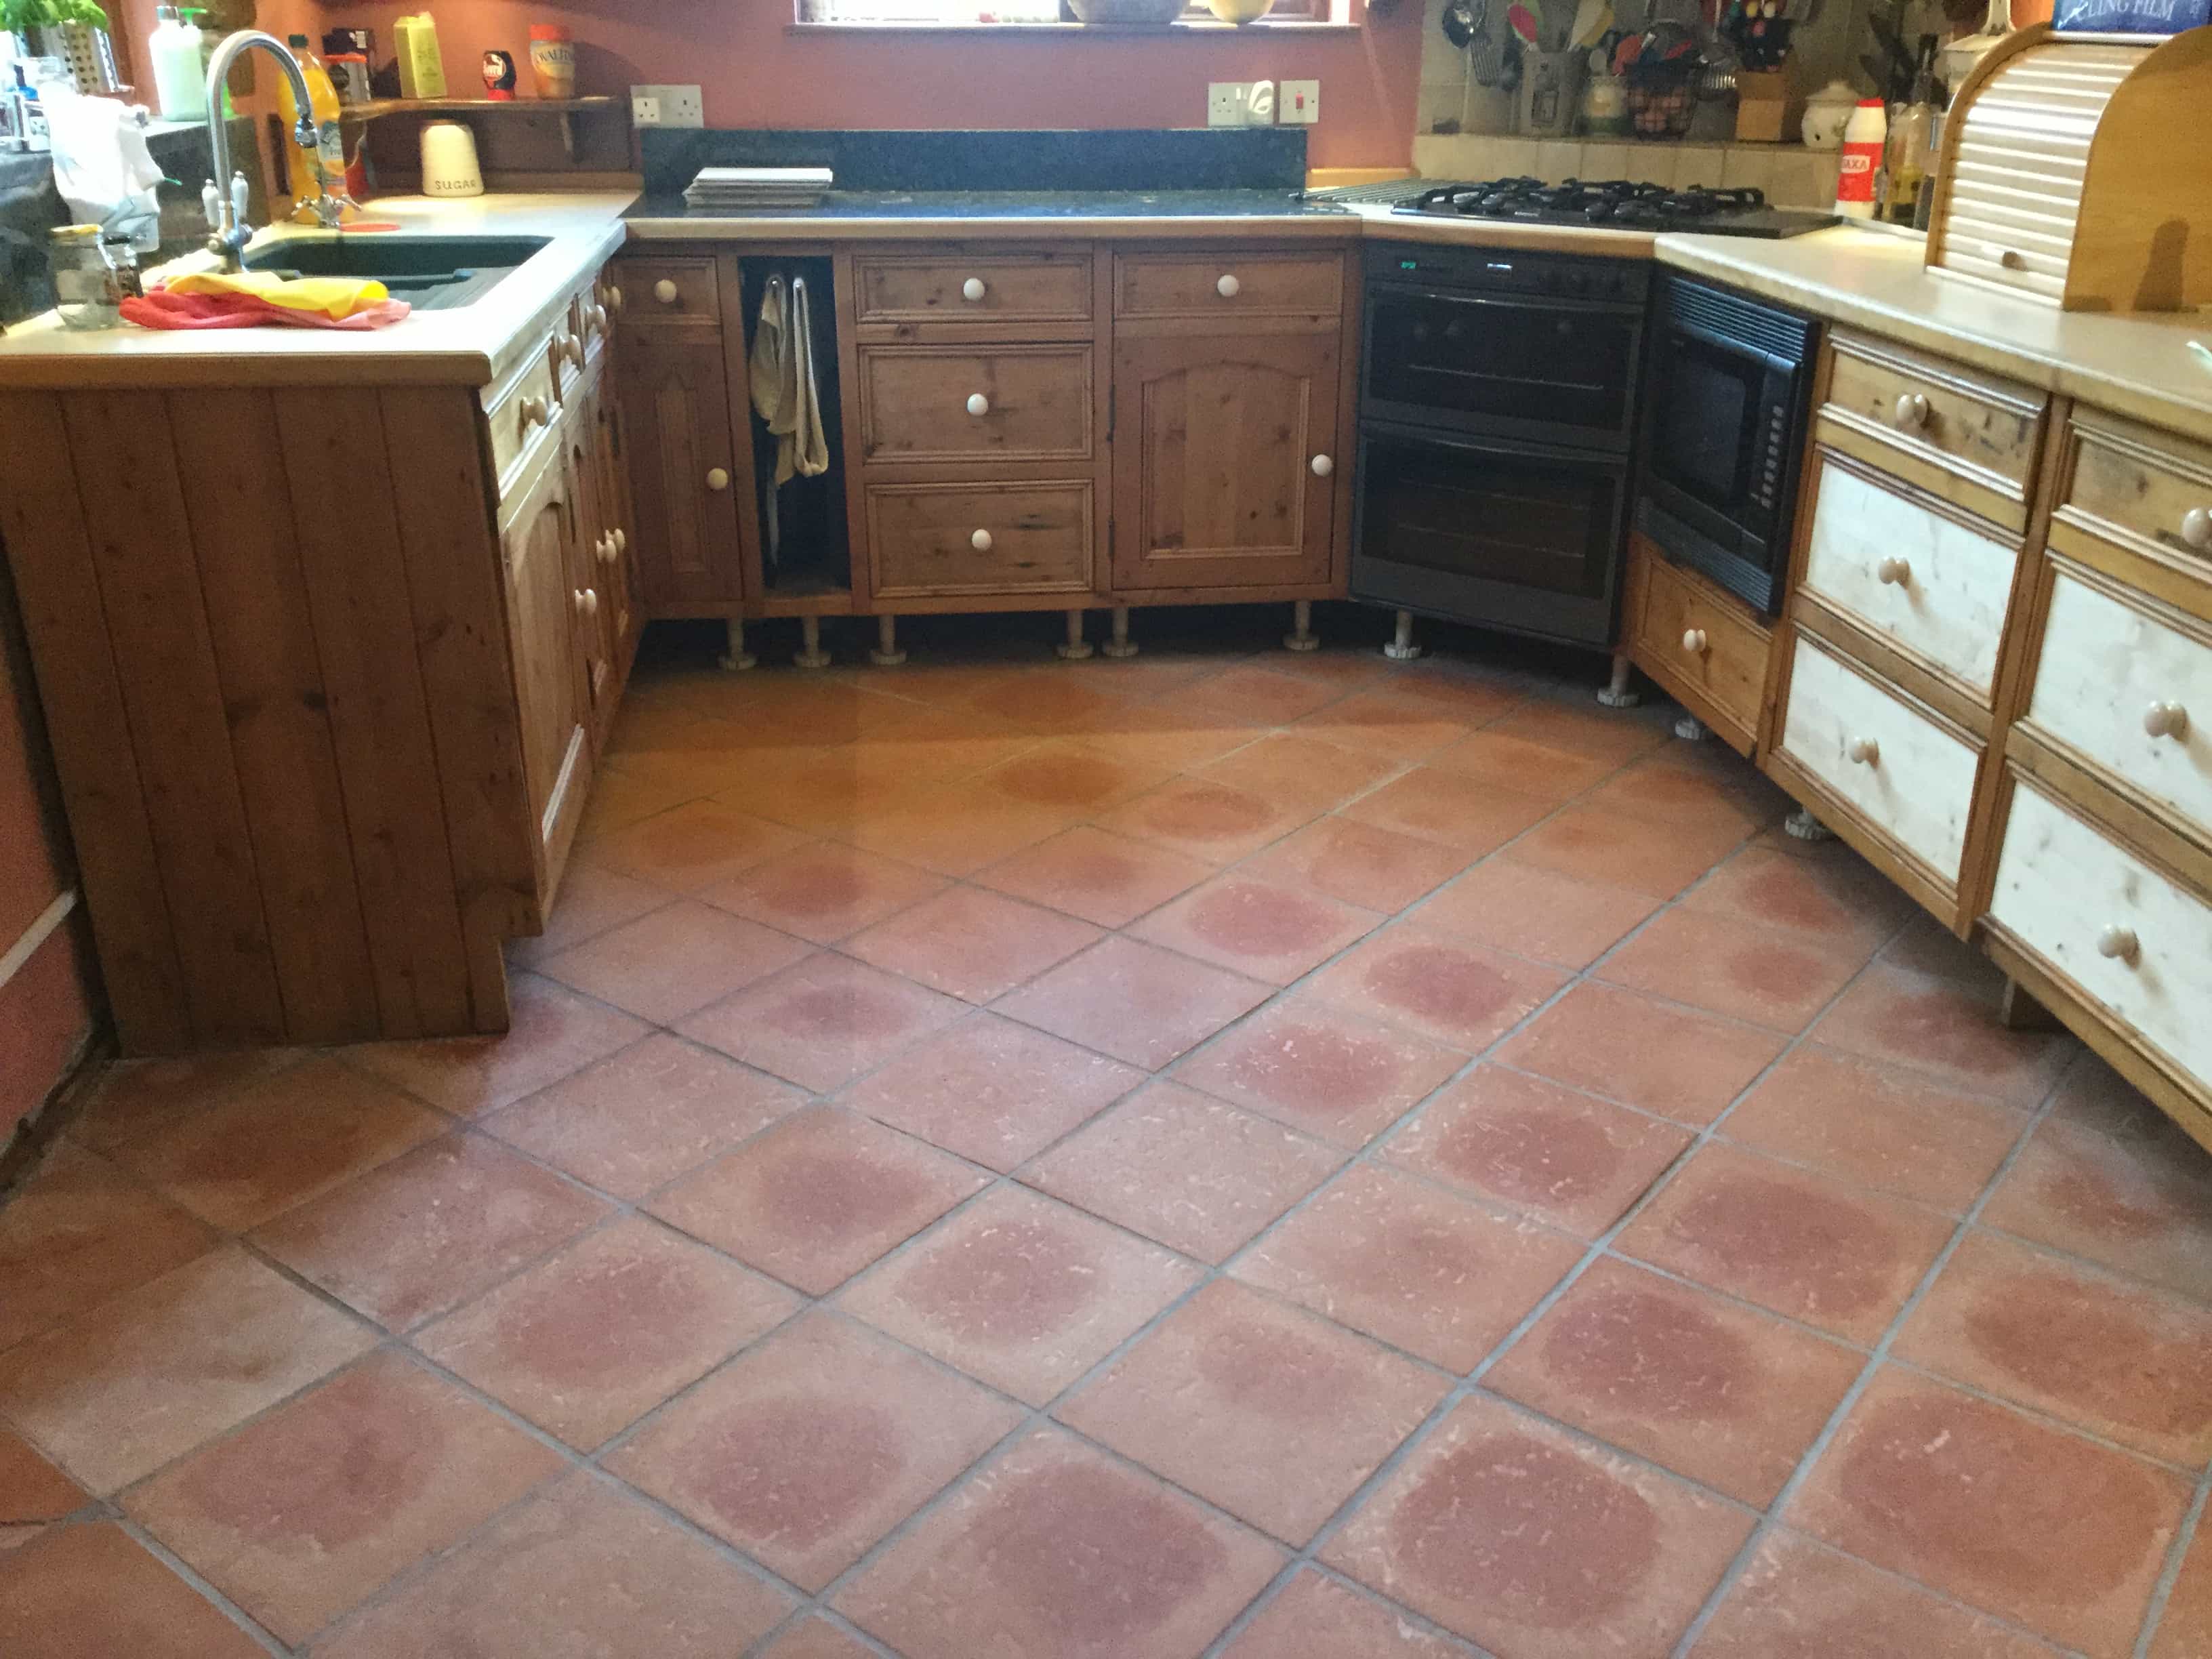
I applied two coats of Seal and Go Extra waiting for the first to dry before applying the next. The sealer lifts the deep red colours in the Quarry tiles and adds a nice appealing shine. The sealer works by ensuring dirt remains on the surface where it can easily be cleaned away.
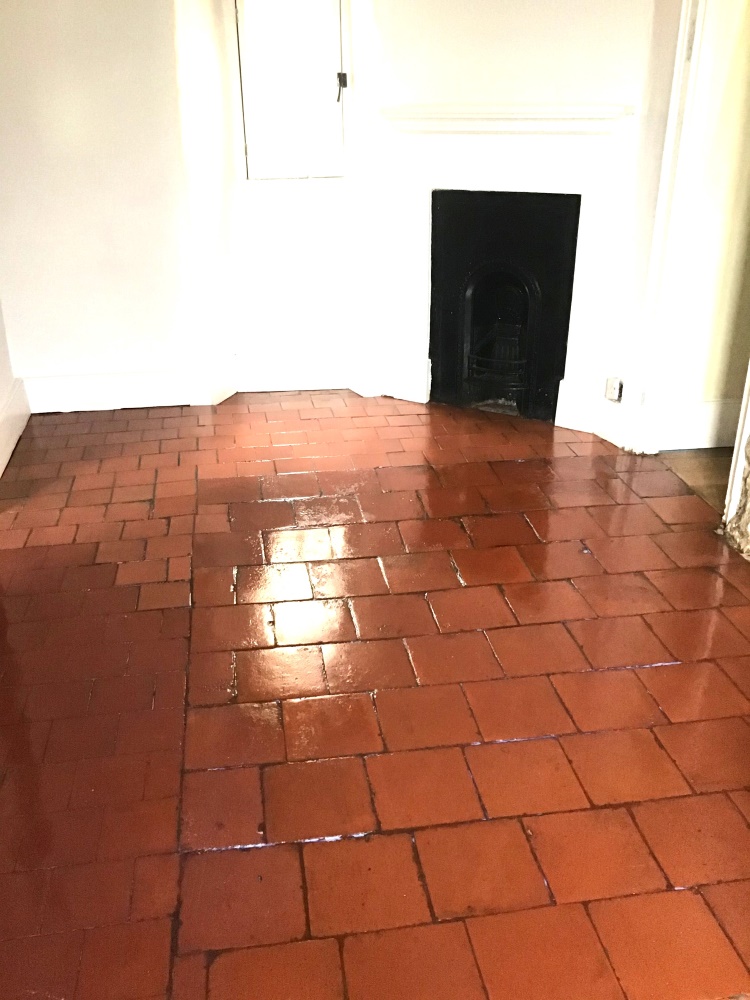
Quarry Tiled Kitchen Floor After Renovation Wollaston

My client was very happy with their now clean quarry tiled floor and left the following feedback for me:

“I was looking forward to the results before it was even booked in, and I was not disappointed. A professional approach and very helpful throughout.”

Before leaving I took time to explain how to maintain the floor using Tile Doctor Neutral Tile Cleaner. Its important to use a product like this on a sealed floor as many tile cleaning products are simply too strong and will strip the sealer off the floor with regular use.
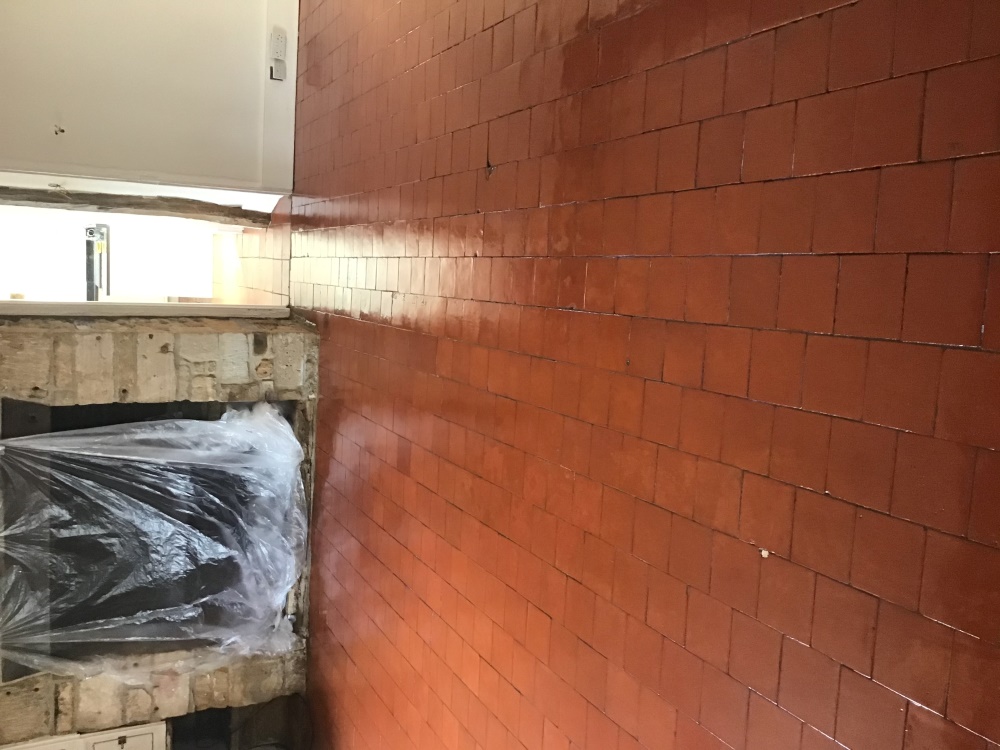
Quarry Tiled Kitchen Floor After Renovation Wollaston


Professional Cleaning of a Quarry Tiled Floor in Northamptonshire

Dirty Quarry Tiled Floor Deep Cleaned and Sealed in Wollaston Read More »

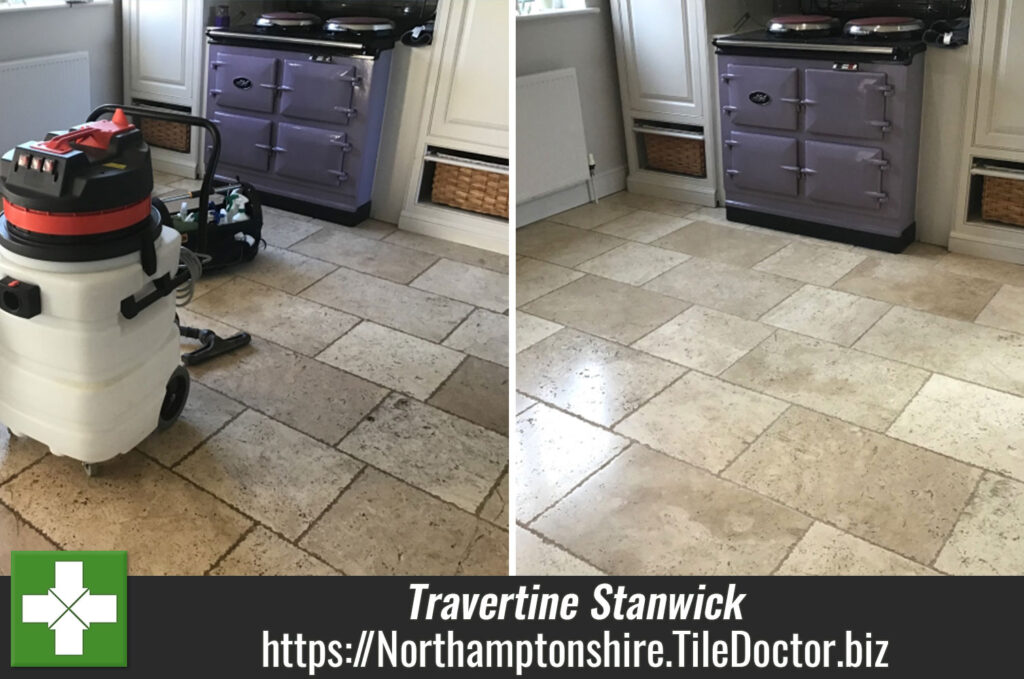
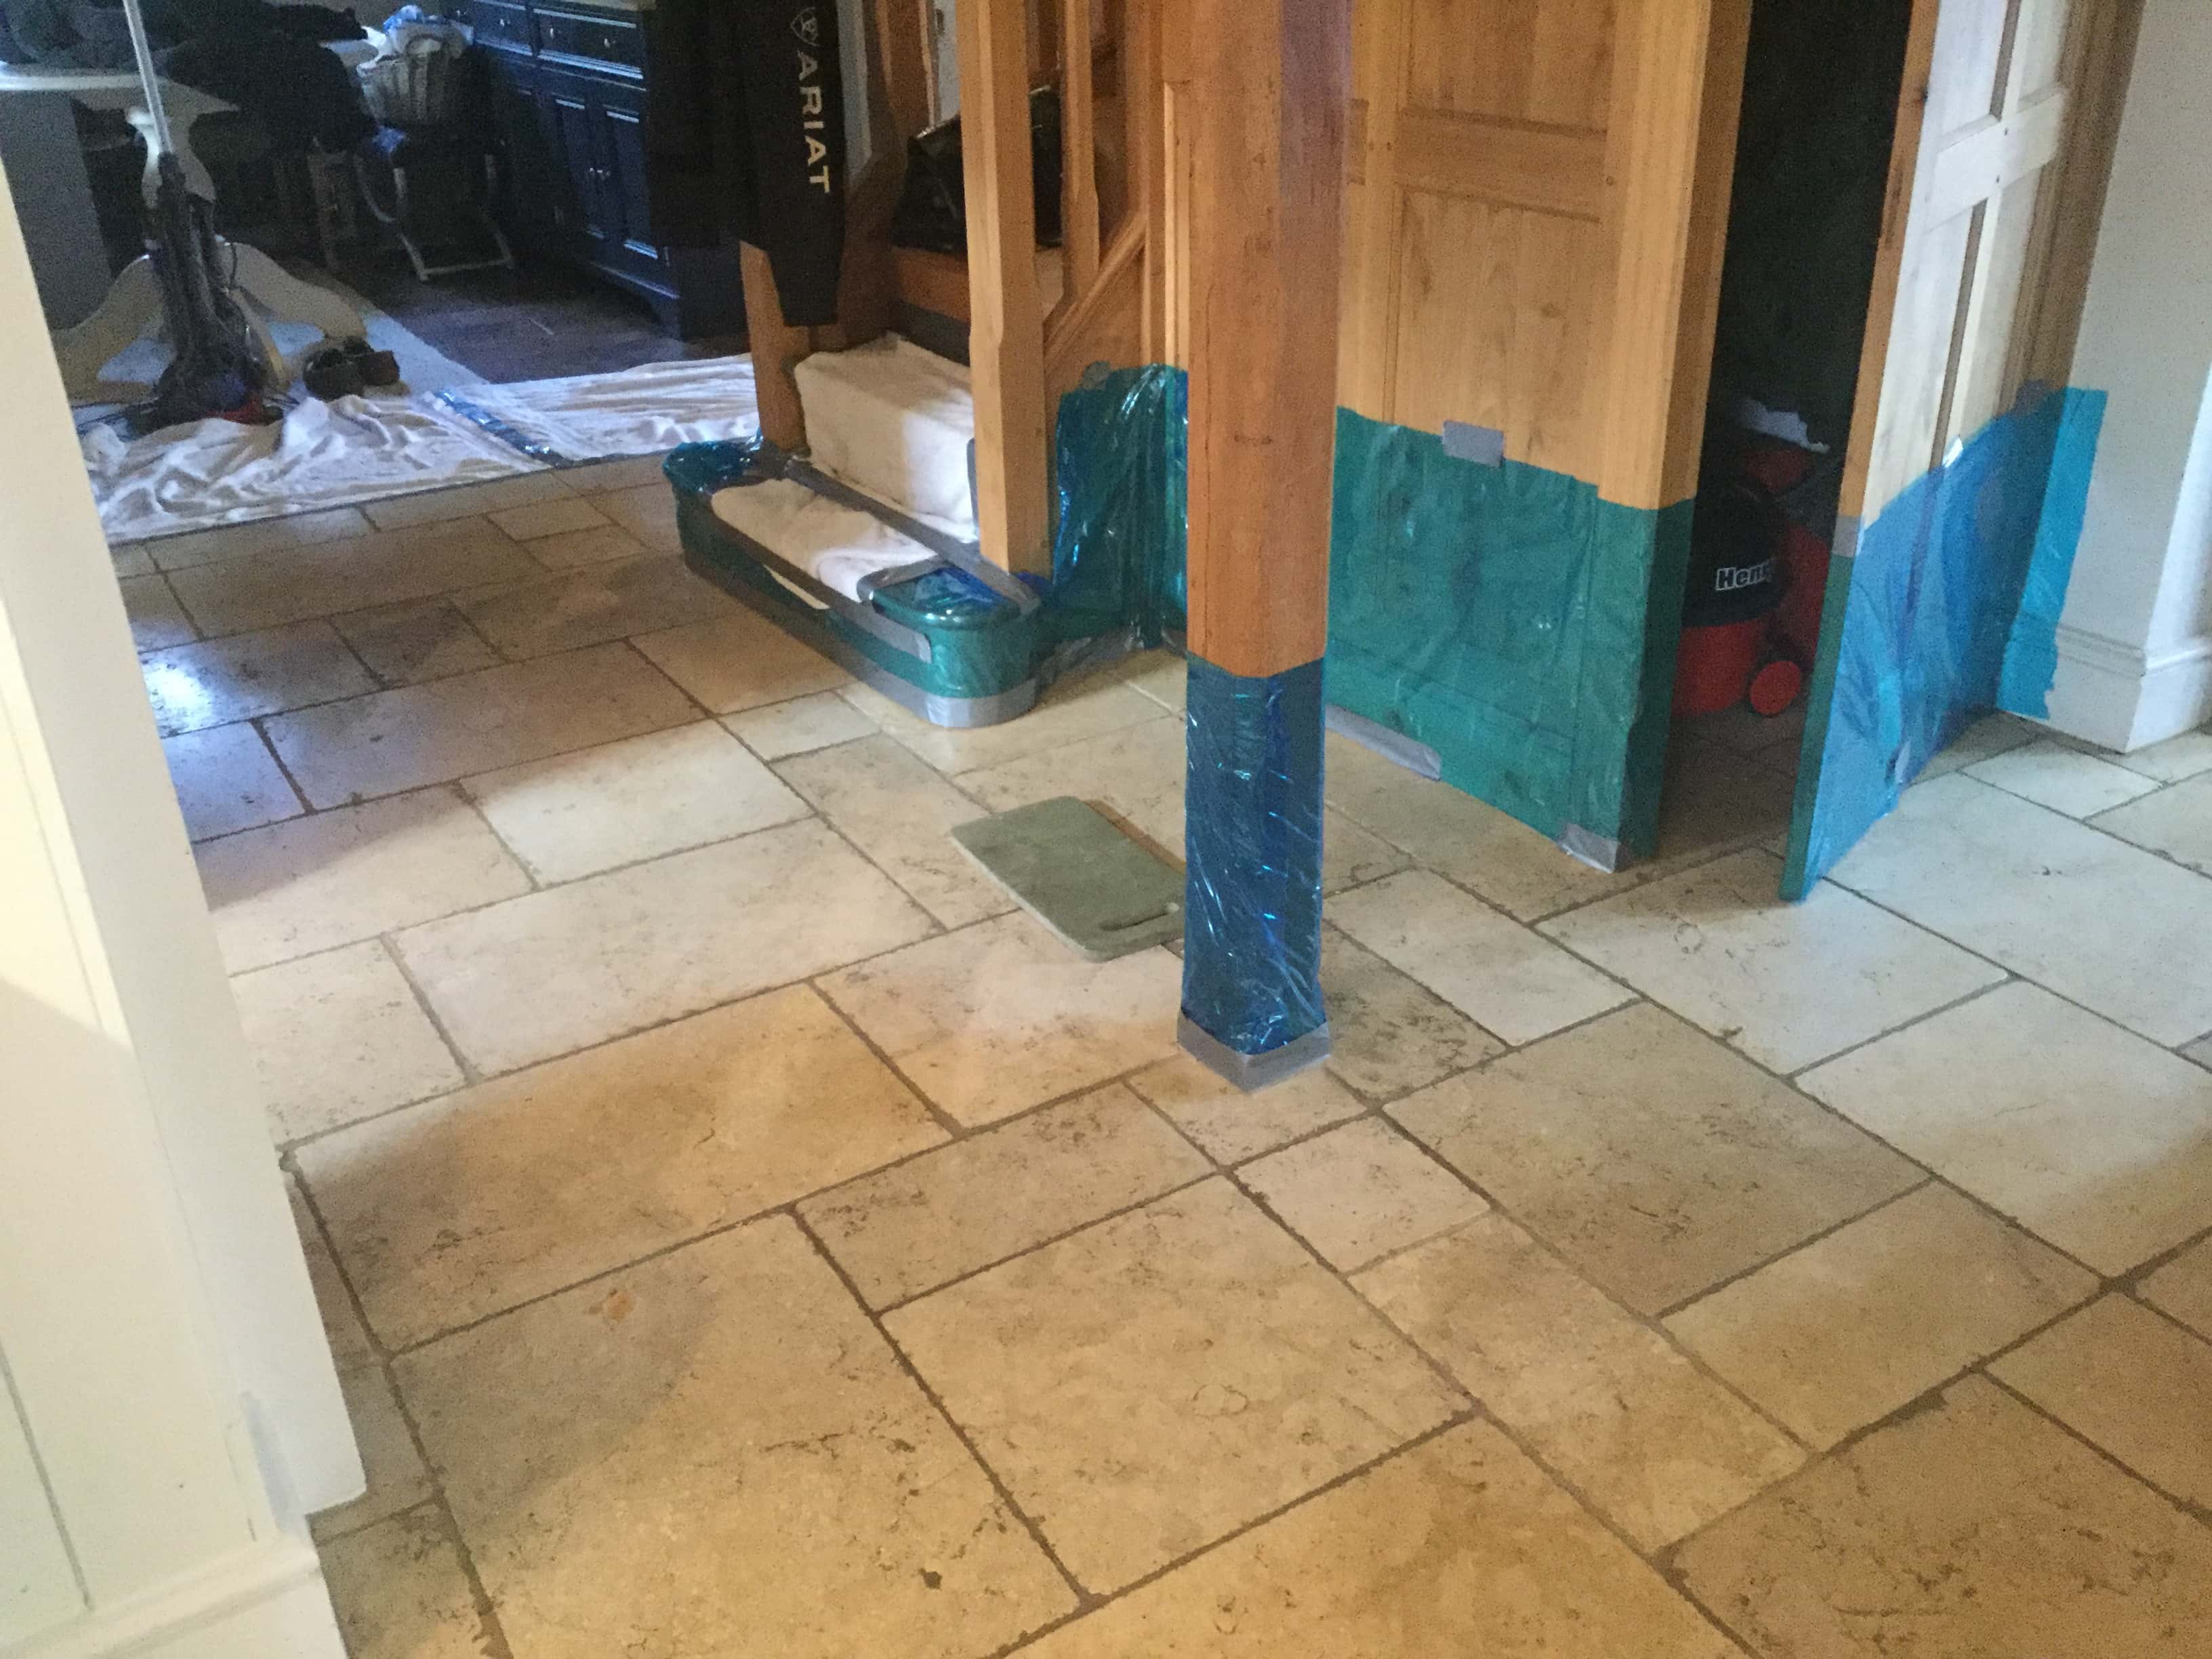
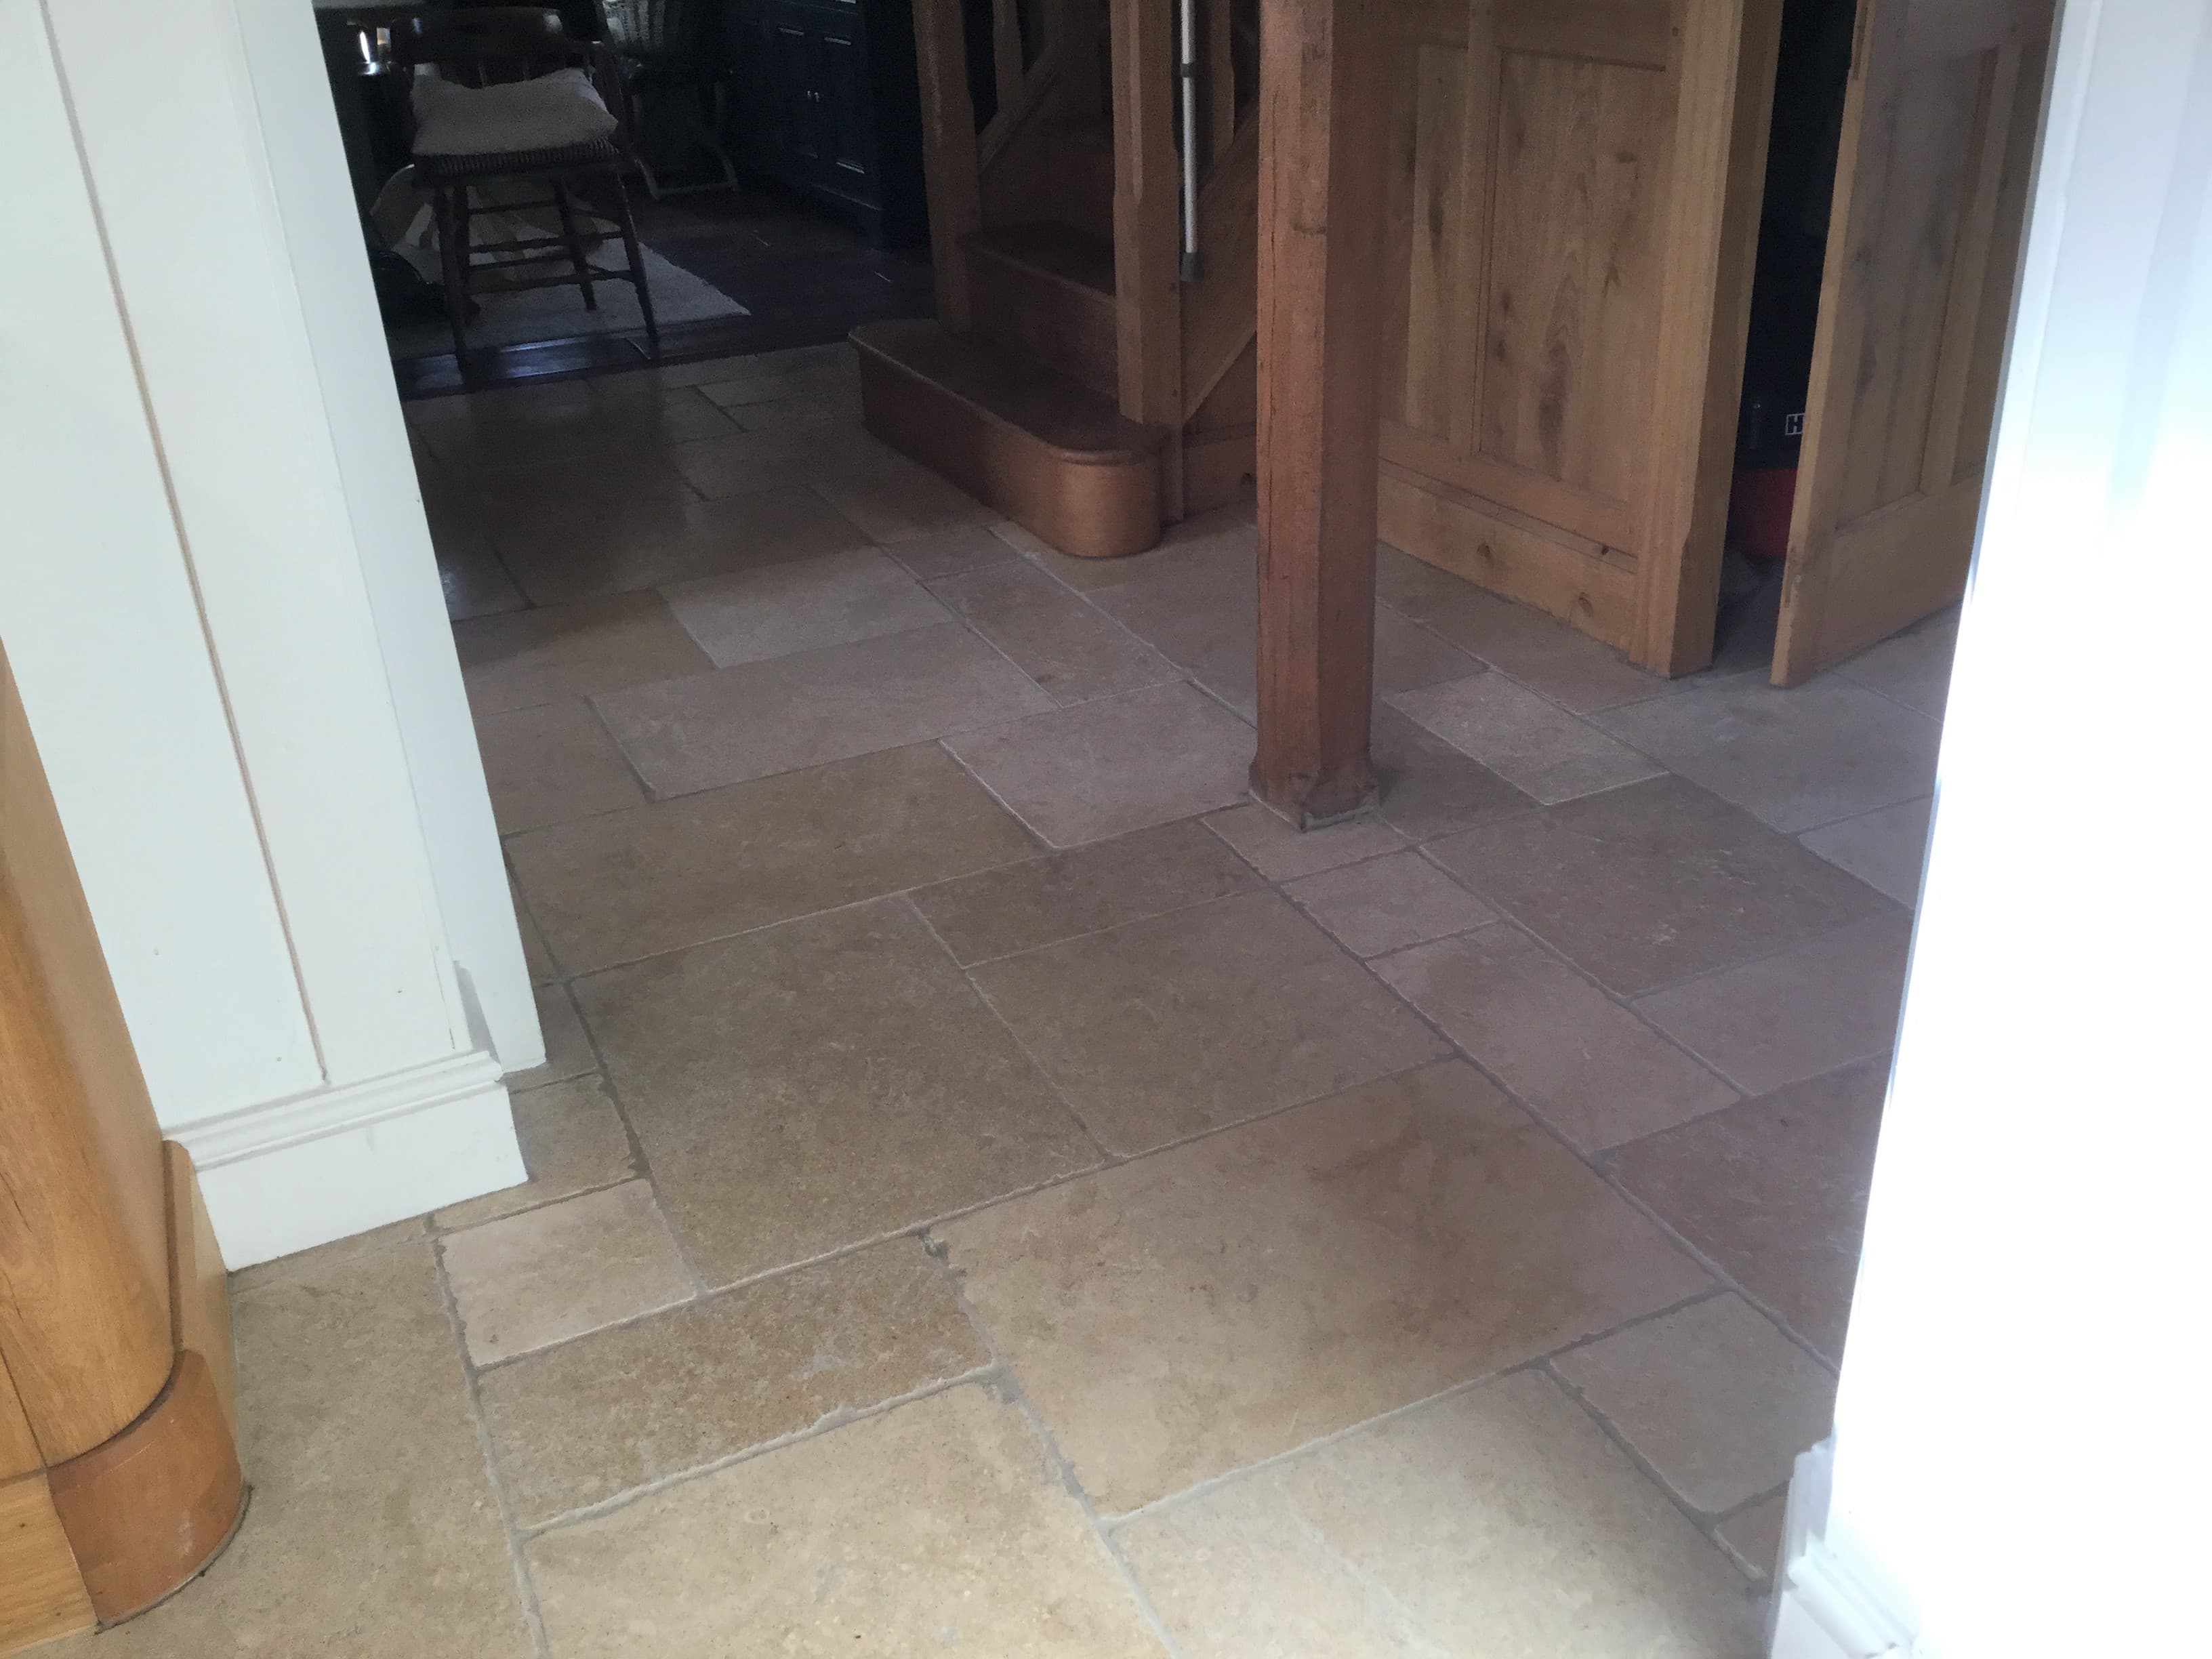
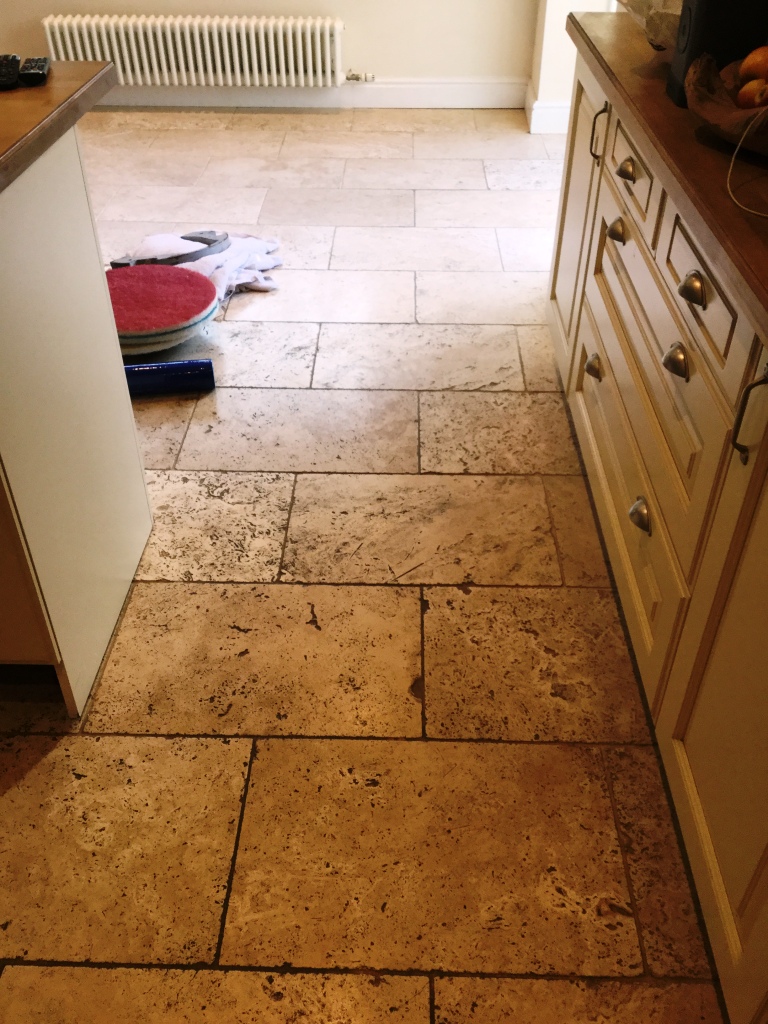
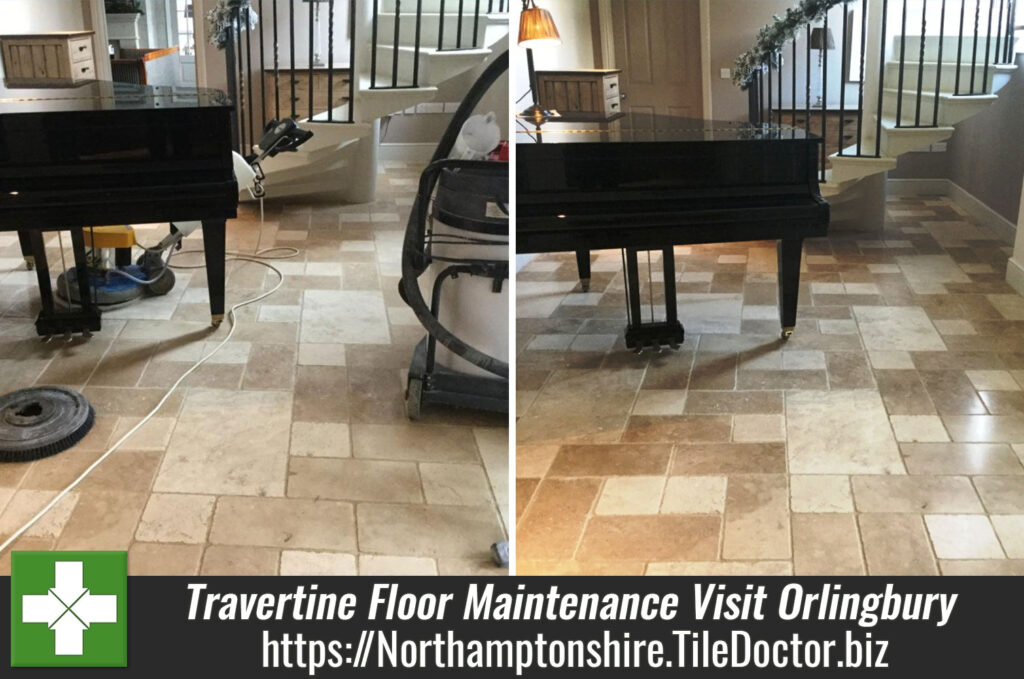
Tumbled Travertine Tiled Kitchen Floor Renovation Stanwick

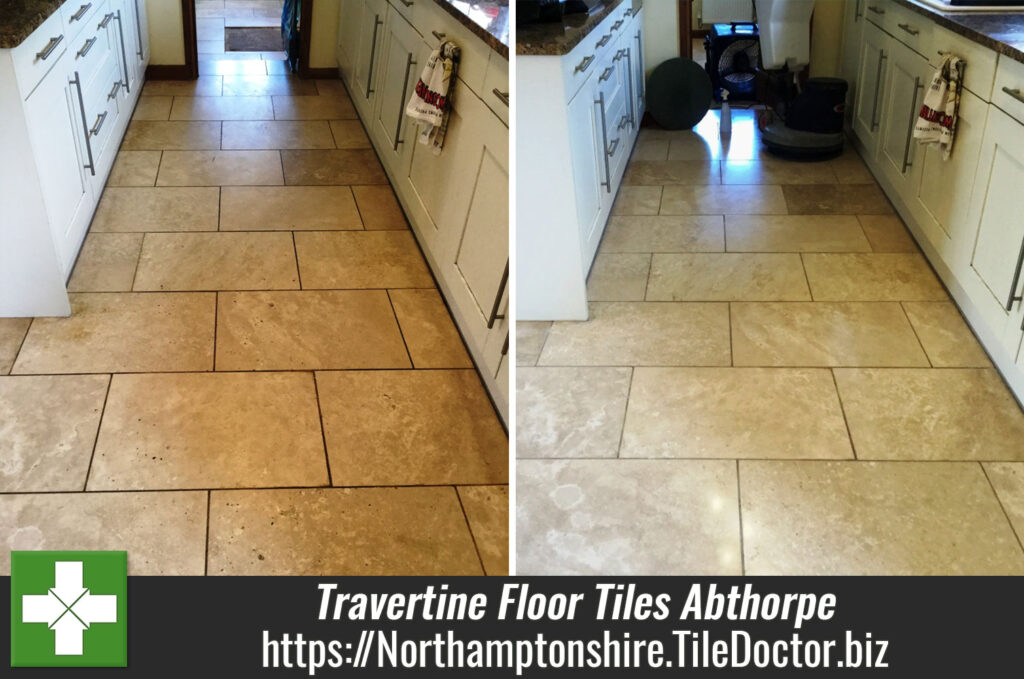
Tumbled Travertine Kitchen Floor Filled and Polished in Stanwick Near Wellingborough

A homeowner from the village of Stanwick near Wellingborough contacted me about their Tumbled Travertine Kitchen floor which was proving very hard to maintain. Having worked on similar floors before I was confident of helping and so arranged a date to pop round and come up with a plan for its renovation.

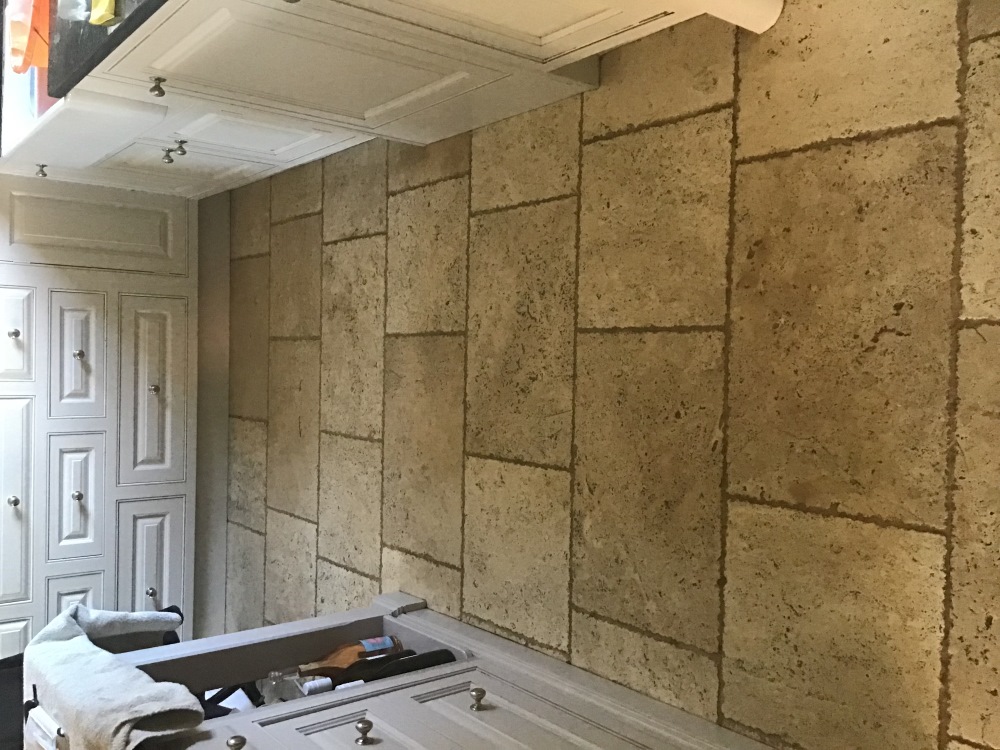
Tumbled Travertine Tiled Kitchen Floor Before Cleaning Stanwick

Surveying the floor, I could see the main problem was the pitting in the tiles which are basically small holes and is quite common with Travertine. Dirt was becoming ingrained in the holes which were proving very difficult to remove with regular cleaning and this left it looking dull and permanently dirty. I recommended deep cleaning the floor to remove all the dirt, filling the holes, polishing the stone to bring back its appearance and then sealing to protect it going forward.

Happy with the plan I created a quote for the work which was agreed and a date set for our return.

Cleaning and Polishing a Travertine Tiled Floor

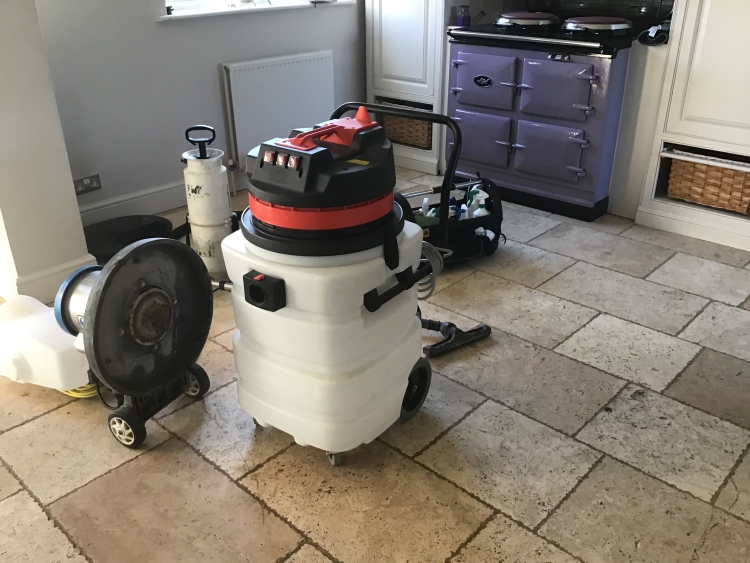
I gave the floor a sweep to remove any loose dirt and grit and started with the application of the first pad which is a coarse 400-grit and designed to remove minor scratches, old sealers and ingrained dirt. The pads fit a 17” buffer machine and is applied with water to lubricate the process, then once the pad has been applied to each tile the floor is rinsed with water and the resultant slurry is extracted using a wet vacuum.

Tumbled Travertine Tiled Kitchen Floor Before Cleaning Stanwick

Before moving onto the second pad in the set I gave the grout lines a clean with Tile Doctor Pro-Clean which was scrubbed into the grout using a stiff narrow brush. The pads can struggle to reach into the recessed grout lines, so I usually find this is the best way to get the grout clean.

The floor was given another rinse with water and then I continued to work through the medium 800-grit and then fine 1500-grit pads rinsing with water and then extracting the slurry with a wet vacuum after each pad.

The Travertine was now clean and after drying with fans I commenced the task of filling the larger holes with a resin filler that matched the natural colour of the stone as close as possible. The filler takes an hour to set and then the patches are rubbed down with handheld burnishing blocks.

Sealing a Tumbled Travertine Tiled Kitchen Floor

I returned the following day and started by completing the polishing process by applying the last 3000-grit very fine burnishing pad with the 17” rotary machine, the pad is applied dry with a small amount of water sprayed on the floor as you go along. With the floor now fully dry and the filled holes polished flat the last step was to apply the sealer which will protect the floor going forwards.

Last step was to seal the Travertine to prevent dirt from becoming ingrained in the stone going forward. To do this I applied two coats of Tile Doctor Colour Grow which is a colour enhancing sealer which works by soaking into the pores occupying the space and thereby preventing dirt from residing there. This ensures that dirt remains on the surface where it is easily cleaned away.

Tumbled Travertine Tiled Kitchen Floor After Cleaning Stanwick

Once done the floor looked so much healthier and the new sealer will ensure that the Travertine keeps its appearance and is much easier to clean in future. Regarding cleaning, I recommended the use of Tile Doctor Stone Soap for the regular cleaning of this floor. This product is formulated for use on sealed stone and it help maintain the patina.

Tumbled Travertine Tiled Kitchen Floor After Cleaning Stanwick


Professional Travertine Tiled Floor Restoration in Northamptonshire

Tumbled Travertine Kitchen Floor Filled and Polished in Stanwick Near Wellingborough Read More »

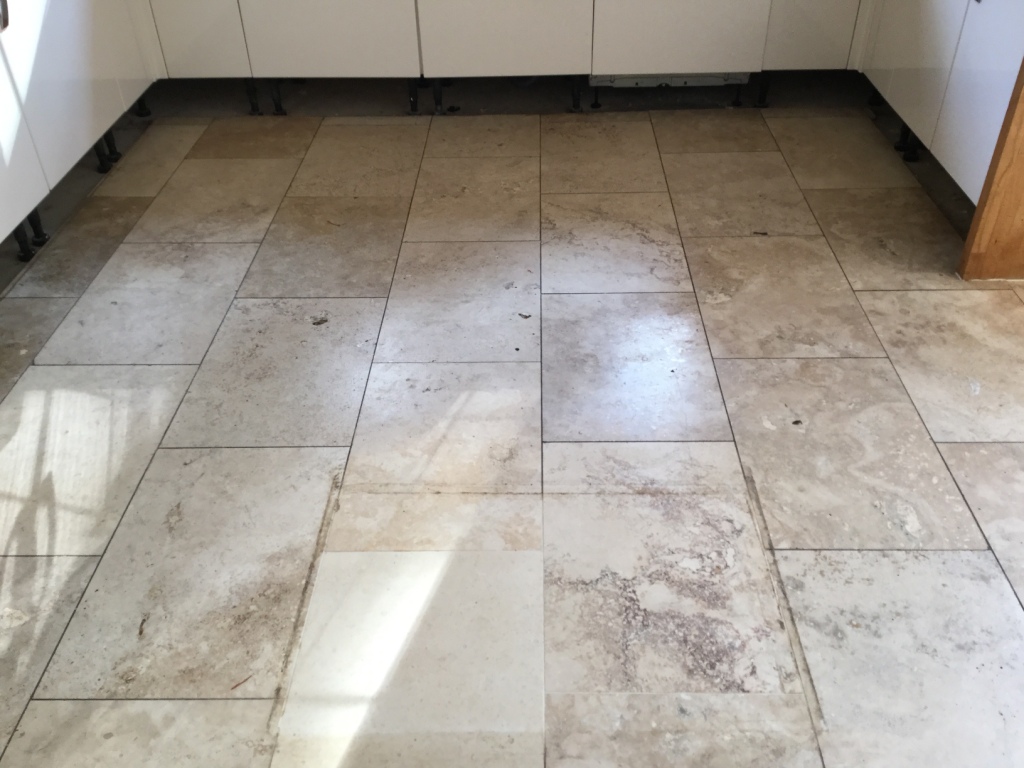
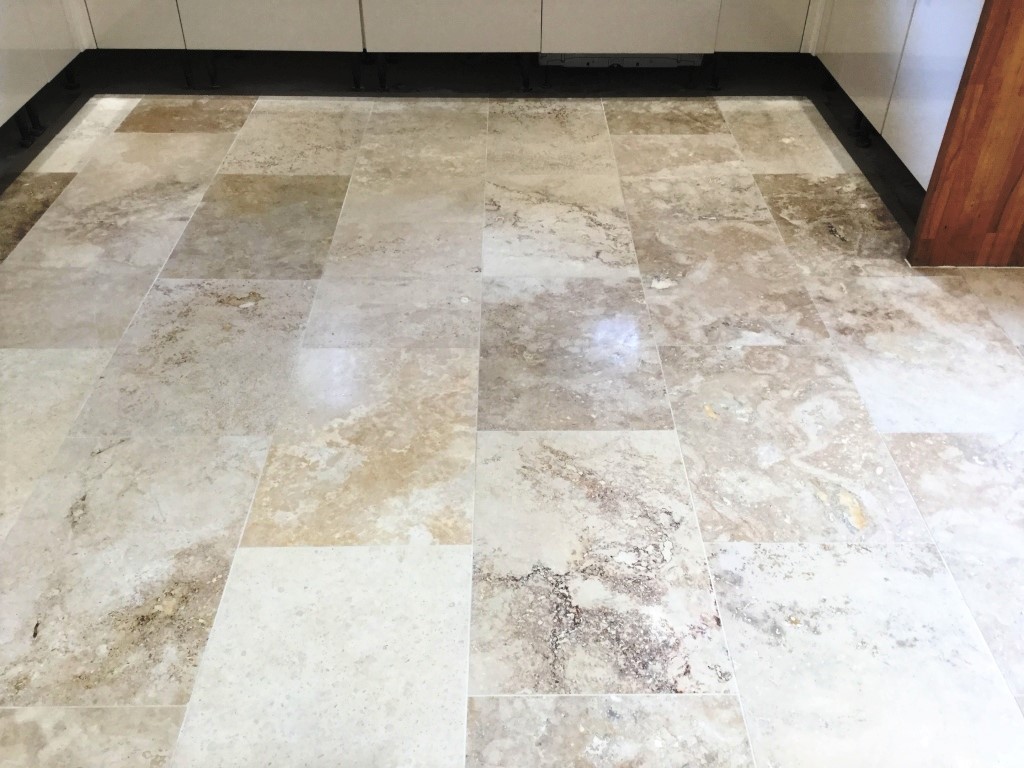
Limestone Tiled Kitchen Floor Renovation Geddington

Pitted Limestone Floor Deep Cleaned, Polished, Filled and Sealed in Geddington

This client from Geddington called me in to renovate their Limestone tiled floor which had been installed throughout much of the ground floor. Limestone like any natural stone is porous and will suffer from ingrained dirt if the sealer isn’t maintained, so it’s not unusual to need work like this doing every three to five years.

Limestone Tiled Kitchen Floor Before Cleaning Geddington

I visited the property to survey the tiles and could see the stone had quite a lot of surface pitting which was trapping dirt and making it very difficult to keep clean. Pitting is quite common in this type of stone, and they are usually filled at the factory, however the filler can become dislodged with wear and the problem can be made worse by the use of acidic cleaning products.

Limestone Tile Kitchen Floor Before Cleaning Geddington Limestone Tiled Steps Before Cleaning Geddington

After surveying the floor, I came up with a comprehensive renovation plan that included deep cleaning the stone, filling the pits, polishing, and then sealing. I also made a note to discuss aftercare cleaning at the end so the floor wouldn’t get so bad in future.

Happy with my plan and quote a date was agreed for the work to commence.

Cleaning a Pitted Limestone Tiled Kitchen Floor

It was a large floor so to minimise disruption to the owner I split the job up into several areas and worked through the following process.

Work started with a general clean of the floor using Tile Doctor Pro-Clean with a focus on cleaning the grout. I used a strong dilution of Pro-Clean, left it to soak into the stone and grout for around ten minutes and then scrubbed it into the floor using a black pad fitted to a rotary machine. I also ran a stiff grout brush along the grout lines to get them as clean as possible. Once done the floor was rinsed and the soiling extracted with a wet vacuum.

The next step was to hone the Limestone using a set of diamond encrusted burnishing pads. These pads are great for bringing up the polish on a stone floor like this and you start with a coarse 400-grit pad fitted to a rotary floor buffer. Water is used to lubricate the process and the pads are run over each tile three or four times. The floor is then rinsed and extracted as before, and the process repeated with the 800 and then 1500 grit pads.

Once done the floor was looking much cleaner and brighter and ready for the next step which was to fill the pits. To do this I inspected the floor, identifying all the areas that needed attention and then filled those holes with a resin filler that is colour matched to the stone.

Sealing a Pitted Limestone Tiled Kitchen Floor

The last step was to seal the limestone and for this I used Tile Doctor Ultra-Seal which is an impregnating sealer that soaks into the stone, occupying the pores of the stone and thereby preventing dirt from residing there. Sealing keeps the dirt on the surface where it can easily be cleaned away. Ultra-Seal doesn’t contain any colour enhancers, so it leaves the stone with a very natural appearance which is what my client wanted.

Limestone Tile Kitchen Floor After Cleaning Geddington Limestone Tiled Steps After Cleaning Geddington

The floor was transformed by the work and my client was very happy with the result, they even went to the trouble to leave the following review:

“We are absolutely delighted with the work undertaken by Philip, the Northamptonshire Tile Doctor. He has completely transformed very dirty limestone floors into something of great beauty – better than new. Philip was a pleasure to deal with throughout and we can highly recommend him.”

Limestone Tiled Kitchen Floor After Cleaning Geddington

With regards to aftercare cleaning, I recommended they use Tile Doctor Stone Soap which is designed for cleaning polished stone floors and helps maintain the patina.


Professional Restoration of a Limestone Tiled Floor in Northamptonshire

Pitted Limestone Floor Deep Cleaned, Polished, Filled and Sealed in Geddington Read More »

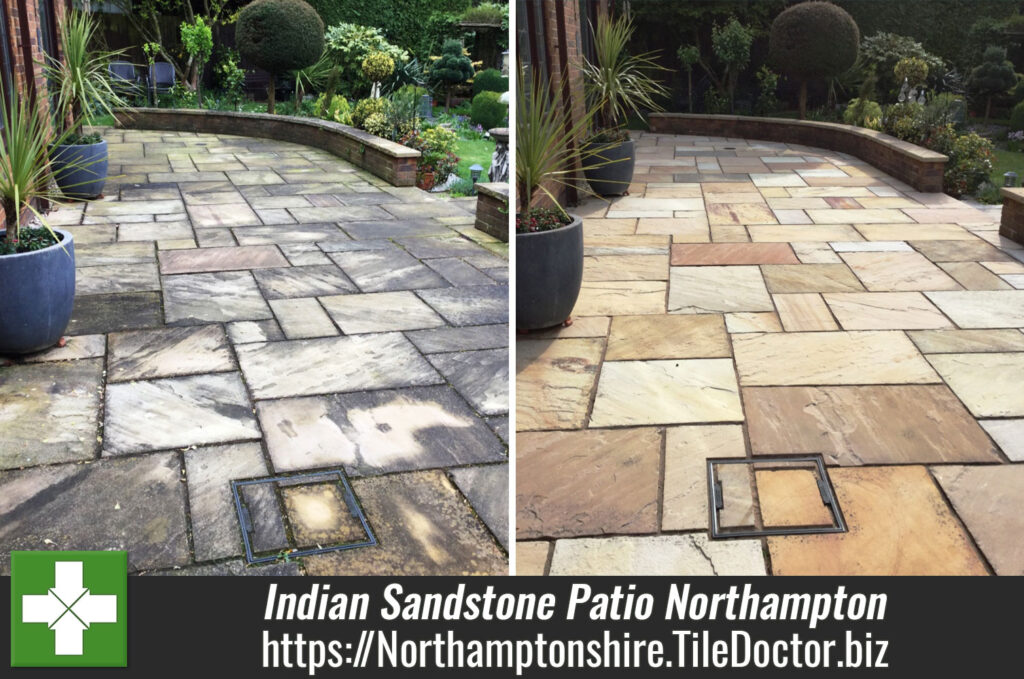
Indian Sandstone Patio Renovation Rushden

Renovating an Indian Sandstone Patio in Rushden

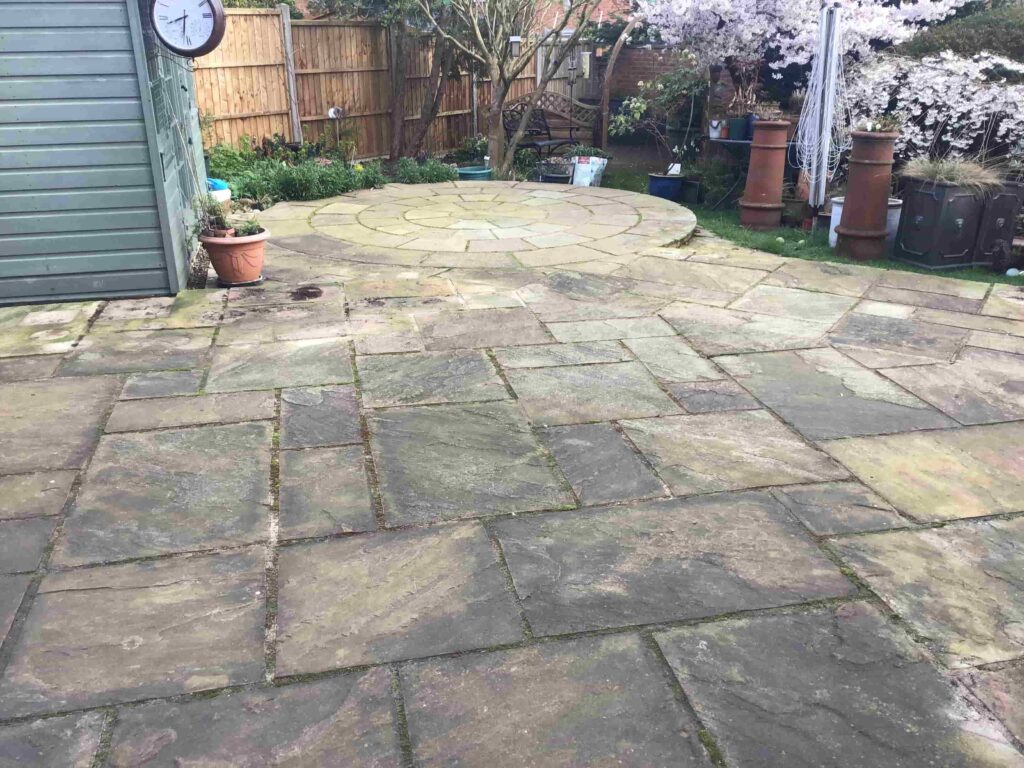
The following photos show an Indian Sandstone patio of about 100 m2 in size at a property in Rushden. It had been some years since it had been cleaned and as you might expect the patio was now covered in green algae and staining. Also, much of the grout had become cracked or loose from the effects of frost and had broken down and needed replacing.

Indian Sandstone Patio Rushden Before Cleaning

The beginning of the year is a perfect time to get a patio ready, the autumn leaves have fallen so there’s less debris causing stains, and of course you will be ready for the spring sunshine.

Indian Sandstone Patio Rushden Before Cleaning

Cleaning an Indian Sandstone Patio

I started the renovation by digging out all the loose grout between the pavers. There isn’t really a quick way of doing this, so it’s just a question of getting down on my hands and knees and scraping it out.

I cleared up the debris and decanted a few litres of Tile Doctor Patio and Brick Driveway cleaner into a pump-up sprayer. This product is a powerful outdoor cleaning solution formulated to power through blackspots, lichen, moss, and stains. It’s a very strong product, so if you’re doing this yourself do wear protection. It was then sprayed onto all areas of the patio and left to soak in.

This is used as a pre-treatment to pressure washing and is best left to dwell on the surface for fifteen to thirty minutes depending on the severity of the soiling. The longer you leave it the more time it has to work on breaking down embedded soiling, green algae and lichen etc. A five-litre bottle can cover up to 25m2 so for a patio of this size you need around four bottles.

My next course of action was to set up the pressure washer so I could clean and rinse down the patio. I use a van mounted Briggs & Stratton petrol pressure washer for this which can generate pressures of up to 300 bar. This is much more powerful than general domestic electric machines and the high pressure of the machine also removes any loose grout I missed earlier.

The client had asked me to replace the missing grout, which was approximately half of the area. I was prepared for this and had sourced a wet mix grout of a similar colour to the original. This was mixed with water and brushed into the grout lines, then re brushed to leave a level finish.

Sealing a Sandstone Patio Tiled Floor

Allowing for the patio and grout to dry overnight, I returned the following day to brush over excess grout that had dried on the tiles before applying Tile Doctor Colour Grow sealer to help protect the patio from further staining and make it easier to clean going forward.

This product works by soaking into the stone, occupying the pores, and thereby preventing dirt from residing there, this keeps it on the surface where it can easily be rinsed away. Colour Grow also contains a colour enhancer that brings out the colour in the stone, something it does rather well on Sandstone which has a lot of natural character.

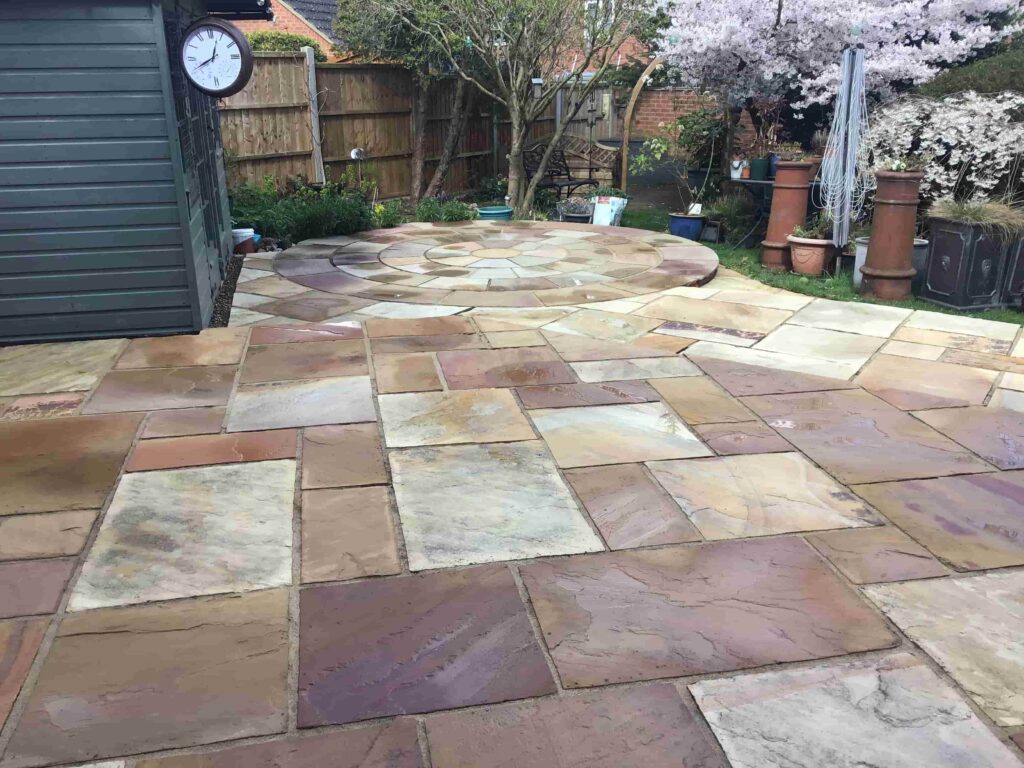
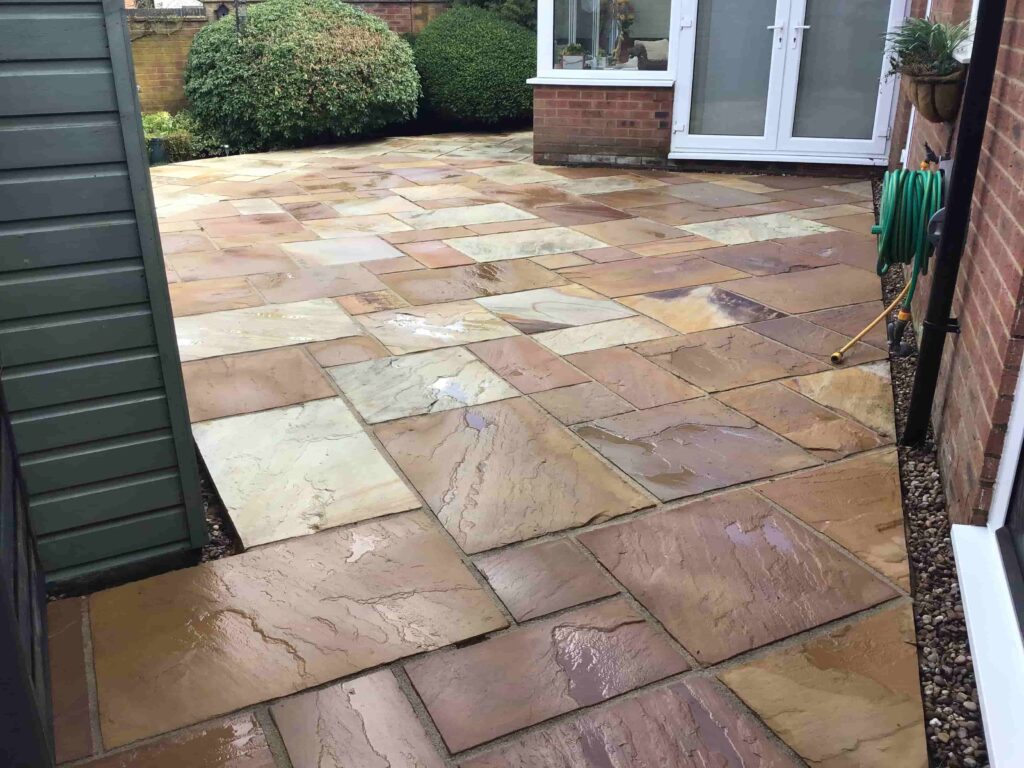
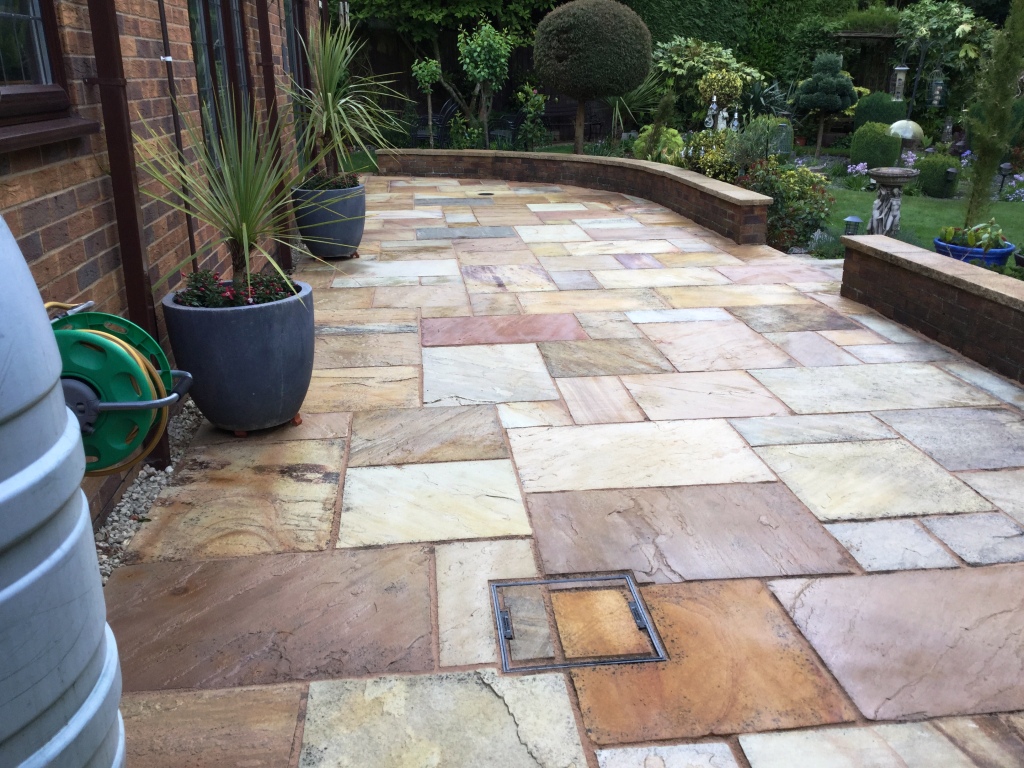
Indian Sandstone Patio Rushden After Cleaning

My client was very pleased with the transformation and left the following comment on our website:

“Very professional our patio was awful now it looks the same as when installed 10 years ago.”

Before leaving, I discussed our Tile Doctor Maintenance Plan which would mean we would return every year to maintain the patio. This would be a good investment each spring to keep the area looking good and ensure they could enjoy the outdoor entertainment area for longer.

Indian Sandstone Patio Rushden After Cleaning


Professional Restoration of an Indian Sandstone Patio in Northamptonshire

Renovating an Indian Sandstone Patio in Rushden Read More »

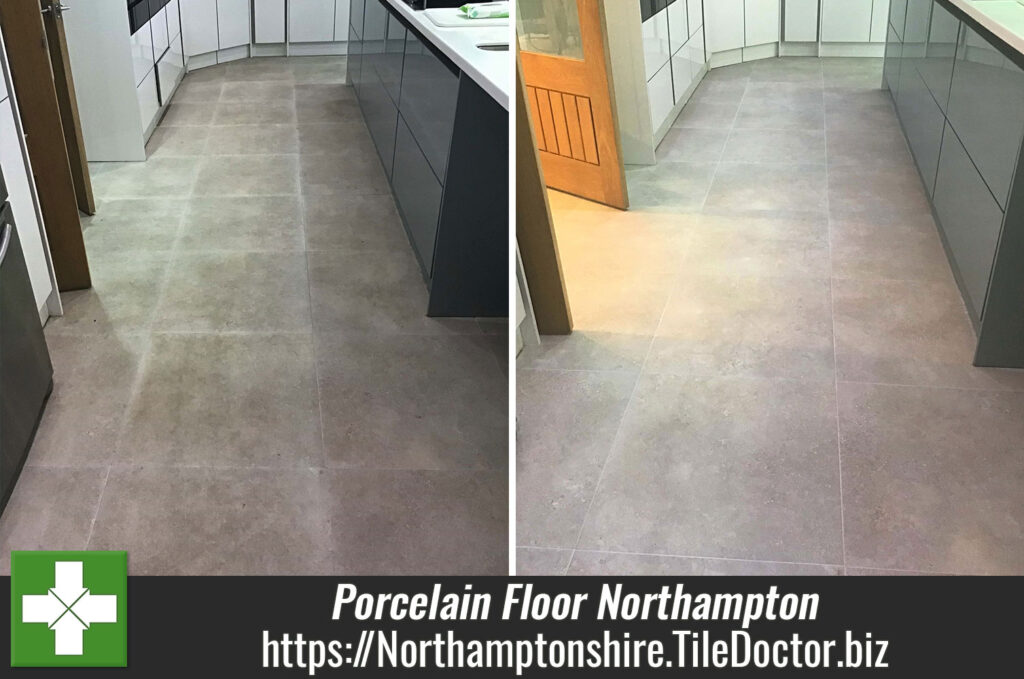
Grout Haze Removed From Porcelain Floor Tiles Northampton

Removing Polymer Grout Haze following Porcelain Floor Installation in Northampton

This client from Northampton called contact me about their newly installed Porcelain tiles which appeared to be much darker than they remembered from in the shop. They were disappointed with their appearance and so I agreed a time to pop round, diagnose the issues and come up with a solution.

Grout Haze Before Removal From Porcelain Floor Tiles Northampton

Once at the property I quickly established after testing a couple of tiles that there was grout haze over the entire area from installation. This happens when the grout starts to dry on the tile before it is cleaned and fully rinsed off. This problem was compounded by the customer vigorously mopping the floor with several different products trying to resolve this issue themselves and the product building up and attracting more soil to the areas, therefore darkening it further.

Grout Haze Before Removal From Porcelain Floor Tiles Northampton

The test clean I conducted removed the grout haze to reveal the tile they had been originally expecting. Impressed with the results from the test they asked me to repeat the process on the whole floor which included the kitchen and adjoining dining area. I worked out a quote which was agreed and a date scheduled for my return.

Removing Grout Haze from a Porcelain Tiled Floor

Fortunately, the owner knew which grouting product was used when laying the floor, this was very useful as polymer-based grouts need a different approach to traditional grouts. As it turns out it was a polymer-based grout which makes sense as they are known to set faster and cause this problem as a result.

The process I used was to apply Tile Doctor Remove and Go to a workable section of the floor which was approximately 8m2. The solution was allowed to dwell for ten minutes or so prior to agitating with a rotary brush machine. This area was then rinsed off with water and a wet and dry pick-up machine. This process is used to break down the polymers in the grout but does not fully remove the haze from the tiles, that is covered in the next section.

Part two of treating the grout haze involves the application of Tile Doctor Grout Clean-Up to the tile and allowing it to dwell for a further ten minutes, a black buffing pad is then used with the rotary machine to scrub the product into the Porcelain tile. As before the soiled solution is removed with another rinse and extracted with the wet and dry pick-up machine.

Once that was done, I inspected the floor to ensure all the grout haze has been removed and repeated the 2nd stage process where required.

Sealing a Porcelain Tiled Floor

I allowed the floors to dry off overnight and returned the following day to apply Tile Doctor Ultra Seal Sealant over all the areas, this is especially good for protecting the grout lines from staining.

Grout Haze After Removal From Porcelain Floor Tiles Northampton

Given the dark colour of the Porcelain tiles it’s difficult to appreciate the improvement from the photographs, my customer was extremely happy with the result though and left the following glowing review:

“Fabulous service from Phil and great results really really pleased. Lovely man and very hard working. Thank you”

Before leaving I made sure to discuss aftercare cleaning, which for this floor I recommend using Tile Doctor pH Neutral Tile Cleaner which is a gentle but effective cleaning product designed for use on sealed tile and stone.

Grout Haze After Removal From Porcelain Floor Tiles Northampton


Porcelain Tile Cleaning in Northamptonshire

Removing Polymer Grout Haze following Porcelain Floor Installation in Northampton Read More »

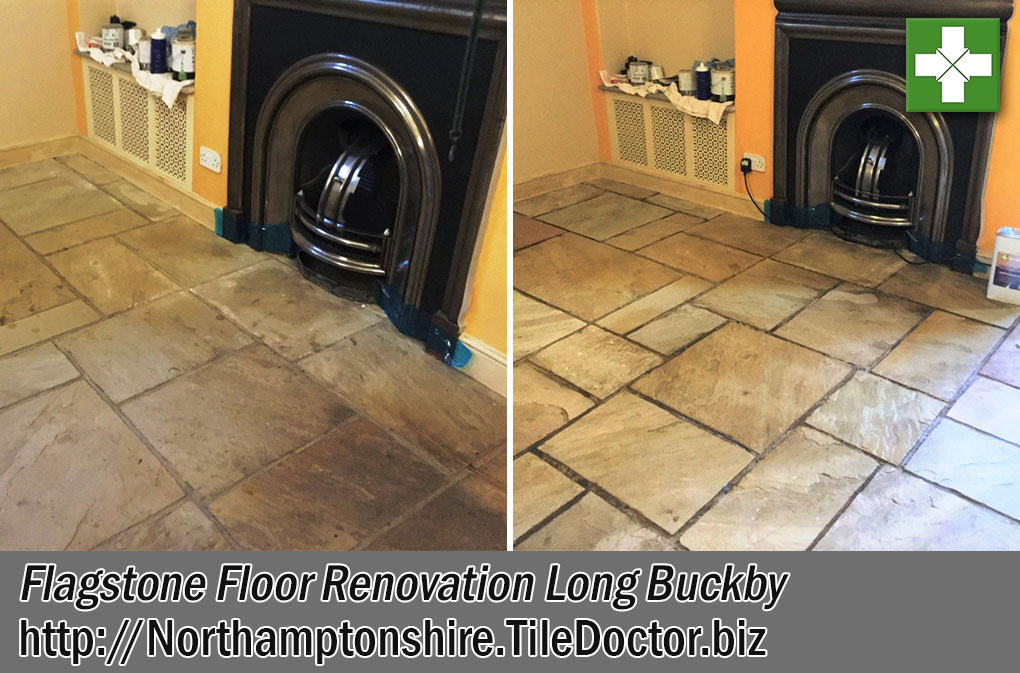
Flagstone Floor Before After Restoration Olney

Flagstone Kitchen Floor Deep Cleaned and Sealed for Olney Landlord

I was contacted by the owner of the property near Olney, on the border of Northamptonshire, who was renting the house out whilst he worked abroad. The flagstone floors on the ground floor were grubby and the tenants were struggling to keep them clean. I guess being a rental property the tenants didn’t want to be blamed for the condition of the floors when they eventually left.

I was asked to pop round to the property, meet the tenants, inspect the floors, and come up with a plan to resolve the issues. It was clear to me that the flags had not been sealed when laid and as a result dirt had become trapped in the pores of the stone making it difficult to shift. With the owner abroad all correspondence was done over the internet and so I sent over an email to explain the problem and included a quote to resolve the issues. Happy to have the problem resolved and with quote I got the go-ahead.

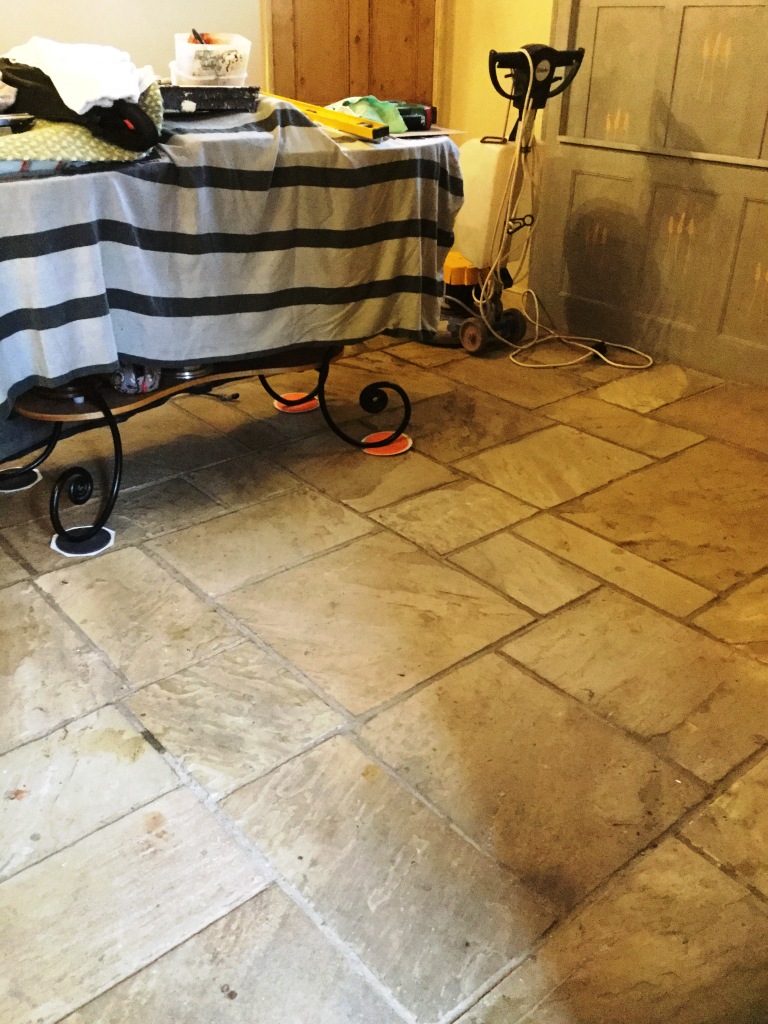
Flagstone-Floor-Before-Renovation-Olney

Deep Cleaning Sandstone Kitchen Flagstones

The work was carried out over two days with day one for cleaning and the second for sealing. Cleaning started by spraying the flagstones using a 3:1 dilution of Tile Doctor Pro-Clean using a pump-up sprayer. This was left to soak in for ten minutes and then agitated using a rotary machine fitted with a black scrubbing pad. This process generates a lot of soiling as the dirt is released from the pores of the stone which is rinsed off the floor and extracted with a wet vacuum.

Flagstone Floor During Renovation Olney Flagstone Floor During Renovation Olney

The next process was to give the grout a good scrub using 10:1 dilution of Tile Doctor Grout Clean-up. This was applied to the grout lines throughout and scrubbed in by hand using stiff grout brushes to remove any stubborn stains. The entire area was then rinsed using water and extracted with the wet vacuum as before. The vacuum was used to remove as much moisture from the floor as possible and then they were left to dry off overnight. I also make use of an industrial air mover to speed up drying times as I work.

Flagstone Floor During Renovation Olney Flagstone Floor During Renovation Olney

Sealing Sandstone Flagstones

I returned the following day to seal the flagstones but before starting I checked the moisture levels in the flagstones with a damp meter. The readings were fine so I proceeded to apply the first of three coats of Tile Doctor Colour Grow sealer, allowing each coat to fully dry before applying the next.

Flagstone-Floor-During-Sealing-Olney

As well as providing protection from dirt and stains this product enhances the natural colour in stone and being an impregnator that soaks into the pores will work well in a demanding kitchen environment. Additionally, Colour Grow is fully breathable which is an important feature when sealing tiles in an older period property like this one which will have been built without the benefit of a damp proof membrane.

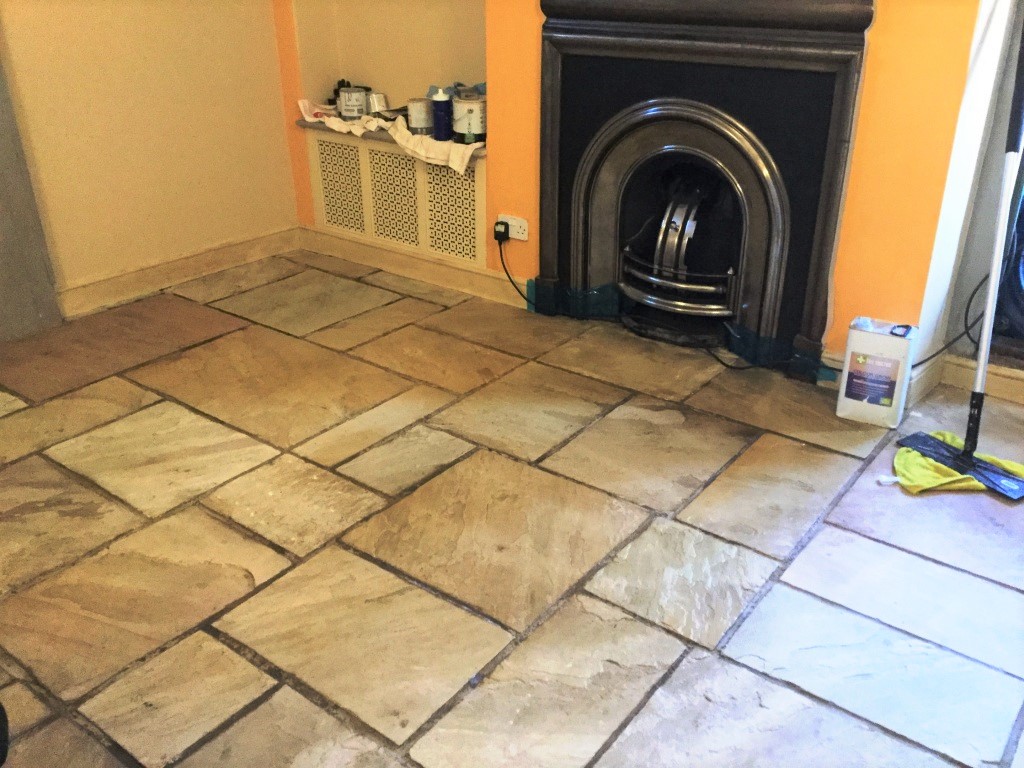
Flagstone-Floor-After-Renovation-Olney

I sent before and after photographs to the landlord as he was abroad, he was very pleased with the job and told me the tenants had contacted him to tell him how happy they were with the process and the finished result and even left the following feedback on my web site.

I’ve had a large number of tradespeople work on my house in the last few years and Phil is up there with the best of them. Many trades don’t do comms well, but Phil does: he’s easy to reach, easy to communicate with and quickly understood what needed doing – and just did it, exactly how we wanted and to a very high standard. Highly recommended.

Flagstone-Floor-After-Renovation-Olney


Grout Haze removed from a Sandstone tiled floor in Northamptonshire

Flagstone Kitchen Floor Deep Cleaned and Sealed for Olney Landlord Read More »

Ceramic Tiled Floor Before After Tile Grout Cleaning Burton Latimer

Ceramic Tile and Grout Deep Cleaned in a Burton Latimer Kitchen

This customer from Burton Latimer near Kettering was having a new kitchen fitted which would have a different layout to the original. The Ceramic tiled floor was wall to wall and they wanted to see if the tiles could be renovated rather than having to replace them.

Ceramic Tile and Grout During Cleaning in Burton Latimer Kitchen Floor

I attended the customers property to inspect the floor and carry out a test clean on one of the dirtiest ceramic tiles and adjacent grout. The tiles were in a fairly grubby condition and the grout was black with dirt which happens a lot with Ceramic tiled floors. This is due to the ceramic tile being impervious and so the dirt from the tile becomes washed into the grout lines during cleaning.

Ceramic Tile and Grout During Cleaning in Burton Latimer Kitchen Floor

I carried out the test clean which went well and my customer was impressed; keen to proceed and happy with my quotation the work was booked in. The renovation was scheduled for the day after the old kitchen was removed and before the new kitchen was installed the following week.

Deep Cleaning Ceramic Tile and Grout

To deep clean the tile and grout a strong 1:3 dilution of Tile Doctor Pro-Clean and warm water was applied to the floor with a pump-up sprayer. The solution was allowed to dwell for several minutes before being worked into the grout using a stiff brush. This was followed up by agitating the solution into the rest of the floor with a rotary floor scrubbing machine fitted with a stiff brush attachment.

Working in sections and removing slurry with a wet pick-up machine. The next process was to apply Tile Doctor Grout Clean-up to all grout lines for a second clean to remove as much stubborn staining as possible. Again, this was worked into the grout with stiff grout brushes. Following this I went over the floor again with a black scrubbing pad attached to the rotary machine. The machines solution tank was filled with water to help lubricate the process and neutralise the floor.

Finally, all the excess water was removed with a wet pick-up machine and the floor was left to dry off overnight.

Sealing Grout on a Ceramic Tiled Floor

I returned the following day to seal the grout, Ceramic tiles won’t take a sealer and as mentioned earlier its best to seal the grout so the dirt remains on the surface and doesn’t get trapped in the rough grout.

After confirmed the floor was dry, I carefully applied Tile Doctor Ultra-Seal to the grout lines using a pipette and then wiping off any excess afterwards.

Ceramic Tile and Grout After Cleaning in Burton Latimer Kitchen Floor

Once done the floor looked new and my client was happy with result, it was a good decision and even more so when you consider the money saved in comparison to replacing the floor.

Ceramic Tile and Grout After Cleaning in Burton Latimer Kitchen Floor


Deep Cleaning Ceramic Tile and Grout in Northamptonshire

Ceramic Tile and Grout Deep Cleaned in a Burton Latimer Kitchen Read More »

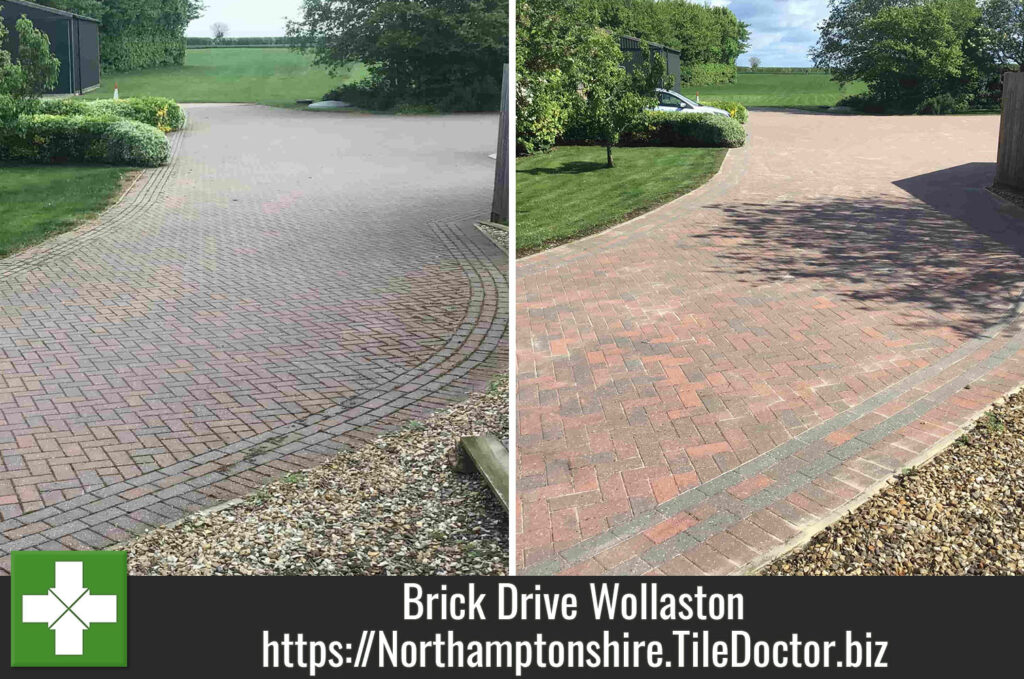
Brick Paved Driveway Renovated in Wollaston Northamptonshire

Large Brick Paved Driveway Deep Cleaned in Wollaston

This client from the village of Wollaston called us out to renovate their block paved driveway and adjacent courtyard. The drive had weathered since installation and had the usual problem of weeds, lichen and algae growing in the sand between bricks.

Brick Paved Farm Driveway Wollaston Before Cleaning

If the root of a weed is allowed to grow it will reach down under the brick making it difficult to remove later. I therefore recommend maintaining a driveway at least annually to ensure these problems can be kept under control. For most brick paved driveways this can be done yourself but if you have a large installation such as the entrance to this Farm do give me a call as I have special equipment that makes the work easier.

Brick Paved Farm Driveway Wollaston Before Cleaning

Cleaning a Brick Paved Driveway

I arrived at the farm at 8am and set up our professional petrol driven jet washer and to prepare the site for work. Working in sections I first applied a dilution of Tile Doctor Brick Driveway Cleaner to area and left it to soften the moss and assist with the removal of lichen staining and blackspot. This was followed by pressure washing using a rotary surface cleaner to minimise splashing, this process removes top soiling from the blocks and any weeds, moss etc from in between the blocks, this really helps get a more even result than just using a lance attachment.

Once the section had been scrubbed a lance attachment was used to jet wash and clean all the edging stones and hard to access areas before rinsing down walls, shrubs etc. Luckily weather was on our side so we were able to return the following day to apply a weed treatment and brush in kiln dried sand which we supplied to inhibit the growth of weeds and keep the courtyard weed free for longer. This transformation took just under 3 days in total.

Brick Paved Farm Driveway Wollaston After Cleaning

The customer was extremely happy with the results we managed to achieve and the customer has had us back to carry out further work to restore their patio area.

Brick Paved Farm Driveway Wollaston After Cleaning


Professional Clean of a Brick Paved Driveway in Northamptonshire

Large Brick Paved Driveway Deep Cleaned in Wollaston Read More »
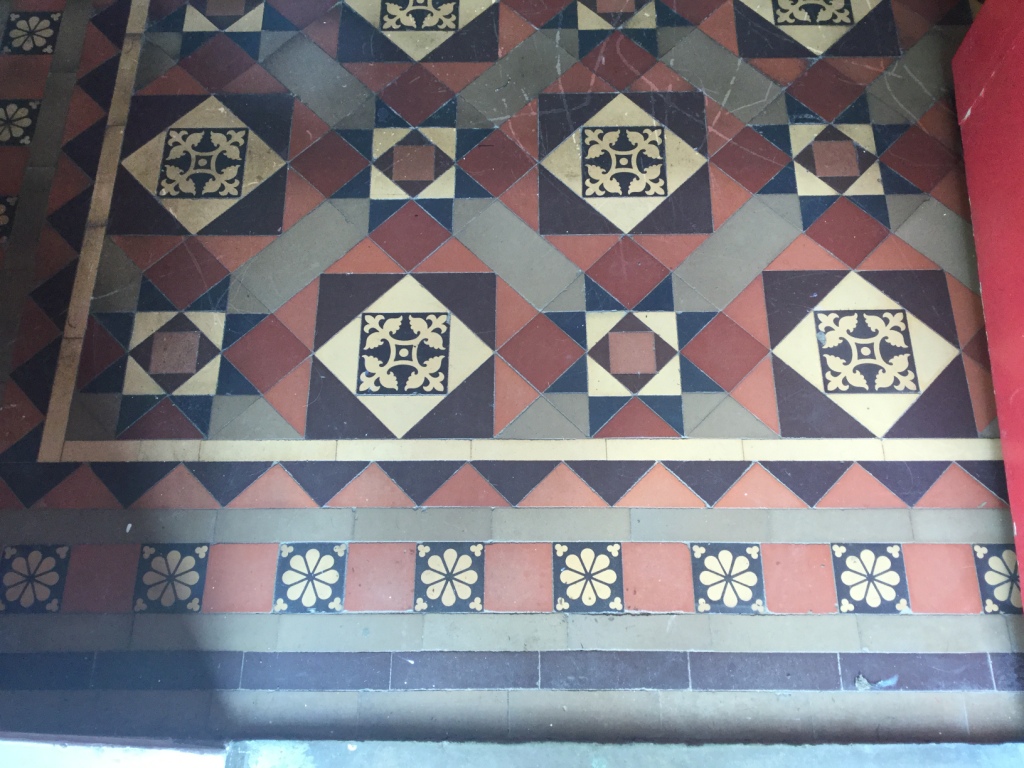
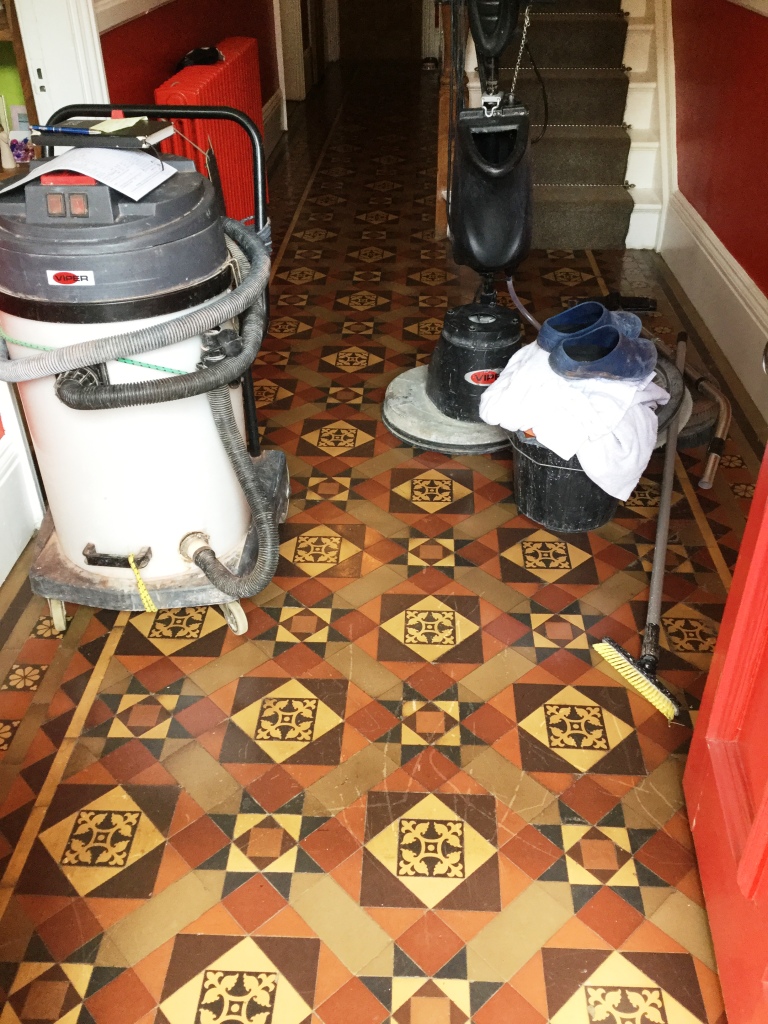
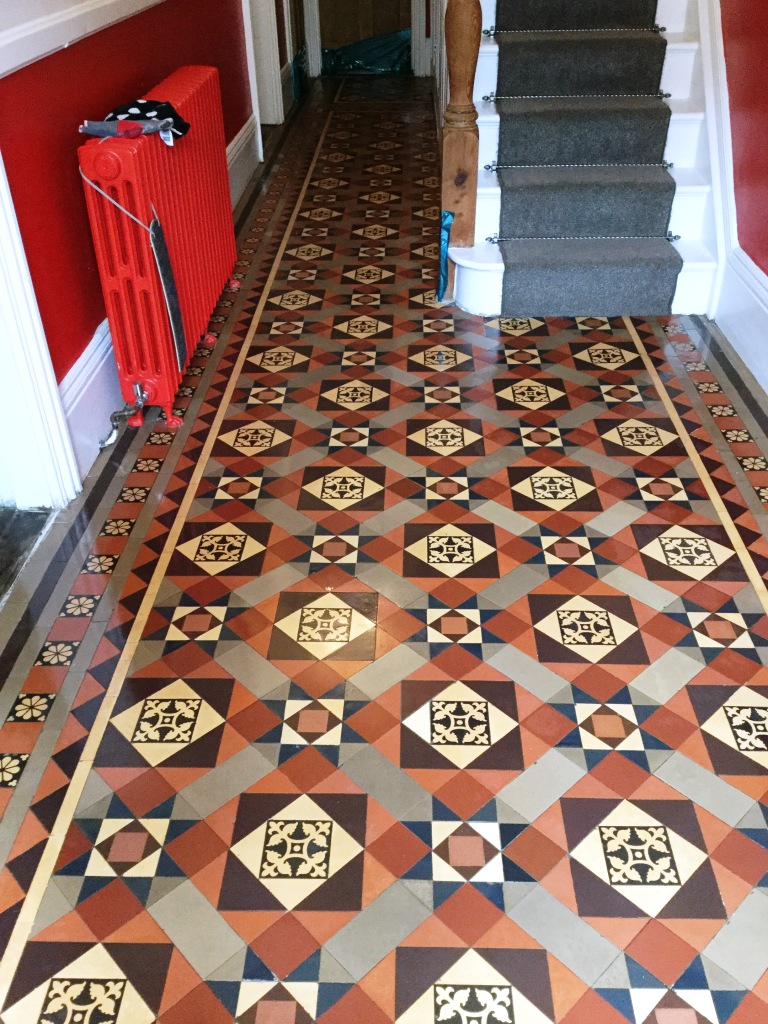
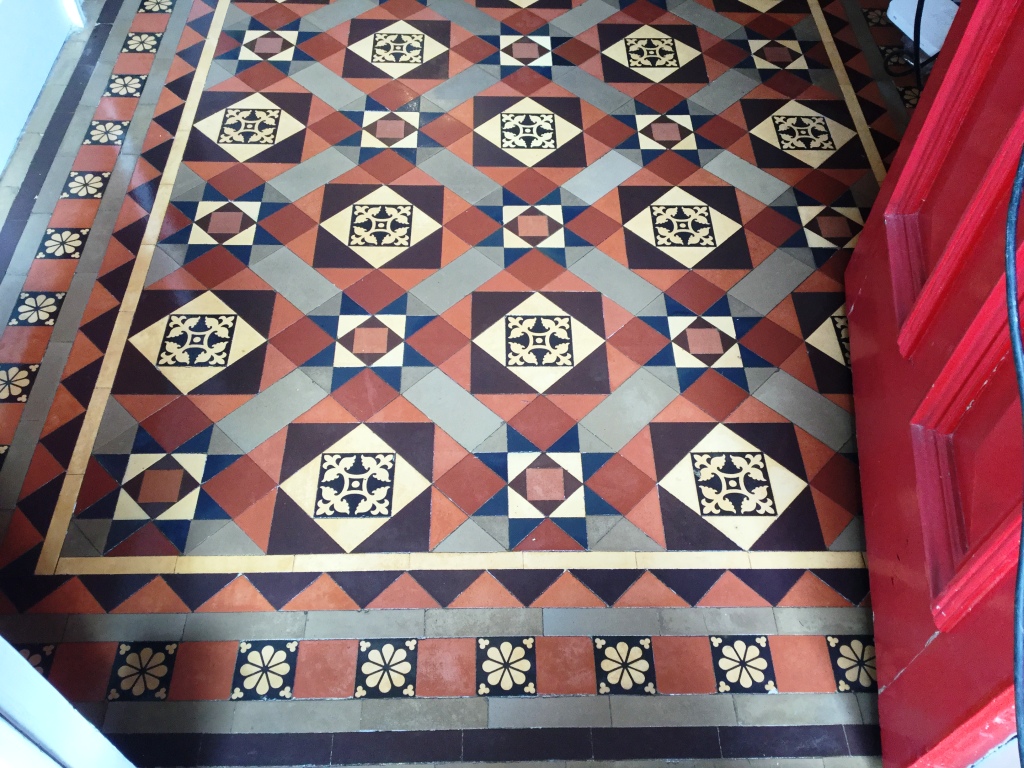
Victorian Tiled Hallway Restoration Irthlingborough

Victorian Tiled Hallway Repaired and Restored in Irthlingborough

The following photos show a period Victorian floor in Irthlingborough which is close to Rushden and Wellingborough. Our client had discovered the floor after lifting a carpet that had been down for over a decade, the tiles had been stained with bitumen, which I assume was used as an adhesive, and she was keen to find out if it could be restored to its original condition.

Victorian Tiled Floor Before Restoration Irthlingborough

I attended the property to survey the floor and could see as well as the bitumen there were loose tiles in a couple of areas by the doorway that would also need looking at. Fortunately, I was able to reassure her that I could remove the bitumen residue and resolve the loose tiles and provided a quotation via e mail a few days later. Pleased the issues could be resolved the quote was accepted and we agreed a date for the work to be carried out.

Victorian Tiled Floor Before Restoration Irthlingborough

Cleaning and Repairing a Victorian Tiled Hallway Floor

After unloading my equipment, I taped up the skirting boards and doors to protect them. Next, I began by applying a coatings remover called Tile Doctor Remove and Go along the edges of the floor and allowed it to dwell for five to ten minutes to break down the bitumen, this was then agitated by using brushes, before rinsing with a wet vacuum pick up machine.

Once all the edges were cleaned, I started scrubbing the floor working in sections of two to three square meters using a 17” black scrubbing pad attached to a rotary floor machine. I worked back towards the front door working the Remove & Go into the tiles. This system released most of the dirt, staining and bitumen out of the Victorian tiles to the surface where it could be removed with a wet vacuum.

I then attached a coarse 200-grit burnishing pad to the rotary scrubbing machine and began working over the entire area adding a little water at each stage. This process removed the remaining bitumen and staining and gave the tiles a new lease of life. Again, the soiling was removed with the wet vacuum.

Repairing Victorian Hallway Tiles

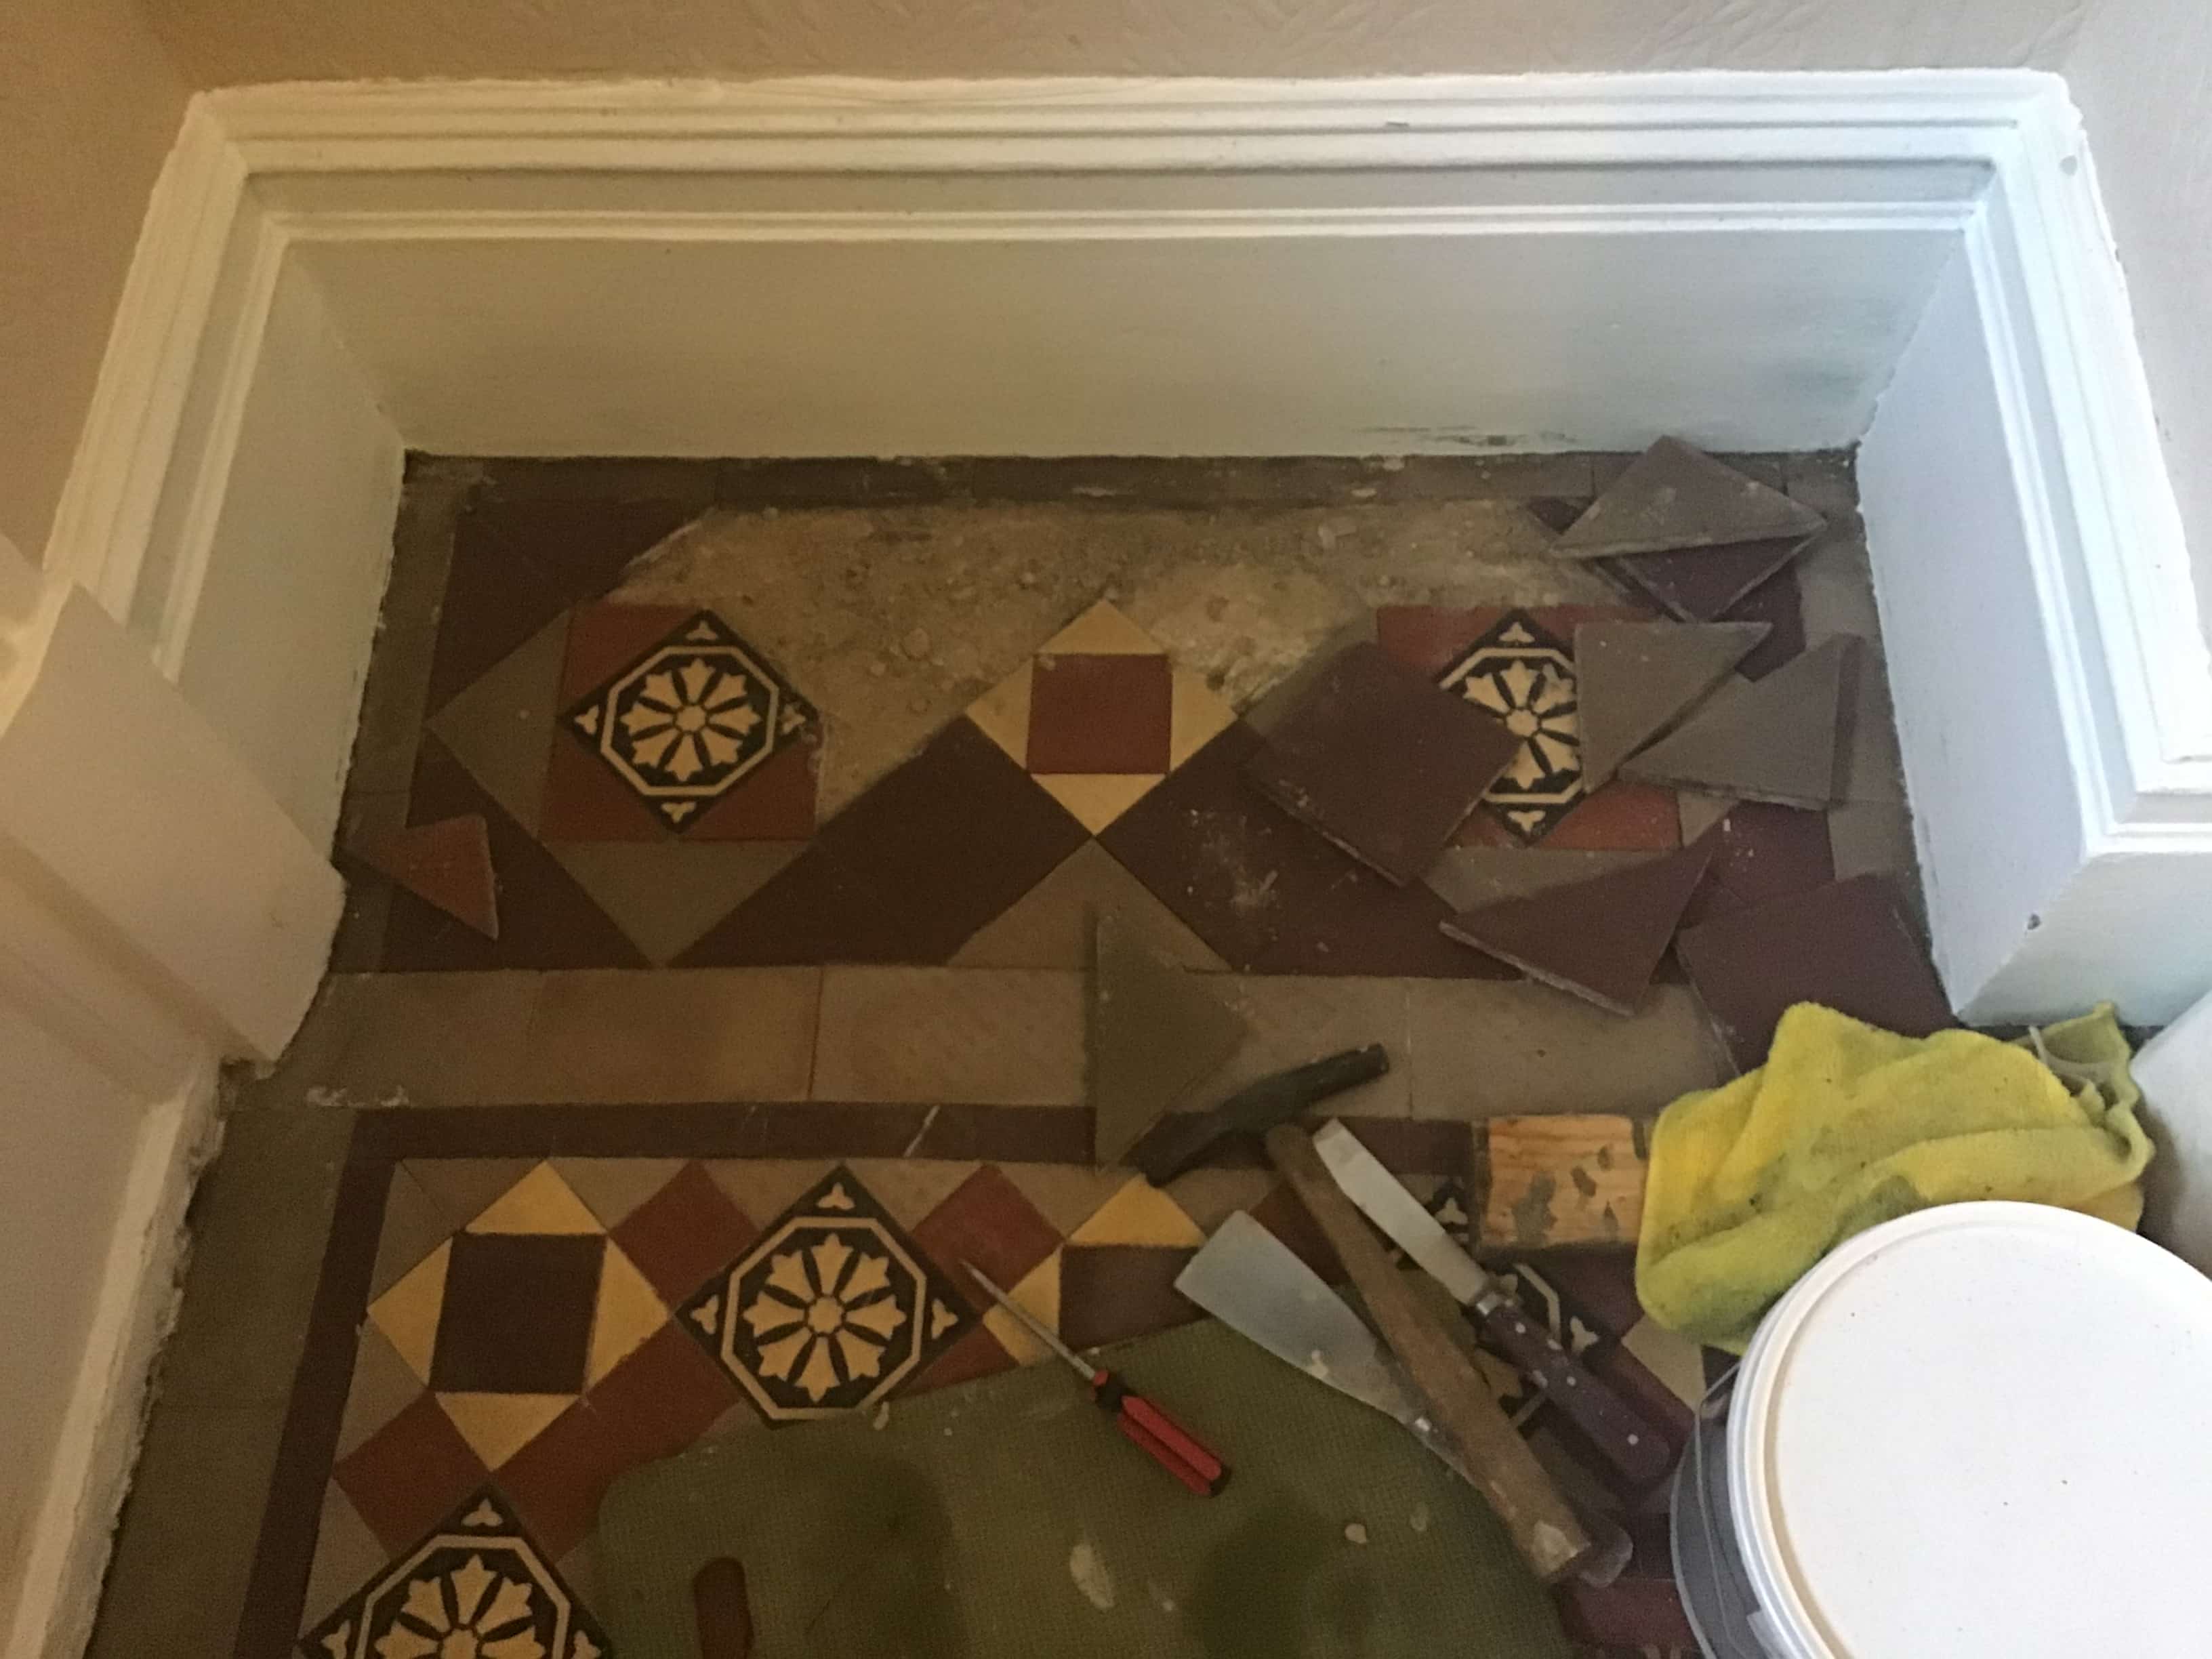
Once the area was clean, I was able to commence work on the repairs. As you can see from the photos there were 2 areas of approximately 18″ x 10″ where the subfloor had moved, and all of the tiles needed to be lifted so it could be repaired.

Victorian Tiled Floor During Restoration Irthlingborough

The sub floor was then broken up, removed, and replaced with a new cement screed level with the original base.

Victorian Tiled Floor During Restoration Irthlingborough Victorian Tiled Floor During Restoration Irthlingborough

Once the screed had set, I was then able to relay the original tiles with the original pattern and regrout these sections to secure them in position.

Victorian Tiled Floor During Restoration Irthlingborough

Once the grout had gone off, I was able to finally give these areas a clean using Tile Doctor Grout Clean-up to remove any residue and grout smears before the area was sealed.

Sealing a Victorian Tiled Hallway Floor

The hallway was then left to dry out for a couple of days, old floors like this one don’t have the benefit of a plastic membrane to protect them damp so it can take a while. Tiles need to be dry before sealing, otherwise the results can be inconsistent so it’s worth the wait.

Victorian Tiled Floor After Restoration Irthlingborough

When I returned the first task was to take a few moisture readings with a damp meter and check the repaired sections had set solidly. All was well so I started with the first coat of sealer which for this floor was Tile Doctor Colour Grow sealant which leaves a natural finish. This is a breathable sealant which is an important consideration for a floor without a damp proof membrane, being breathable it will allow moisture to pass from the sub floor and evaporate at the surface. A non-breathable sealer would effectively seal in the moisture which over time will build under the floor until it eventually reaches the walls causing rising damp.

Victorian Tiled Floor After Restoration Irthlingborough

The client was happy with the results and left the following positive feedback which is always appreciated.

“Philip did a very good job on our Victorian tiled hallway.”

Victorian Tiled Floor After Restoration Irthlingborough


Professional Restoration of a Victorian Tiled Hallway in Northamptonshire

Victorian Tiled Hallway Repaired and Restored in Irthlingborough Read More »

Travertine Tiled Hallway and Kitchen Floor Renovated Welton Daventry

Dirty Tumbled Travertine Floor Renovated in Welton near Daventry

This is a Tumbled Travertine floor with a Honed finish that was installed some years prior in the hallway and kitchen of a house in the village of Welton near Daventry. Kitchens and hallways have the highest foot traffic of any room in a house and without regular maintenance the sealer started to wear down allowing dirt and staining to reach the pores of the tile and grout lines. Travertine is known for its small depressions known as pitting and without the protection of the sealer those areas became heavily soiled. The grout had also darkened with ingrained dirt turning what was a light grey colour into a contrasting black.

Tumbled Honed Travertine Welton Before Cleaning

After visiting the property and surveying the floor I recommended burnishing the floor with a set of abrasive pads to remove the dirt and then resealing with a more durable product. To prove my point, I ran a small test clean on the floor so they could see the potential difference this could make. Happy with the result they asked for a quote which was accepted, and the job was booked in.

Cleaning a Tumbled Travertine Tiled Kitchen Floor

I started the cleaning process by sweeping and vacuuming the floor to remove any grit and other debris. Then it was cleaned with a 3:1 dilution of Tile Doctor Pro-Clean, spraying it onto the floor and allowing it to dwell and make a start breaking down the soiling. The product was then worked into the floor using a stiff brush paying particular attention to the pitted areas and along the grout lines to get them clean. This was followed by rinsing the floor with more water and extracting the soiling with a wet pick-up machine.

The next step was to use the burnishing pad system starting with the coarse pad fitted to a rotary machine and worked into the tiles with a small amount of water for lubrication. The set of pads come in various grits and are actually made from industrial diamonds.

This first 400-grit pad cleans the tiles and removes any remaining sealant that may have been present on the tiles. This was continued with the finer 800-grit pad, again using nothing but water and then rinsing the floor of any slurry generated by the process after each pad.

When the floor had dried, I applied a fine 1500-grit pad to bring up the polish on the Travertine until it had a silky honed finish. There is a fourth 3000-grit pad in the system that brings up the polish even further to achieve a high shine finish, but my client didn’t want that look.

Tumbled Honed Travertine Welton During Cleaning

Sealing a Tumbled Travertine Tiled Kitchen Floor

To protect the travertine, it was sealed using three coats of Tile Doctor Ultra-Seal sealant which is an impregnating invisible sealer resulting in a very natural finish. Once dry the floor was buffed using a soft white buffing pad.

Tumbled Honed Travertine Welton After Cleaning

You can see from the photos how much cleaner and lighter the Travertine tiles look and that the light grey colour of the grout has been restored. The new sealer will make it much easier to maintain now and with the correct cleaning regime in place the sealer should last a long time. My client was very happy with the work and left the following feedback for me:

“Really happy with our new floor. The service was professional and thorough – definitely worth the money.”

For the regular cleaning of a floor like this I recommend Tile Doctor Stone Soap which is a mild cleaning product that’s designed for use on sealed and polished stone. You must be especially careful when choosing a cleaning product for sealed tiles as many of the products you find in supermarkets are simply too strong and can degrade the sealer prematurely.

Tumbled Honed Travertine Welton After Cleaning


Professional Restoration of a Travertine Tiled Floor in Northamptonshire

Dirty Tumbled Travertine Floor Renovated in Welton near Daventry Read More »

Terracotta Tiled Floor Renovation Towcester

Dirty Terracotta Floor Renovated in Towcester

This Terracotta tiled floor was installed throughout the kitchen, diner, and hallway of a cottage in the village of Towcester. You can see from the photographs on this page that the floor had not been properly maintained, the grout lines had turned dark with ingrained dirt and the whole floor was now well overdue a renovation.

Terracotta Tiled Floor Before Cleaning Towcester

My client liked the floor and its character but as he was going to the expense of fitting a new kitchen he wanted to know if the floor could be restored to its former glory as his wife wanted a high shine finish and an easy to maintain floor.

Terracotta Tiled Floor Before Cleaning Towcester

Renovating the Terracotta and Grout would involve completely striping the floor of any previous sealants, deep cleaning the tiles and then applying a fresh seal. They were happy for me to do the work and it was agreed that the best time for this to be carried out would be after the old kitchen had been removed and before the new kitchen units were fitted. This would allow for a uniform wall to wall finish, and it would also make my work easier as I wouldn’t have to navigate around the kitchen units.

Cleaning a Terracotta Tiled Kitchen Floor

To get the floor clean and remove previous sealers and coatings I applied a strong dilution of Tile Doctor Pro-Clean. I had tried a few products on the tiles and had discovered after conducting a few tests that this had the right impact when it came to removing the many layers of old sealant. Tile Doctor Pro-Clean has an alkaline formula which makes it ideal for cleaning natural products such as Terracotta.

Terracotta Tiled Floor During Cleaning Towcester

The Pro-Clean was left to soak into the tiles for ten minutes and then scrubbed into the floor using a 17” rotary floor buffer fitted with a black scrubbing pad and running at slow speed to reduce splashing. This activity soon brought the dirt out of the tiles and the now soiled cleaning solution was removed using a wet vacuum. The floor was then rinsed down with water and the process repeated a couple of times until I was happy with the results.

Terracotta Tiled Floor During Cleaning Towcester

To clean up the grout a stiff grout brush was run along the grout lines in combination with more Pro-Clean. There were a few stubborn stains on the floor, and these were removed by spot cleaning the affected area with another product called Tile Doctor Remove and Go employed with a steamer to lift the stain out of the clay tile.

Terracotta Tiled Floor During Cleaning Towcester

Once happy the floor was clean, the floor was given an acid wash using a using a 10:1 dilution of Tile Doctor Grout Clean-up. This final step in the cleaning produce removes old grout smears, alkaline salts that can lead to efflorescence and will neutralise the use of alkaline cleaning products used earlier.

Sealing Terracotta Tiles in Towcester

After more rinsing with water and extraction with the wet vacuum the floor was left to dry for four days before returning to seal the Terracotta. To achieve the desired glossy finish the Terracotta was sealed using Tile Doctor Seal and Go which is an ideal sealer for Terracotta and provides durable stain protection together with a silk finish. The more coats you apply the higher shine finish you are able to achieve depending on the porosity of the tile and in this case seven coats were applied.

Terracotta Tiled Floor During Sealing Towcester

The client was extremely impressed with the results achieved in the kitchen, diner and hallway and left the following 5-star feedback.

“Phil has done an absolutely outstanding job on our terracotta floor tiles. Made them look like new. Wonderful outcome. His attention to detail and professionalism are of an excellent standard. It was a pleasure to do business with Phil and we will definitely be calling on his services again in the future. He is a really nice bloke too. Thanks again Phil.”

Terracotta Tiled Floor After Sealing Towcester


Professional Restoration of a Terracotta Tiled Kitchen in Northamptonshire

Dirty Terracotta Floor Renovated in Towcester Read More »

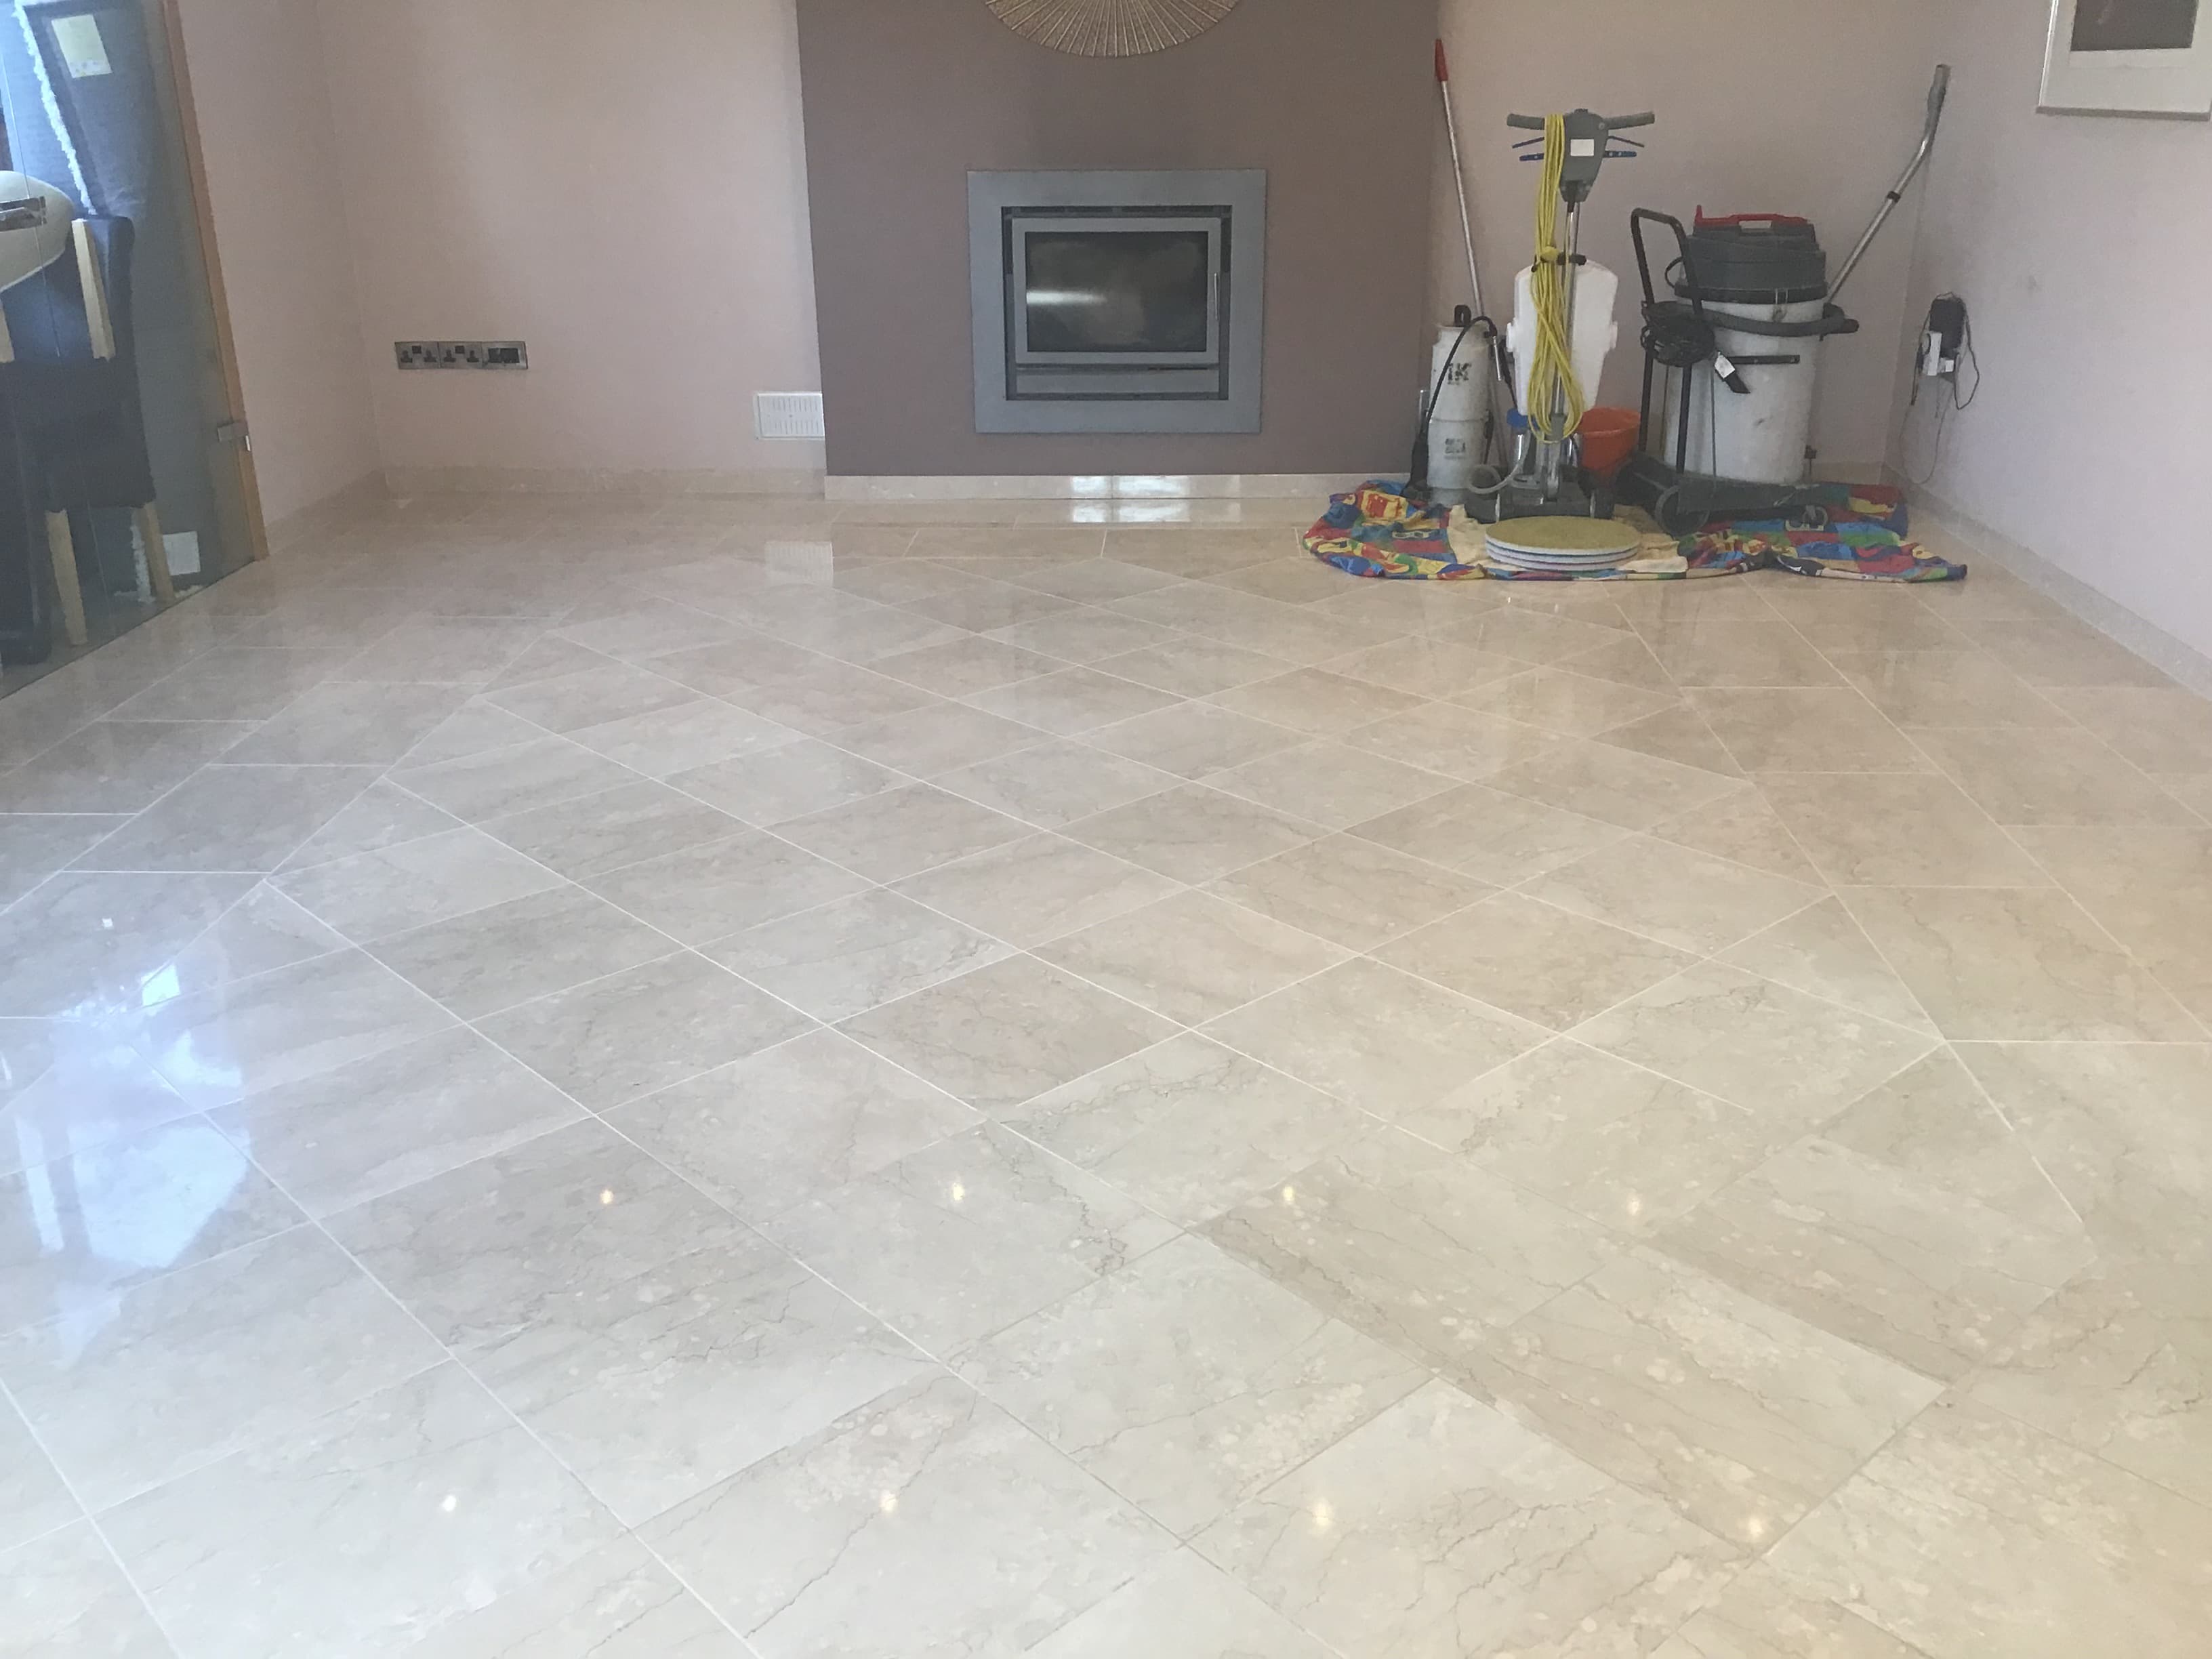
Pale Marble Floor Clean Seal Old Village

Grout Cleaning and Polishing a Marble Tiled Floor in Old Village

Last year I was called to look at Polished Marble floor at a house in the small village of Old in Northamptonshire which is situated between Kettering and Northampton. The Marble floor was reasonably large at 25m2, and the main problem was the Marble had lost most of its shine, becoming dull and lifeless over time, additionally the grout which was once white had darkened with ground in dirt,

Marble Tiled Floor Before Grout Cleaning and Polishing

If you want the look of a highly polished floor then it will need regular polishing to keep its appearance, in fact Tile Doctor provide a “Maintenance Plan” service for this purpose. How often you need a repolish really depends on how much the floor is used and for a busy high traffic area such as this kitchen diner it may be necessary to have two visits a year.

In this case the Marble needed a lot more than a repolish, my client was unhappy with the stained grout lines and the tiles really needed stripping and resealing to bring the colour back to somewhere near its original. After surveying the floor, I was able to confirm what needed to be done and gave them a price for the work which they were happy to accept.

Cleaning and Polishing a Marble Tiled Kitchen Diner Floor

To get the grout clean and give remove grit etc from the floor before polishing I gave it an initial clean using a medium dilution of Tile Doctor Pro-Clean. This is a professional Tile and Grout cleaning product which is applied to the grout, left to soak in for ten minutes and then scrubbed into the grout line by hand. The soil is then rinsed off with water and then extracted with a wet vacuum.

To bring up the polished appearance of the Marble tiles I used a set of four 17” diamond encrusted burnishing pads which have different levels of grit. The pads are applied to the Marble tiles in sequence using a floor buffer and a small amount of water for lubrication. I started with a coarse pad, before moving on to a medium pad, then a fine pad on the first day, working in small sections of around 4 – 5sqm. The floor is given a thorough rinse between each pad to remove any excess residue generated from the burnishing process. The soil was then extracted using a wet vacuum to keep the mess to a minimum.

Sealing a Marble Tiled Kitchen Diner Floor

The floor was left to dry overnight, and I returned the next day. I carried on the process using the very fine burnishing pad to achieve a high shine finish. This pad is applied dry to the floor using only a little water sprayed onto the tile. It brings up the final polish on the tiles and leaves the floor dry so it can be sealed afterwards.

To seal I applied a single coat of Tile Doctor Ultra-Seal which is a premium impregnating sealer that soaks into the pores of the stone protecting it from within. It’s a natural look sealer and by this, I mean it doesn’t alter the natural look of the stone and is almost invisible. The area was dried with a fan for one hour and then I checked the performance of the sealer by carrying out a water repellence test. The result of this test will let me know if a second coat of sealer may be needed.

Marble Tiled Floor After Grout Cleaning and Polishing

Once complete the grout was white again and the Marble tiles had a deep shine to them. My client was very happy with the results of my work and took the time to leave the following comment on the Tile Doctor feedback system.

Marble Polishing and Grout Cleaning Testimonial Old Village

For aftercare cleaning I recommended Tile Doctor Stone Soap which will keep the floor clean and help maintain the lustre. I also I let them know about our maintenance program which involves popping back for a couple of hours once a year to give the floor a polish with a very fine 3000-grit burnishing pad and top up the sealer.

Marble Tiled Floor After Grout Cleaning and Polishing


Professional Restoration of a Marble Tiled Floor in Northampton

Grout Cleaning and Polishing a Marble Tiled Floor in Old Village Read More »

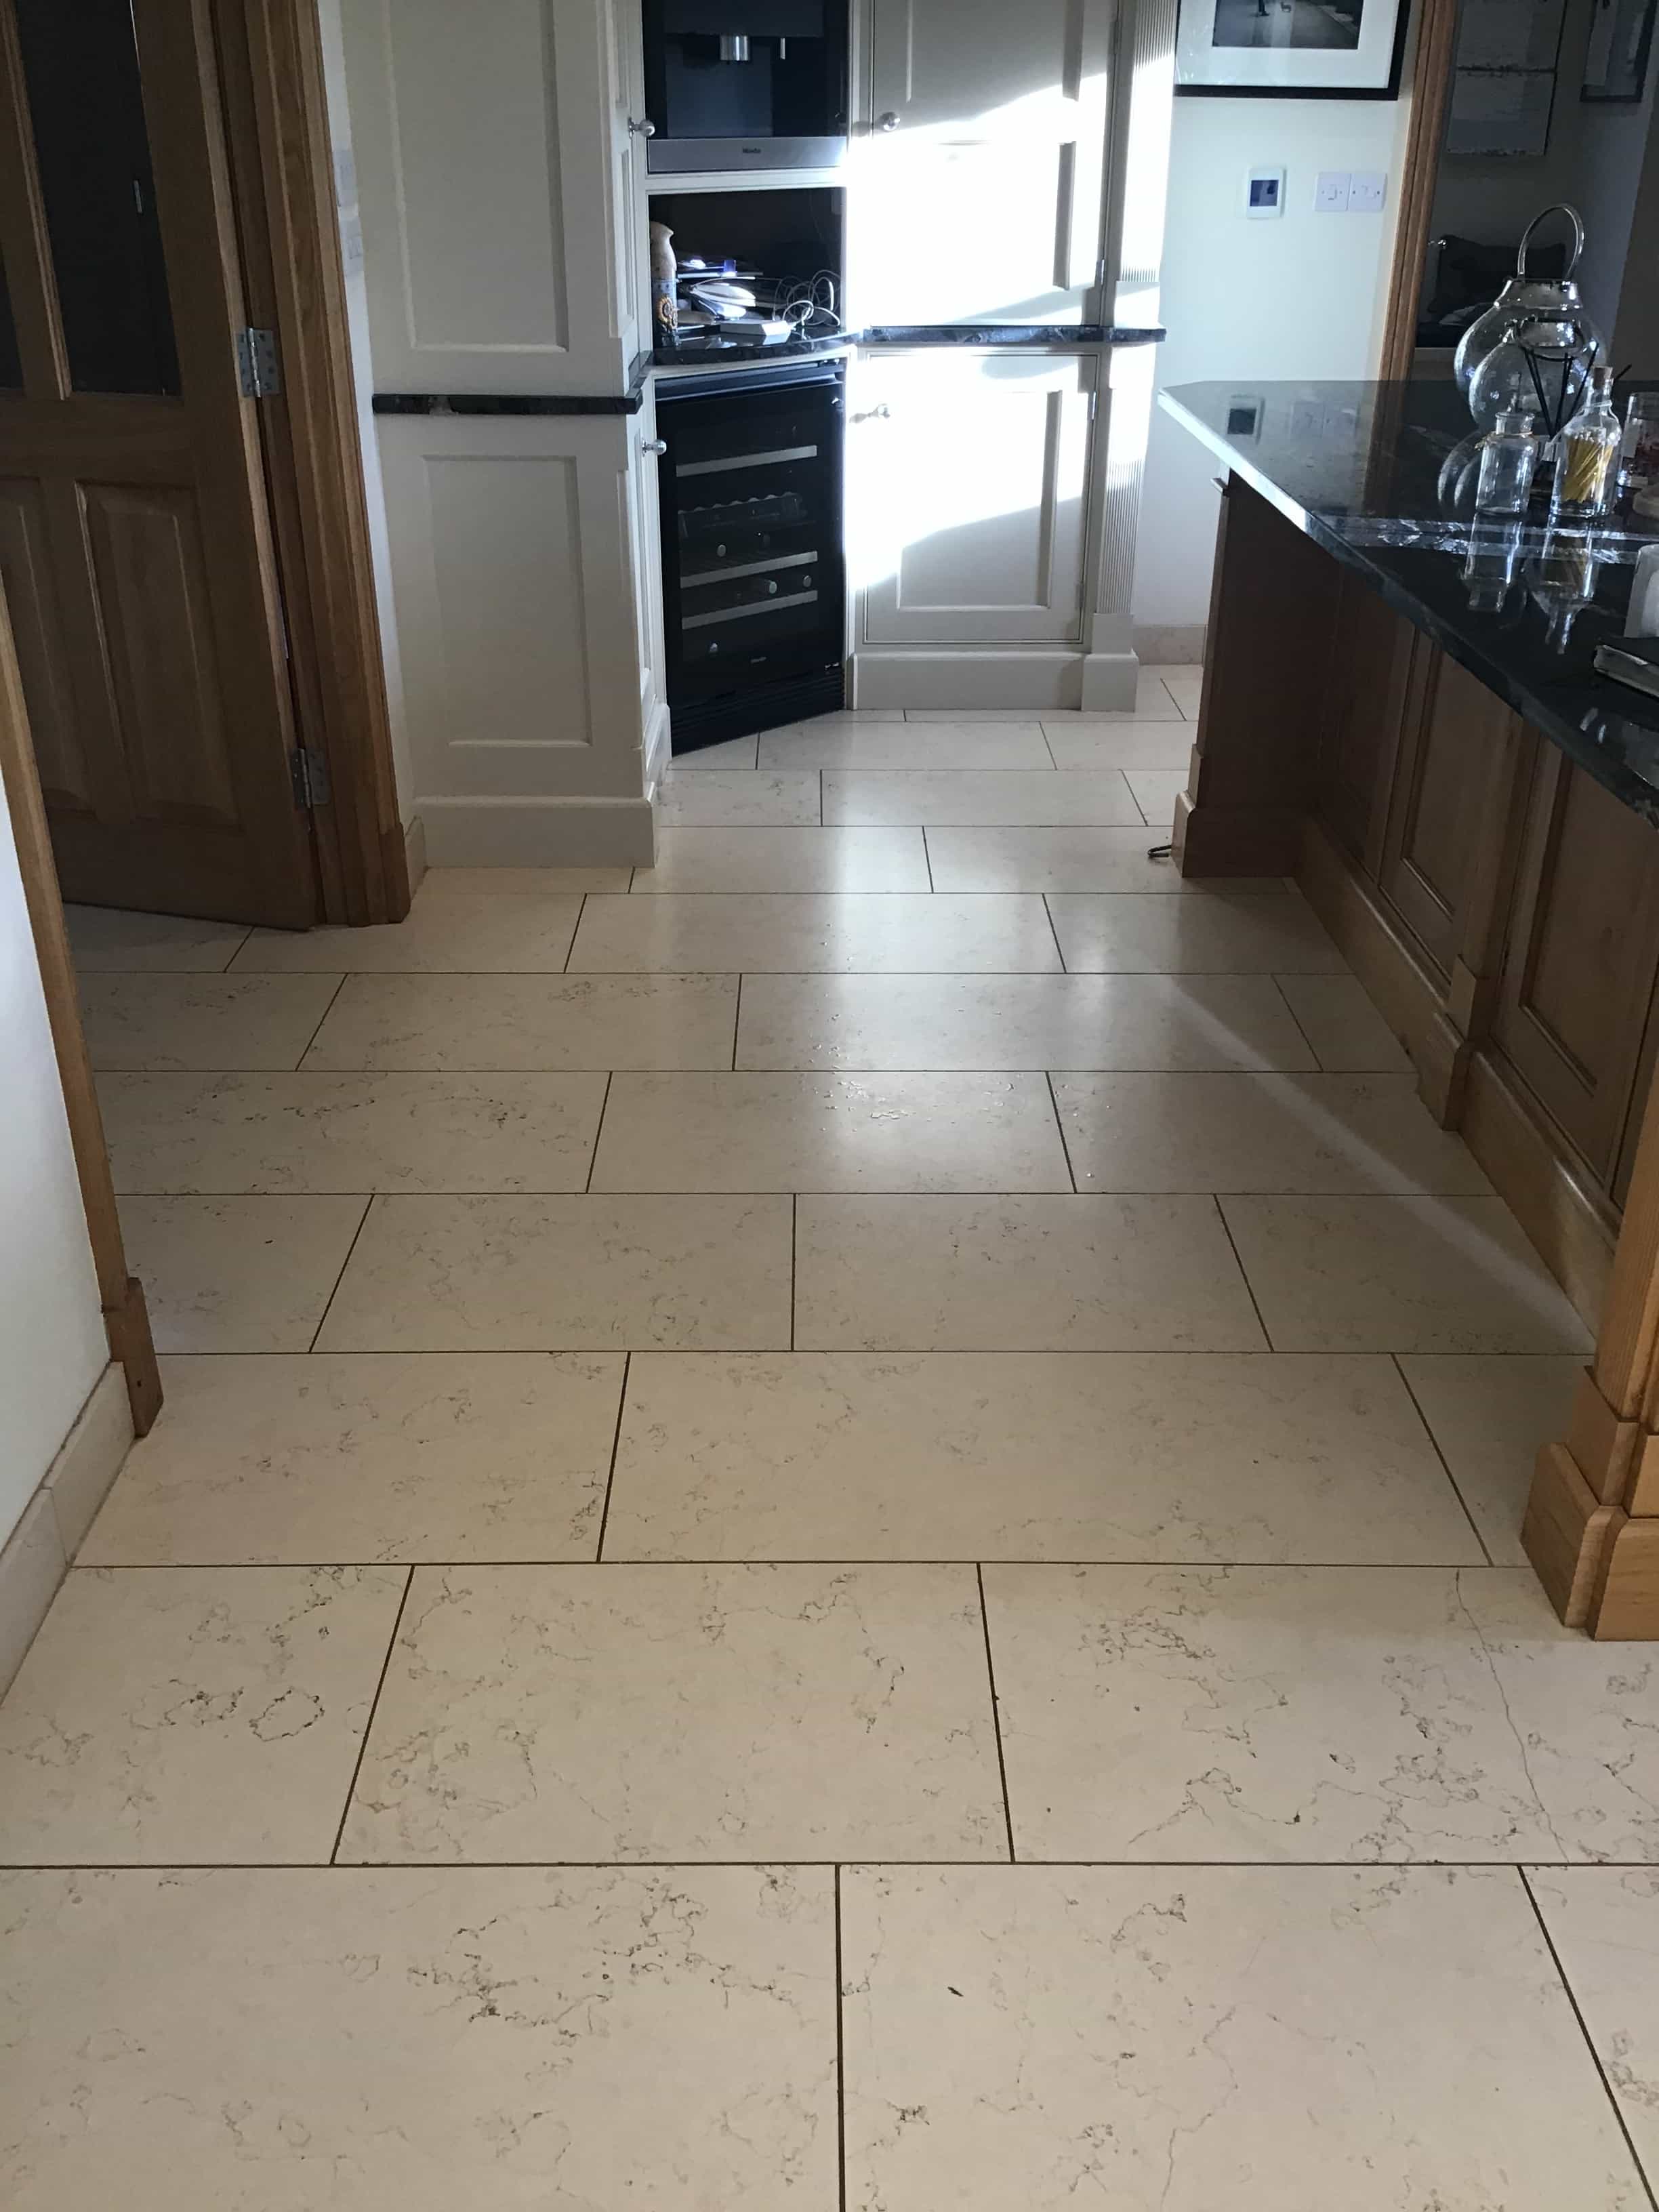
Limestone Kitchen Floor Cleaned Sealed Boughton Northamptonshire

Limestone Kitchen Floor Cleaned, Polished and Sealed in Boughton

These photos are of a four-year-old Limestone kitchen floor at a property in Boughton that the customer was finding hard to keep clean and maintain a shine. Part of the problem was he owned two dogs and we often warn about the problems of dog urine on sealed tile and stone due to it being high in nitrogen.

Limstone Kitchen Floor Before Clean Polish Boughton

On my initial visit I was able to ascertain that the sealer had almost completely worn off, leaving the stone vulnerable to dirt becoming ingrained into the pores of the stone. I come across this problem a lot, in my experience when stone floors are installed by tilers, they generally apply a single coat of sealant which wears off over time, and as discussed earlier can be prematurely degraded by strong chemicals.

Limstone Kitchen Floor Before Clean Polish Boughton

My quote to renovate the Limestone floor was accepted and included a deep clean to the stone and grout, stone polish and then re-seal.

Cleaning/Polishing Limestone Tiled Flooring

I arrived on site on the arranged date and began by scrubbing all the grout lines with Tile Doctor grout brushes and a 3:1 dilution of Tile Doctor Pro-Clean. I then moved on to a small handheld polishing machine to clean around the tile edges using 800 and 1500 grit diamond encrusted burnishing pad to achieve a deep clean.

The process was then repeated throughout the rest of the area using larger 17” burnishing pads fitted to a floor polishing machine. The burnishing pads I used come in a set of four starting with 400-grit and moving up to 800, 1500 and 3000 grit, after each pad is applied the floor is rinsed with water and the soil extracted with a wet vacuum.

It took me much of the day to complete this stage of the renovation and the floor was still damp so once done I left for the day, allowing the floor to dry off overnight.

Sealing a Limestone Tiled Kitchen Floor

I returned the following day to complete the final polish using the 3000-grit burnishing pad, this gave a high polished finish which the customer had requested. This last pad is applied dry with only a little water splashed onto the tile, a process we call a spray burnish.

The floor was then sealed with three applications of Tile Doctor Ultra Seal Sealant to protect the newly restored and polished tiles. Ultra-Seal is a penetrating sealer that soaks into those recently cleaned pores in the stone, occupying the space and preventing any dirt from becoming ingrained there. It’s also a natural look sealer so it doesn’t change the colour of the stone in anyway and is almost indetectable once applied.

“Hard work from Philip has left us with a kitchen floor brought back to life – cleaned and sealed in little over 24 hours – brilliant job – Thanks”

Before leaving I gave the customer some tips on maintenance and a complimentary bottle of Tile Doctor Stone Soap to enable him to keep the floor looking its best, this product works well with the sealant we applied and is PH neutral so won’t degrade the new sealer.

Limestone Kitchen Floor After Clean Polish Boughton


Professional Restoration of a Limestone Tiled Kitchen Floor in Northamptonshire

Limestone Kitchen Floor Cleaned, Polished and Sealed in Boughton Read More »

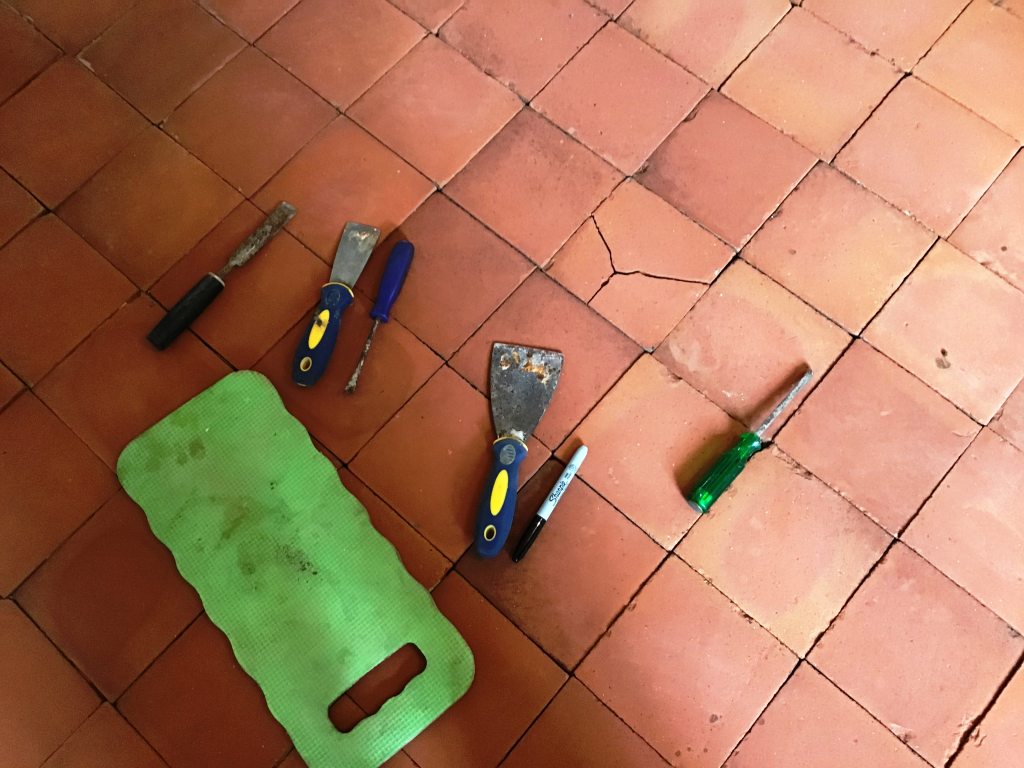
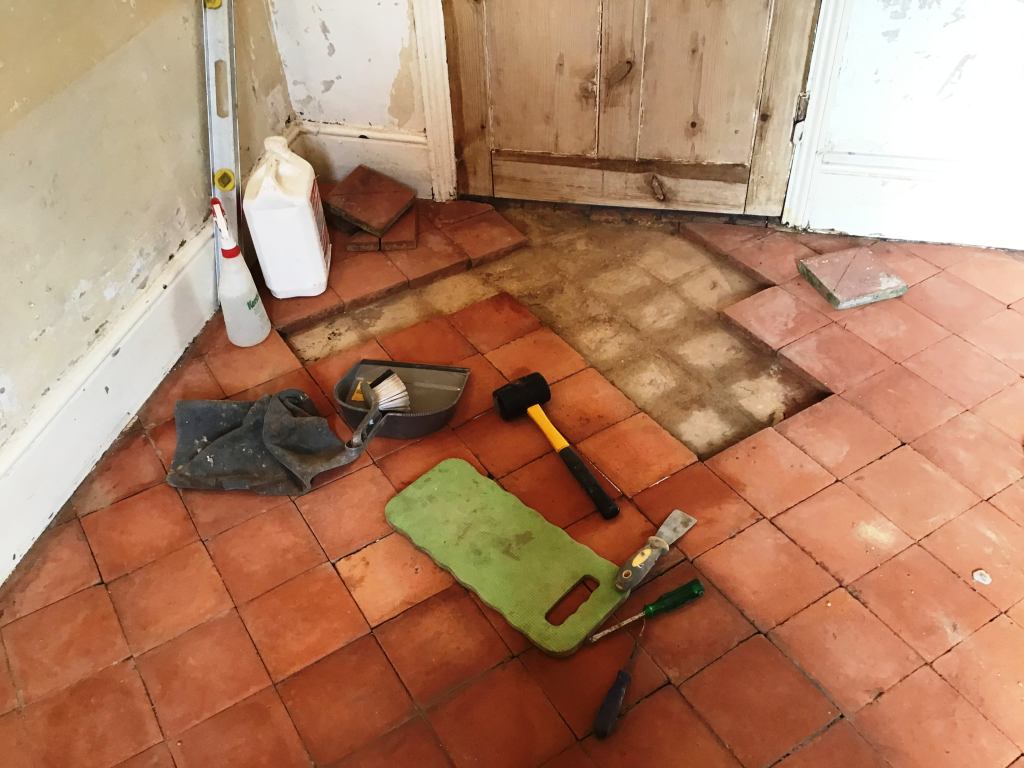
Quarry Tiled Floor Restoration Bozeat

Quarry Tile Repairs and Restoration at a period cottage Bozeat

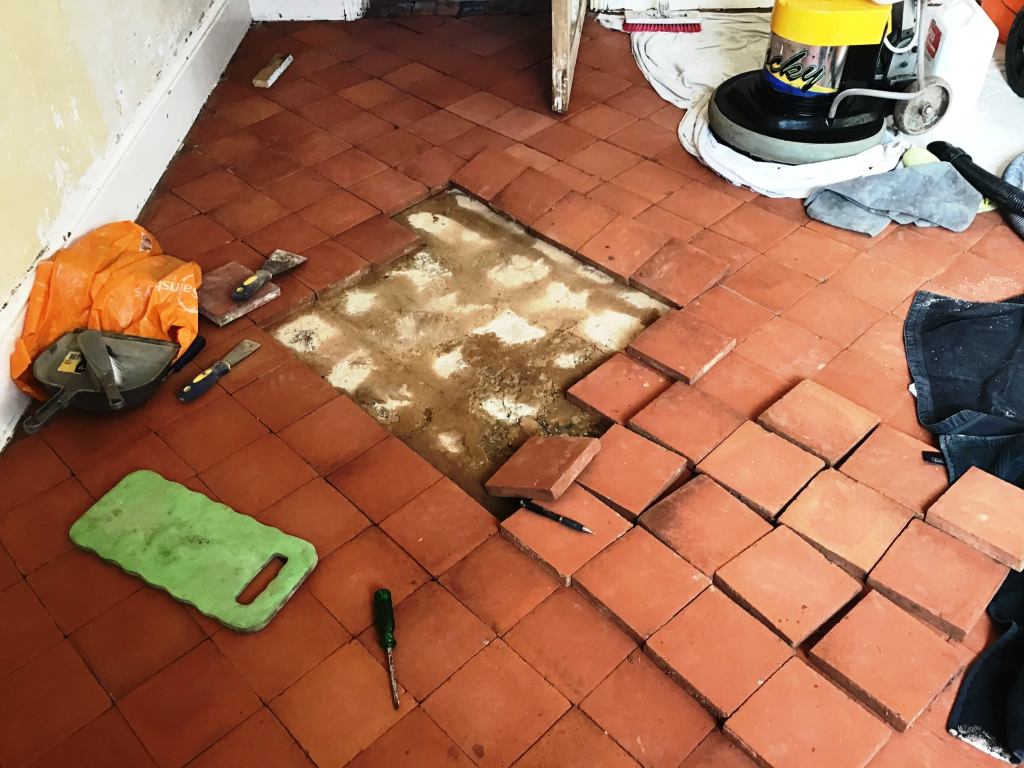
The following photos are of a Quarry tiled dining room floor in a period cottage located in the small village of Bozeat. My customer had removed a carpet and discovered them underneath, as you can see from the photographs however the tiles were in a poor state of repair. Undaunted the owner wanted to restore them as a lovely period feature and contacted Tile Doctor.

Quarry Tile Floor Before Restoration Bozeat Cottage Quarry Tile Floor Before Restoration Bozeat Cottage

I went over to survey the Quarry tiles and could see the floor had not faired well under the carpet over the years, several tiles were cracked and 40 to 50 tiles were loose and would needed resetting to stop them moving underfoot, especially in the high traffic areas. I discussed with them that Tile Doctor could repair the floor and clean it and would be able to restore in a few days. They were happy to go ahead with my quote and we arranged a mutually convenient time to carry the work out.

Cleaning and repairing a Quarry Tiled Hallway Floor

My first course of action was to deep clean the floors using Tile Doctor Oxy-Gel which is an alkaline cleaner. Working in small areas the Gel was worked in using a stiff brush on a rotary machine using a little water. As this process was completed in each area, I rinsed off the resulting slurry away with water and then extracted using a wet vacuum. The initial clean removed most of the black staining and paint spots which had occurred over the years, but more work was needed.

The next step was to apply Tile Doctor Grout Clean-Up to further clean up the tiles and tackle the cement residue and other staining. I used a repeat of the cleaning process and rinsed twice with plain water to ensure all traces of product were removed. The next step was to tackle the broken and loose tiles however it was now the end of day one, so after assessing the floor for all repairs required, I installed a portable dryer to aid drying and left for the day.

Quarry Tile Floor During Repair Bozeat Cottage Quarry Tile Floor During Repair Bozeat Cottage

The next day I returned to begin repairs starting by lifting all the loose tiles, working in one square metre sections at a time. Fortunately, my customer had already managed to obtain reclaimed tiles from a reclamation yard so that saved me a job. The colours matched with the originals; however, the reclaimed tiles were slightly larger than the originals and needed to be cut into shape as required. Working methodically, I re-laid the tiles on a fresh bed of screed and grouted them in to match the original floor as best possible.

Quarry Tile Floor During Repair Bozeat Cottage Quarry Tile Floor During Repair Bozeat Cottage

After the repairs were completed I allowed the floor to fully dry for four days, I needed the tiles dry and the newly laid adhesive and grout to set and bed in before the next step. Before leaving I gave my customer strict instructions not to walk over these areas whilst I was gone.

Sealing a Quarry Tiled Hallway Floor

Returning later the following week, I first checked the floor was dry using a damp meter, once satisfied I was able to start the sealing process. The customer had requested a silk finish, however because of the age of the cottage and the possibility of damp in this old floor my choice of sealer was limited to those that are fully breathable.

Quarry Tile Floor After Restoration Bozeat Cottage

On this occasion I chose to apply several coats of Tile Doctor Seal & Go Extra, this product will allow the floor to breathe and provide the desired finish. It was a good decision, and as hoped it enhanced the appearance of the floor beautifully.

Quarry Tile Floor After Restoration Bozeat Cottage

My customer was very happy with the renovation and the transformed floor and left the following feedback:

“Friendly service, reasonably priced and a good standard of work. Has breathed new life into my old quarry tile floor.”


Professional Restoration of a Quarry Tiled Floor in Northamptonshire

Quarry Tile Repairs and Restoration at a period cottage Bozeat Read More »

Travertine Tiled Floor Before After Renovation Brixworth

Travertine Floor Tiles Repaired and Polished in Old Near Brixworth

Polished Travertine is a popular tile which can look stunning, however without the correct maintenance regime in place it can soon turn dull and flat as my customer in the small village of Old near Brixworth discovered. In this case they had 40m2 of Travertine tiling installed in the living room and breakfast room which in particular had become dull, sticky, and hard to clean. On top of that a couple of holes had appeared in the main kitchen walkway areas which was causing concern.

Polished Travertine Kitchen Floor Before Renovation Brixworth

I visited the property to carry out a site survey and conduct a test clean on the stained areas. My customer was relieved to see how well the grout and staining responded to the cleaning and we moved on to discuss how to repairs the holes. We see this a lot with Travertine where natural holes or pitting are usually filed with a resin before being sold but the problem can be exacerbated with the use of acidic cleaning products. Holes also trap dirt which can accumulates quickly as dirt is washed into the holes during cleaning detracting from the appearance of the stone.

Polished Travertine Kitchen Floor Before Renovation Brixworth

To resolve I planned on filling the holes with a resin and then re-polishing the floor to make it blend in. A quote was issued via e mail which was accepted, and a date booked in the diary for work to be carried.

Cleaning and Restoring Travertine Tiled Kitchen Floor

On the day I arrived the customer had prepared the work area by removing all small items of furniture. My first step was to brush and vacuum the area to remove any loose debris. I then sprayed the floor with a dilution of Tile doctor Pro-Clean focusing on the heavily soiled areas and grout lines throughout the breakfast area and then left to soak in for ten minutes. After scrubbing the grout with a grout brush the area was rinsed with a small amount of water and the area dried using a wet vacuum. This process was then repeated in the kitchen.

Tile Doctor has found the best way to renovate polished stone is to use a set of diamond encrusted burnishing pads to hone the stone and build back the polish. Usually this involved applying a set of for or five pads of different grits depending on the severity of soiling and any surface scratches. I started with the coarsest grit and worked through in sequence to the finer grits to achieve a polished finish. Water is used to lubricate the process and the floor is rinsed and extracted between pads.

Once this process was completed, I dried the damaged tiles with a heat gun so I could fill them. I mixed a resin that closely matched the white and brown colours of the Travertine and filled in the holes, smoothing, and polishing with handheld diamond blocks to achieve a smooth finish.

Polished Travertine Kitchen Floor After Renovation Brixworth

Sealing a Travertine Tiled Kitchen Floor

When we returned the next day, the floor had dried, and I was able to give the floor a final polish with a very fine 3000-grit burnishing pad applied with a little water sprayed onto the tile. Finally, the floor was then sealed with two coats of Tile Doctor Ultra-Seal which provides excellent protection without changing the colour of the stone to provide a natural look.

Polished Travertine Kitchen Floor After Renovation Brixworth

Last step was to provide some advice on how to maintain the floor going forward for which I recommend Tile Doctor Stone Soap which is designed for cleaning polished stone floors. The client was over the moon with the outcome and surprised at the improvement, they also left the following review for me which is always a nice surprise.

Fantastic work, my floor looks wonderful it didn’t look this good when it was laid thirteen years ago, I will definitely look after the travertine now and have the floor cleaned and resealed every year.


Professional Restoration of a Travertine Tiled Kitchen Floor in Northamptonshire

Travertine Floor Tiles Repaired and Polished in Old Near Brixworth Read More »

Victorian Quarry Tiled Floor Before and After Restoration Broughton

Quarry Tiled Floor Restored Following Cottage Remodel in Broughton Village

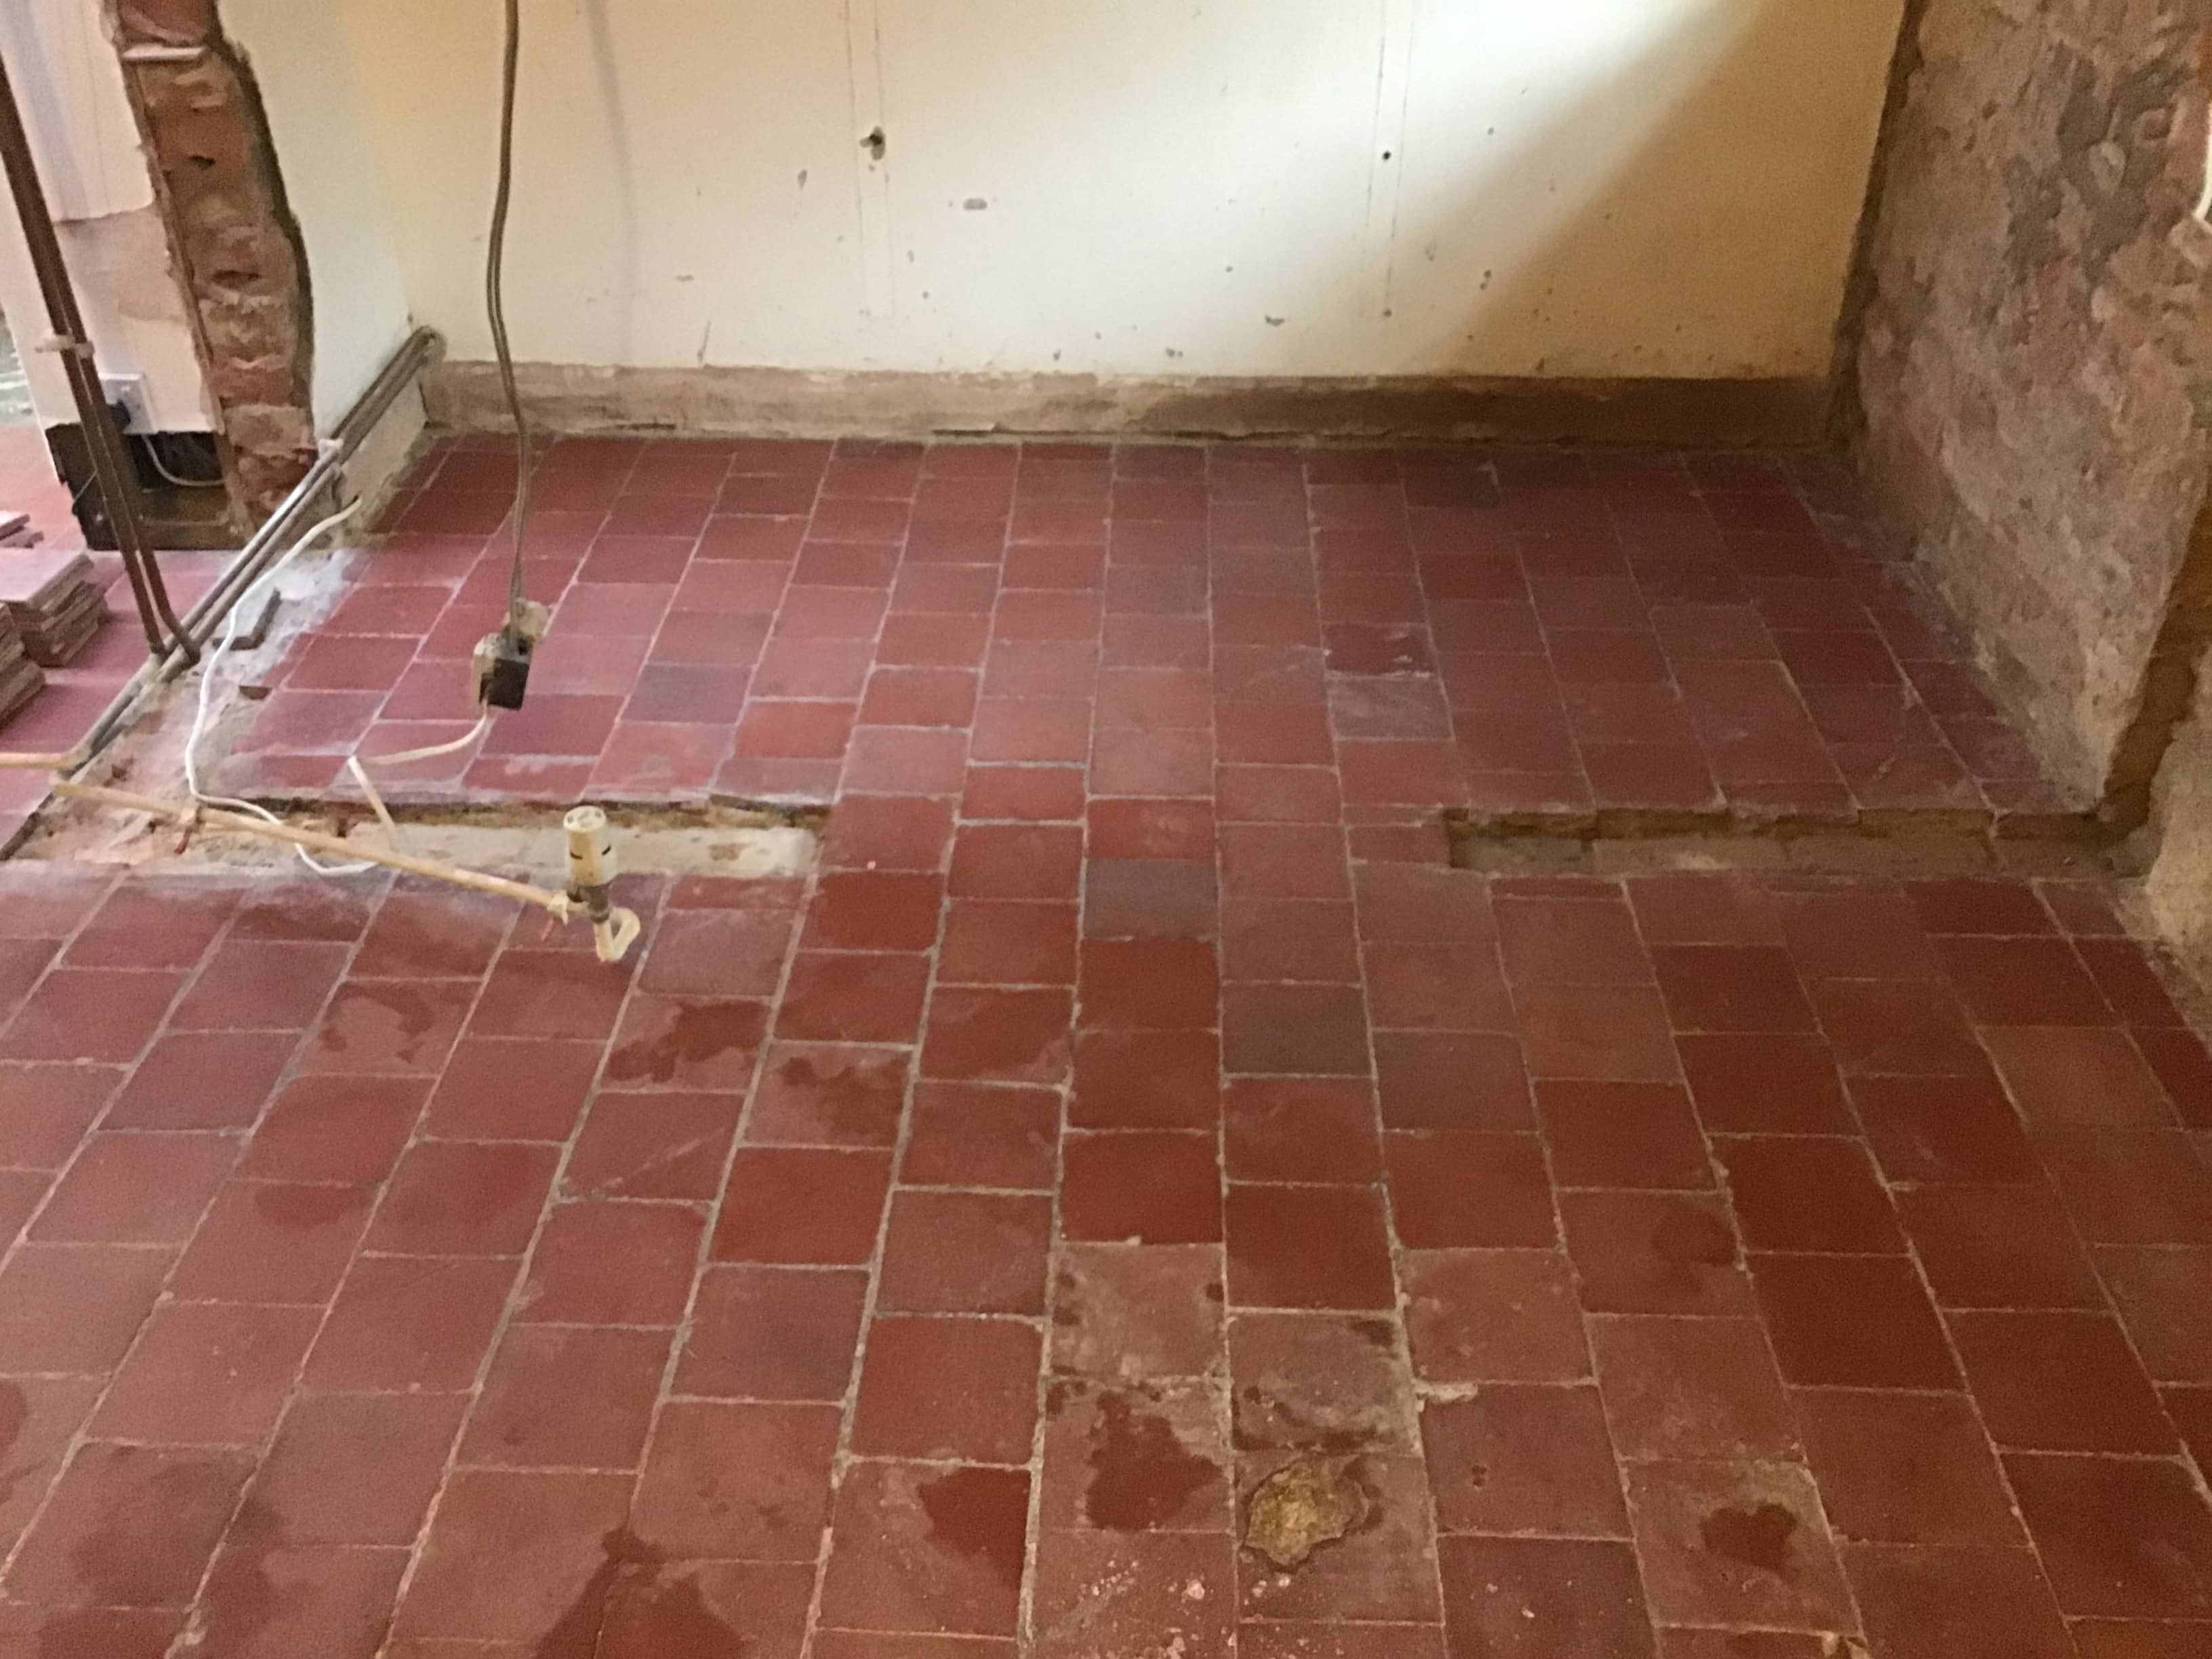
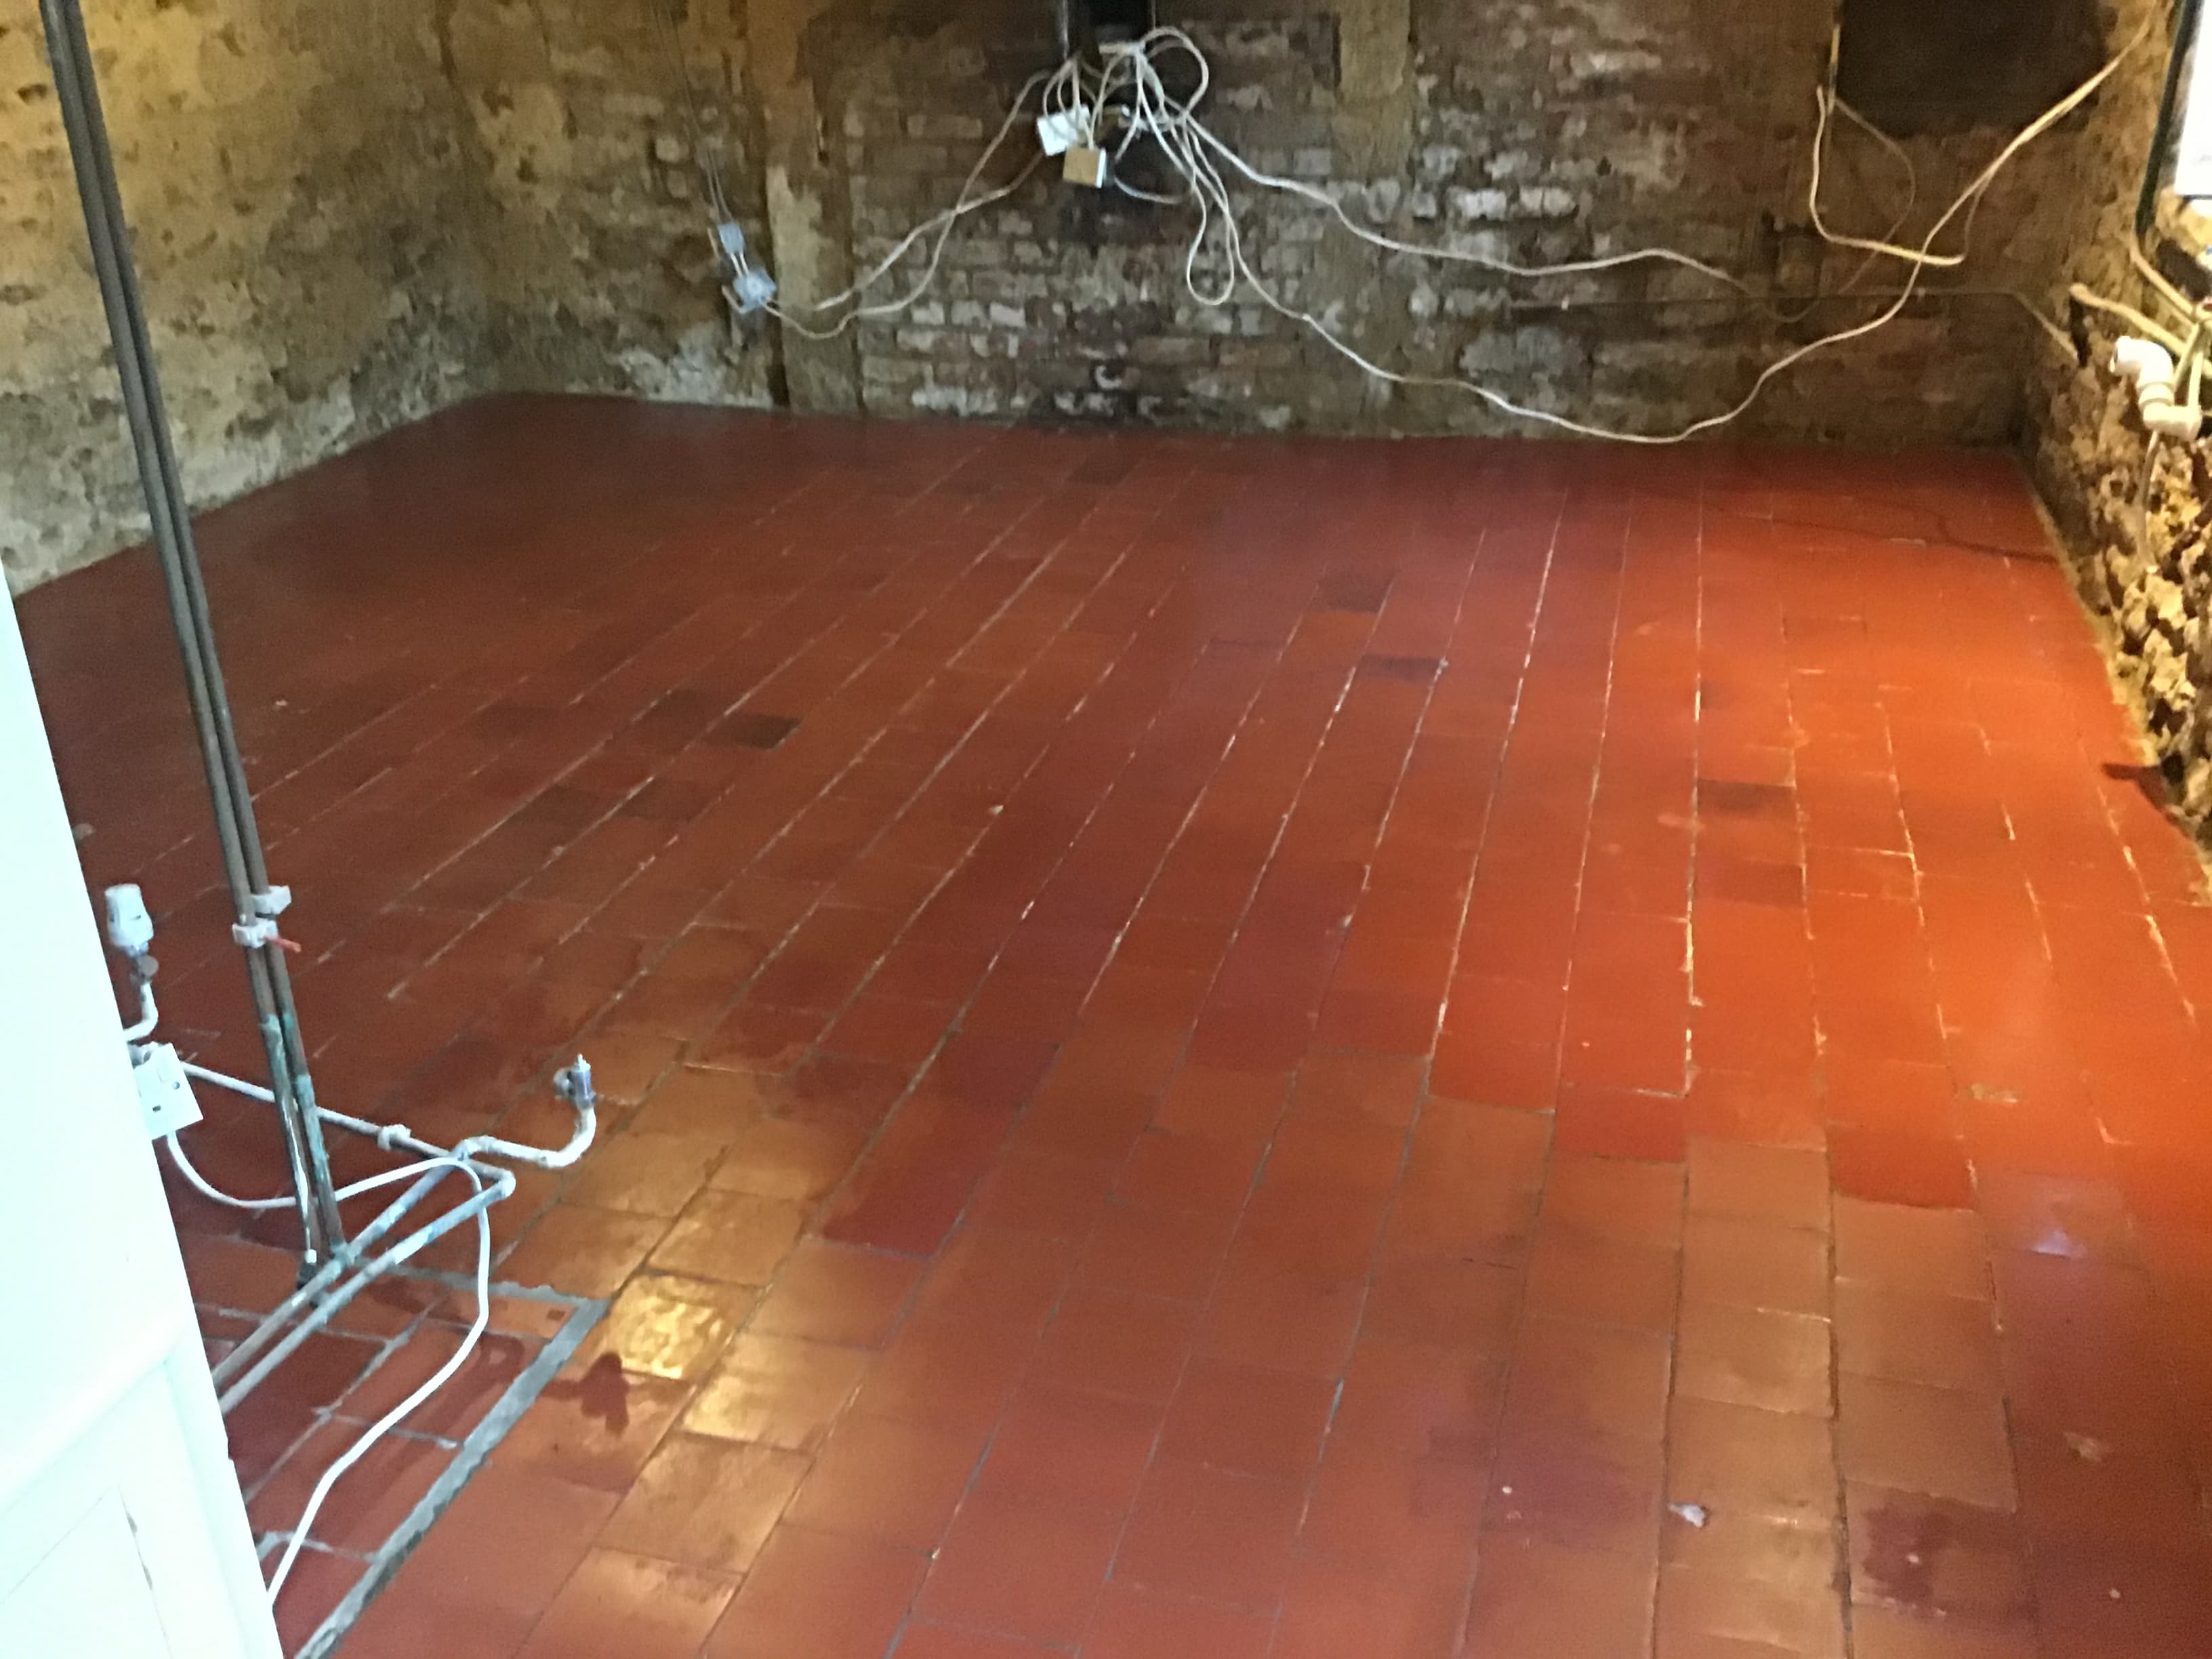
The following photos are from a 16th Century cottage in the village of Broughton near Kettering which was undergoing major restoration works. The Quarry tiled floor was not as old as the house and was probably installed in the Victorian era. The clients wanted the floor restoring before the plastering of walls and new kitchen was installed. There was also a section where a pantry wall had been removed with tiles missing, so these needed to be replaced with reclaimed tiles that the customer had sourced.

Victorian Quarry Tiled Floor Before Restoration Broughto Cottage

I visited site to look at the project, survey the Quarry tiled floor and give them a firm price for the work. I was confident that we could replace the tiles and we could blend the area in to match the existing. Once the floor had a good clean and seal it would look a lot better.

With the quotation agreed I arranged a date where I would have sole access to the property which is always preferred as it means you do not have anyone walking through whilst your cleaning. This also has the added advantage of not having to take precautions over social distancing.

Victorian Quarry Tiled Floor Before Restoration Broughto Cottage

Restoring a Quarry Tiled Kitchen Floor

On the first day on site I carried out the replacement of the missing tiles. This work started by cleaning up the holes in the floor left by the now removed wall and getting the base level and ready for tiling. Next the reclaimed tiles we cut down to fit the shape left by the wall to match the existing tiling. The fit needed to be exact as any mismatch would show later. Once I was happy with the cuts the tiles were fixed in place with rapid set adhesive and once that had set were grouted in place. The next step would be to give the floor a deep clean, so it was left to dry off overnight.

Victorian Quarry Tiled Floor During Restoration Broughto Cottage

The next day with the tile adhesive and grout having gone off overnight I was able to start the cleaning process. Working in sections I began by applying Tile Doctor Oxy Gel to the tile and grout with a little water, leaving it to soak in for ten minutes and then working it into the tiles using a 17 inch rotary scrubbing machine fitted with a black scrubbing pad. A stiff brush was also used along the grout lines to make sure they were equally treated. After scrubbing the now soiled solution was vacuumed off with an industrial wet vac and repeated the process until the entire area had been cleaned.

Tile Doctor Grout Clean Up was then applied using a 1:10 dilution with water. It was mopped it over the entire area to neutralise the tile and remove any grout smears, hazing and mineral deposits which are quite common with floors of this age. The entire area was then given a good rinse with clean water to remove any trace of cleaning product. An industrial fan was also installed and left on site to assist with the drying process until we returned a week later. This would ensure the floor would be bone dry for our return and ready to accept a sealer.

Victorian Quarry Tiled Floor During Restoration Broughto Cottage

Sealing a Quarry Tiled Kitchen Floor

Returning the following week, I tested the moisture levels in the tiles with a damp meter. I was conscious that due to the age of the tiles there may be some inherent damp however my plan had worked, and the tests confirmed the floor was indeed dry and ready for sealing.

Victorian Quarry Tiled Floor During Restoration Broughto Cottage

The client required a silk finish so I opted to apply several coats of Tile Doctor Seal & Go Extra which would provide the required finish yet is breathable and so will not impeded moisture rising through the floor allowing it to evaporate and not become trapped. This is an important consideration when choosing a sealer for an old floor which don’t have a damp proof membrane installed as trapping moisture under the floor can lead to it reaching out to the walls where it can result in rising damp.

The client was extremely happy with the results and has left the following comments on our feedback page.

“Phil was great. On time and a good worker. Gave good advice and carried out all the work thoroughly. The tiles are now looking much better. Very happy. By Peter B, Kettering”

Victorian Quarry Tiled Floor After Restoration Broughto Cottage


Professional Restoration of a Quarry Tiled Kitchen Floor in Northamptonshire

Quarry Tiled Floor Restored Following Cottage Remodel in Broughton Village Read More »

Limestone Tiled Floor Before and After Renovation Wellingborough

Renovating Polished Limestone Floor with Stained Grout in Wellingborough

This Limestone tiled floor installed in a kitchen and family room at a property in Wellingborough is a great example of how this material can lose its appearance without a regular maintenance plan in place.

Limestone Tile and Stained Grout Before Cleaning Wellingborough

The customer called me as not only was she concerned that the floor had lost its lustre the grey grout had become very stained and almost black in heavy traffic areas, in fact my customer had originally asked about re-grouting but I was confident it could be cleaned.
I provided a quote which they were happy to accept.

Limestone Tile and Stained Grout Before Cleaning Wellingborough Limestone Tile and Stained Grout Before Cleaning Wellingborough

Cleaning/Polishing Limestone Tiled Flooring

The area was a nice wide 6 metre by 5 metre space and except for a few items of furniture that would need moving around there were relatively few obstacles. I reasoned the most efficient way to restore the polished appearance of the Limestone would be to use a set of diamond encrusted Burnishing Pads. These are fitted to a rotary machine and applied to the stone in sequence from coarse to smooth. It’s an effective process that cuts back the layer of dirt on the floor and then we build back up the polish.

We started burnishing the Limestone with a coarse 400-grit pad fitted to a rotary machine and applied with a little water for lubrication. The coarse pad is very good at removing dirt and old sealers from stone and once completed the resultant surface water and loose dirt is removed using a wet vacuum.

At this point I turned my attention to the badly stained grout lines, and applied a strong solution of Tile Doctor Pro-Clean which was scrubbed in along the grout lines using a stiff grout brush, this is necessary as the recessed nature of the grout makes it difficult for the rotary pads to reach it.

I then repeated the burnishing process with the medium 800-grit pad and fine 1500-grit pad, the 800-grit pad removes any small surface scratches and the 1500-grit further refines the look of the Limestone slowly restoring its polished appearance.

Renovating Stained Grout on a Limestone Tiled Floor

After the whole floor had been burnished in this way it was given a further rinse with water and the soil extracted as before. I then inspected the floor to see if more work would be needed.

I was not fully happy with how some of the grout lines had responded, some were still slightly stained, and some marks were visible in the high traffic areas. I had already discussed on my initial visit with the client that this might be the case and it was agreed between us that should this be the case I would apply a Tile Doctor Grout Colourant in Light Grey to recolour all the grout lines and achieve a uniform finish.

The stone and grout was still damp from cleaning and polishing, so I decided to leave the grout colouring until the following day.

Sealing a Limestone Tiled Kitchen Floor

On day two I started by grout recolouring all the grout lines, it’s a straight forward process but can be a little tedious where there is a lot of grout to cover. Once complete I allowed the grout colour to dry for a couple of hours before moving onto the next step.

The last pad to be applied in the stone burnishing process is the very fine 3000-grit polishing pad which is applied dry to the tiles using a small amount of water sprayed onto the floor and leaves the stone dry and with a polished silk finish.

The floor was then sealed using two coats of Tile Doctor Ultra Seal Sealant allowing the first coat to dry before applying the second. Ultra-Seal is an impregnating sealer that works by occupying the pores in the stone thereby preventing dirt from becoming ingrained there. It’s also a natural look sealer that doesn’t affect the appearance of the stone

Limestone Tile and Stained Grout After Renovation Wellingborough Limestone Tile and Stained Grout After Renovation Wellingborough

My customer was very happy with the transformation of her floor and provided the feedback copies below. In-fact she was so impressed with the results that she also used our services to restore the grout and silicon in one of her bathrooms.

“Phil was on time & easy to deal with and did an amazing job on my kitchen and bathroom floors and the carpets & sofa. No fuss, just a great job. Liz O.”

Limestone Tile and Stained Grout After Renovation Wellingborough


Professional Restoration of a Limestone Tiled Kitchen Floor in Northamptonshire

Renovating Polished Limestone Floor with Stained Grout in Wellingborough Read More »

Terracotta Tiled Floor Before After Renovation Flore Village

Terracotta Floor Renovation Prior to Kitchen Installation at Flore Village

The following photos are of a Terracotta floor restoration I carried out in the picturesque village of Flore, situated between Northampton and Daventry. I was asked to assess the potential of the Terracotta floor in an old cottage, the clients had always liked the floor but didn’t want the bad condition of the tiles to detract from the effect of the beautiful new kitchen they were planning to install. They needed reassuring that it would be possible to restore the floor to a good standard and thereby enhance the final look of the new kitchen before they went to the expense of replacing the entire floor.

Whilst I was there, I carried out a test clean to a small area of floor, stripping off all old the sealers to expose the natural blemish free face of the tile. Having worked out a process for restoring the floor I was also able to come up with an accurate price for completing the floor. I left the quote with the customer and was pleased to hear back from them a few days later to let me know they had decided to go ahead with the restoration of their floor.

Terracotta Tiled Floor Before Restoration Flore Village Terracotta Tiled Floor During Restoration Flore Village Terracotta Tiled Floor After Restoration Flore Village

Before being able to set a date for my return I had to liaise with for the kitchen company to agree a date them to come and remove the old kitchen and install the new. I would slot in-between the two dates.

Stripping Terracotta Kitchen Floor Tiles

When returned to the do the work the kitchen had been stripped out as promised and with no kitchen units etc. to protect from splashing, I was able to get straight on with the cleaning of the floor using Tile Doctor Oxy-Pro alkaline tile cleaner.

Terracotta Tiled Floor During Restoration Flore Village

Oxy-Pro is a gel and doesn’t require a lot of water to activate it, my concern was Terracotta tiles are very porous and it helps the drying process if you keep the moisture down to a minimum, especially as this work was carried out in November. The product was scrubbed into the Terracotta tiles using a stiff brush tool attached to rotary machine. I also used grout brushes on the wide grout lines working in small sections at a time and clearing the resulting slurry with a wet vacuum as I went.

Terracotta Tiled Floor During Restoration Flore Village

Once the cleaning process was completed across all the Terracotta, I spot treated the many stubborn stains with Tile Doctor Acid Gel, especially along the grout lines. This was brushed in, left to dwell, scrubbed and then removed with a wet vacuum. The stone was then mopped with plain water to neutralise and remove any trace of cleaning products. I then installed a fan to dry the entire area as quickly as possible.

Terracotta Tiled Floor During Restoration Flore Village

Sealing Terracotta Floor Tiles

As the customer was not using the kitchen it provided time to leave the floor for a few days to fully dry out with a small dehumidifier left on site to assist with the drying process. I returned later to seal the floor and started by taking a damp meter reading so I could be sure the Terracotta was completely dry.

Terracotta Tiled Floor During Restoration Flore Village

The results were good, and I was able to go ahead and seal the Terracotta using several coats of Tile Doctor Seal & Go Extra for a silk finish. Once of the reasons I picked this sealer is its breathable so it will cope with any moisture rising through the tile from the subfloor which is an important consideration on old floors which have no damp proof course.

Terracotta Tiled Floor After Restoration Flore Village

Although I never got to see the new kitchen installed my customer was very pleased with the transformation of the floor and left the following testimonial on the Tile Doctor feedback system.

Philip did a fantastic job restoring the terracotta tiles in our kitchen. They are good as new! Philip was hardworking and excellent at communicating with us and planning the best time to do the work around our new kitchen being fitted. Highly recommend! Ayesha D.

Terracotta Tiled Floor After Restoration Flore Village


Professional Restoration of a Terracotta Tiled Kitchen Floor in Northamptonshire

Terracotta Floor Renovation Prior to Kitchen Installation at Flore Village Read More »

Marble Hallway Floor Before After Renovation Earls Barton

Polishing Water Stained Marble Flooring in Earls Barton

I was asked to look at a Polished Marble floor that had been installed in the hallway of an executive property in the Northamptonshire village of Earls Barton and had suffered severe water damage from a burst pipe. Water had penetrated through the ceiling and as the occupants were away at the time two inches of water had flooded the ground floor where it sat for several weeks causing extensive damage and efflorescence to appear in patches all over the floor. The homeowner was extremely worried as this was a very expensive and large Marble floor which was a key feature of the property and didn’t want the disruption of having the tiles lifted and replaced.

As you can see from the pictures, there were white etching marks over the surface of the marble ruining the polished appearance and these could not be removed using normal domestic cleaning processes.

Water Stained Marble Floor Before Renovation Earls Barton Water Stained Marble Floor Before Renovation Earls Barton

I wasn’t surprised to find that the owners couldn’t restore the polished appearance of the Marble, as a hard stone like Marble needs to be burnished to build up a polish. I carried out a damp test and cleaned a test area using diamond encrusted burnishing pads, as the floors were still slightly damp I advised the customer to turn on the underfloor heating to assist in drying out the stone for a week, in that time a quote was issued and accepted and the work was booked in.

Restoring the Appearance of Water Damaged Marble Flooring

Before work commenced, I instructed the client to turn the underfloor heating off as it can affect the chemicals and cleaning process by drying the floor out too quickly.

To restore the polished appearance of the Marble I applied a set of five 17” diamond encrusted burnishing pads which come in 200, 400, 800, 1500 and 3000 grit and are applied to the stone with a heavy duty weighted rotary machine. I started with the very coarse 200-grit pad and worked up through the series of pads gradually building up the polish with increasingly finer grit pads. Water was used to lubricate the polishing process and I rinsed the tiles in between with more water to remove the soil generated using a wet vacuum to remove the resultant soil.

Water Stained Marble Floor During Renovation Earls Barton

I also used a set of 6” diamond encrusted burnishing pads with a handheld machine for getting close to the edges and around the pillars to ensure the floor was polished evenly throughout all areas.

Achieving a High Shine Polish on Marble Tiles

Once the stone had dried, I carried out the final polish to a very high shine as requested by the customer using the very fine 3,000-grit burnishing pad. Unlike the other pads this one is applied dry with only a little water sprayed onto the tile. To finish I applied a couple coats of Tile Doctor Colour Grow which is a colour intensifying impregnating sealer that will provide durable protection going forward making it very easy to clean.

Once complete the natural features of the Marble really stood out and the hallway looked stunning, certainly our client was greatly relieved and very pleased the floor had been restored to its former glory and was once again a beautiful feature when friends and family enter the property.

Water Stained Marble Floor After Renovation Earls Barton Water Stained Marble Floor After Renovation Earls Barton

To keep the Marble looking its best I recommended the client use Tile Doctor Stone Soap going forward and left a complimentary bottle and cleaning instructions. This product has been specially formulated for the regular cleaning of polished stone, it helps build patina and will keep it in excellent condition between professional maintenance cleans.


Restoring the Appearance of Polished Marble in Northamptonshire

Polishing Water Stained Marble Flooring in Earls Barton Read More »

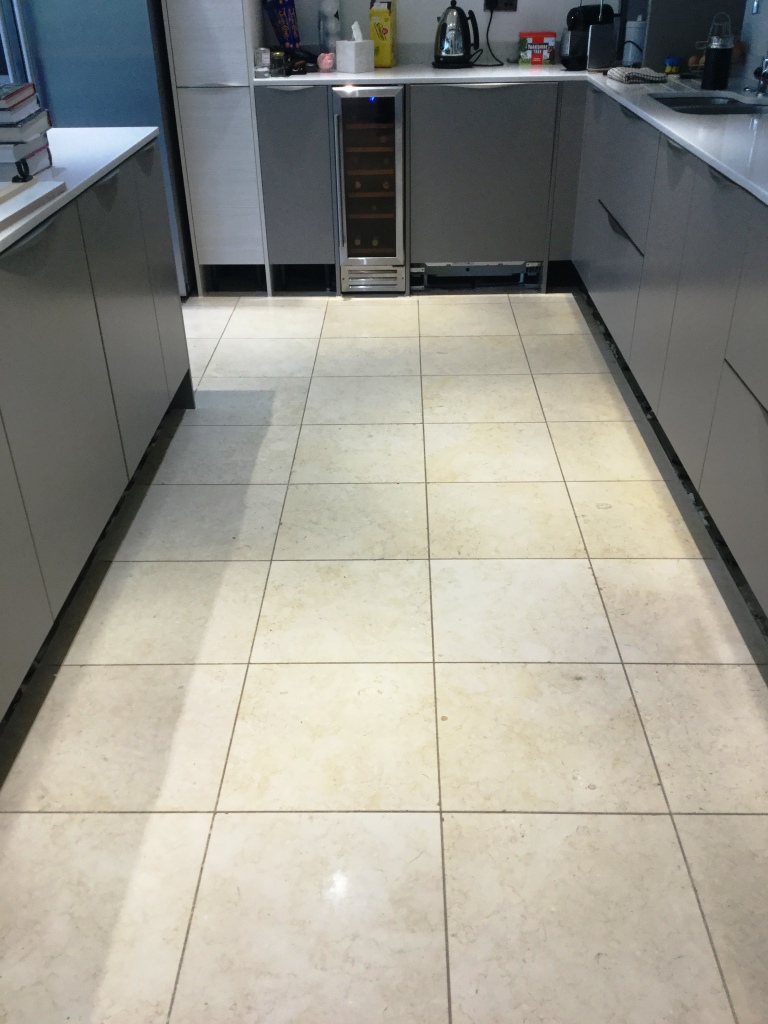
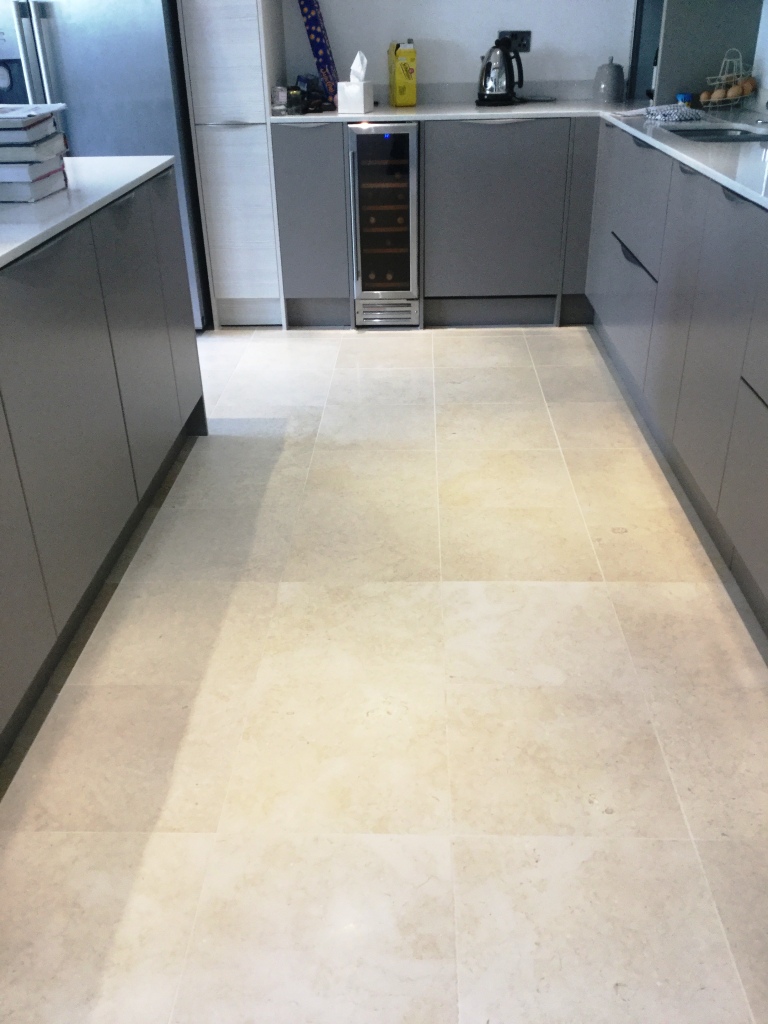
Kitchen Limestone Floor Polishing in Stanwick

Cleaning of Polished Limestone Kitchen Floor Tiles in Stanwick

I was contacted by a client from the village of Stanwick regarding their Limestone tiled floors, which were installed throughout the kitchen area and steps leading to the hallway. Polished stone does lose its appearance over time due to wear and this floor was now in need of re-polishing. An appointment was made to visit the client and carry out a survey of the floor.

Limestone Floor Tiles Before Polishing Stanwick
On my arrival I could see that the Limestone tiles had as suspected become dull and the grout needed attention; it was clear that the sealer had worn off in the busier area and dirt was now becoming ingrained in the stone and grout.

Limestone Floor Tiles Before Polishing Stanwick Limestone Floor Tiles Before Polishing Stanwick

To bring back its polished appearance the floor would need to be honed with burnishing and then re-sealed to protect it. This is a straightforward task which would take two days and so I provided a quote to do the work. The quote was accepted, and the job booked in.

Limestone Floor Tiles Before Polishing Stanwick

Cleaning and Honing Limestone Tiled Kitchen Floor

My first course of action was to protect the walls and kitchen units using a protective wrap before scrubbing the first area using a hot solution of Tile Doctor Pro-Clean using a rotary scrubbing machine fitted with a brush head attachment. This process lifted the dirt from the grout and surface of the tiles.

The floor was then rinsed thoroughly with water to remove the released dirt and cleaning solution which was then extracted off the floor with a wet vacuum. I then proceeded to burnish the Limestone using a set of four Tile Doctor Burnishing Pads fitted to a rotary floor machine. As usual I started with the application of a 400-grit coarse pad lubricated with water, this removes any remaining sealers and ingrained dirt from the stone. The slurry generated was then rinsed away using a wet pick up machine. I then repeated this process using the medium 800-grit and fine 1500-grit burnishing pads which slowly polish the stone, rinsing and extracting after each pad. The floor was then allowed to dry off overnight

Sealing a Limestone Tiled Kitchen Floor

I returned the following day and continued the process using the superfine 3000-grit polishing pad which is the last stage in the polishing process and bought back the polished surface. In this instance I polished the floor to a high shine as requested by the customer. Only a small amount of water is used with this last pad, so it leaves the floor dry and ready for sealing.

To seal I applied two coats of Tile Doctor Ultra-Seal Sealant which is an impregnating sealer that protects from within and gives the floor a natural look. The last step once the sealer was dry was to buff the floor to a nice shine with a rotary machine fitted with a white pad.

Limestone Floor Tiles After Polishing Stanwick
As the photos show, the floors were bought back to life with a gleaming high shine finish, the clients were extremely pleased with the results as you can see from their feedback below.

“Phil is a very hardworking and pleasant guy who kept me fully informed at all stages and the floors and patios look great. Many thanks. Michael B, Stanwick”

Limestone Floor Tiles After Polishing Stanwick
Whilst I was at the property the client asked me if I was able to clean their flagstone patio, I was able to do this and carried out the work for them, you can see the results achieved in the patio section of my website.

Limestone Floor Tiles After Polishing Stanwick
 

Limestone Tiled Kitchen Honed and Polished in Northamptonshire

Cleaning of Polished Limestone Kitchen Floor Tiles in Stanwick Read More »

Flagstone Patio Before After Renovation Stanwick

Renovating a Twenty Year Old Flagstone Patio in Stanwick

I often get asked whilst I am on site what other services I offer; recently when I was polishing a Limestone floor at a house in the small village of Stanwick the client enquired if there was anything I could do with their 20 year old Flagstone Patio which was unfortunately no longer looking its best.

I advised him this is something I would be able to do, and that as well as cleaning all types of internal tile, grout and stone I also offer external stone cleaning using a professional pressure washing machine using up to date equipment such as the Honda Pro 2100 Pressure Washer which was an expensive but worthwhile investment.

Flagstone Patio Before Cleaning Stanwick

The patio had not been professionally cleaned since installation and now moss was growing between the pavers and the stone had darkened over the years, although the customer had used an electric jet washer a couple of times it had not made significant improvement and a thorough clean was now well overdue. The interior Limestone floor had come up well and they were very satisfied with that work, I was confident that they would be pleased with the patio outcome too.

Although the area was large, the benefit of working outside is there is no concerns about making a mess, so the job can be done relatively quickly. I gave the client a quote for the work and we arranged a time for me to return, although it was dependent on the weather.

Cleaning a Large Flagstone Patio in Stanwick

Thankfully the date we had selected turned out to by dry so a day in the fresh air was due. My first course of action was to pre wet the stone with a diluted 3:1 solution of Tile Doctor Pro-Clean to help break down the heavy soiling and soften the moss. Tile Doctor Pro-Clean is a concentrated, multi-purpose high-alkaline cleaner, which strips and degreases heavily soiled areas. It is particularly good on mildew and algae on patios such as this where it makes light work of breaking down the soiling.

The product is left to dwell for a short time, once I could see that the soil was starting to lift, I then used the petrol driven Honda Pro 2100 pressure washer connected to a spinning tool to clean the stone. This is a very powerful piece of machinery and the difference was immediate. The patio tiles looked a completely different colour, in fact the client couldn’t recall ever seeing them this colour!

Flagstone Patio After Cleaning Stanwick

This work was carried out to the customers satisfaction who left the following feedback on my website.

“Phil is a very hardworking and pleasant guy who kept me fully informed at all stages and the floors and patios look great. Many thanks – Michael B, Stanwick, “


Professional Clean of a Flagstone Patio in Northamptonshire

Renovating a Twenty Year Old Flagstone Patio in Stanwick Read More »

Kitchen Terracotta Floor Before After Renovation Moulton

Cleaning a Terracotta Tiled Kitchen Floor in Moulton

We were contacted by the owner of a property in Moulton with a problematic Terracotta tiled kitchen floor. She was seriously considering ripping up the entire area of tiling and replacing it as she was having a new kitchen installed. Both her and her husband were concerned that unless I could restore this floor to somewhere near to its original condition, they would need to replace it.

Terracotta Tiled Kitchen Floor Before Restoration Moulton

I went over to inspect the Terracotta tiles and could see the entire surface was deeply ingrained with soiling and the grout lines were filthy. After carrying out a test it became obvious that the previous sealer had been applied very sparingly and had mostly worn away, leaving the stone prone to staining. Terracotta is a very porous tile and dirt had become ingrained in the pores leaving it looking very dull and difficult to clean.

Terracotta Tiled Kitchen Floor Before Restoration Moulton

I completed the test on a small part of the floor and the customer could see the results which could be achieved. Happy with the result they agreed my quote and we set a date for my return to complete the floor.

Cleaning a Terracotta Tiled Kitchen Floor

The tiles turned out to be made of a fairly soft Terracotta which meant that we were able to deep clean them extremely effectively using a strong dilution of Tile Doctor Pro-Clean. We used Tile Doctor Remove and Go in particularly stubborn areas.

The process I use is to spray the Pro-Clean onto the floor and leave it to soak in for about ten minutes before being worked in using a heavy rotary machine fitted with a black scrubbing pad. The resulting slurry is removed using a wet pick up vacuum. All the dirt and virtually all of the old sealer was removed at this stage; the remaining patches around the edges of the area being finished by hand with a 200-grit burnishing block. The grout lines were then cleaned by hand with an angled grout brush.

Terracotta Tiled Kitchen Floor During Restoration Moulton Terracotta Tiled Kitchen Floor During Restoration Moulton

Finally, the deep-seated oil stains in front of the cooker were brought out using Tile Doctor Oxy-Gel which was left to dwell on the marks for an hour before being agitated with a diamond burnishing pad and rinsed away with a wet pick up machine. The floor was rinsed with water and allowed to dry off overnight.

Terracotta Tiled Kitchen Floor During Restoration Moulton

Sealing a Terracotta Tiled Kitchen Floor

The following day I inspected the floor and checked it was ready to be sealed. All was well so I applied an initial coat of Tile Doctor Colour Grow which is an impregnating sealer that occupies the pores in the tile enhancing the natural colours of the Terracotta and provide a base layer of protection from staining.

Terracotta Tiled Kitchen Floor After Restoration Moulton

I returned at a convenient time once the kitchen was completely installed to finish the job. This involves carrying out a light maintenance clean with Tile Doctor Neutral Cleaner and once the floor was dry, I applied 5 further coats of Tile Doctor Seal and Go which provides a pleasing satin finish which is really suited to this type of floor.

Terracotta Tiled Kitchen Floor After Restoration Moulton

The customer was very happy with the results and has left the following feedback.

“We were really pleased with the results, thank you!”

Terracotta Tiled Kitchen Floor After Restoration Moulton


Professional Restoration of a Terracotta Floor in Northamptonshire

Cleaning a Terracotta Tiled Kitchen Floor in Moulton Read More »

Limestone Tiled Floor Before After Cleaning and polishing Yelvertoft

12-Year-Old Limestone Floor Renovation in Yelvertoft

I was called in to look at this Limestone tiled kitchen and hallway floor that had been installed 12 years prior at a small cottage in Yelvertoft. Yelvertoft is a small village with a population of less than a 1000 people near Daventry, with the Grand Union Canal passing close by.

I always like to do a site visit to survey the floor before recommending a solution, photographs help but you can never be certain until you have had chance to run some tests and discussed the history of the floor with the owner. As it turns out the stone had not been professionally cleaned and sealed since it was installed and was now in a bad state. So much so that my client was concerned it was beyond restoration and had considered replacing the floor.

Limestone Kitchen Floor Before Renovation Yelvertoft

I carried out a cleaning test on a small area and although it was very badly soiled, I found the Limestone responded well to our cleaning processes. The client was quite surprised as they had almost given up on it! We discussed the process involved, which would take two days and worked out a cost for the works. Confident I would do the job well my quote was accepted, and a date set for my return.

Limestone Kitchen Floor Before Renovation Yelvertoft

Cleaning a Limestone Tiled Kitchen and Hallway Floor

Arriving on the first day, we noted that there was a fairly new oak stairway and beam that had been fitted. I protected these and the kitchen units with a protective wrap to prevent any splashes from the cleaning process.

To restore the appearance of the Limestone I started with the application of a set of Tile Doctor Burnishing pads beginning with a very coarse 200-grit pad instead of the usual 400-grit. I reasoned that with the Stone being in such bad condition it could benefit from the coarser pad which gives a very deep clean, removing light and medium scratches by resurfacing the top of the tile. The pads are applied with water to lubricate and the fine slurry generated is rinsed off afterwards with more water and then extracted with a wet vacuum. After applying the 200-grit pad this process is repeated with increasingly higher grit pads to further hone the stone and eventually finishing with a very fine 3000 grit pad to achieve a polished finish.

Once I was satisfied with the Limestone tiles a strong dilution of Tile Doctor Pro-Clean and Grout Clean-Up was used to remove the stubborn staining from the grout lines. The floor was given a final rinse and extraction and you could see a huge improvement in the floor which looked lighter and much cleaner.

Sealing a Limestone Tiled Kitchen and Hallway Floor

I allowed the floors to dry off overnight and returned the next day to apply a sealer first checking for moisture with a damp meter to ensure the floor was dry and ready for sealing.

To seal the Limestone, I chose Tile Doctor Ultra Seal Sealant which is a no-sheen, natural-look, penetrating sealer that is formulated to provide maximum stain protection, especially in food preparation areas like the kitchen. It is also an excellent grout sealer, but mainly it gives a lovely natural finish allowing the variations in the natural Limestone to shine through.

Limestone Kitchen Floor After Renovation Yelvertoft

The pictures and clients’ testimonial really do speak for themselves; I was really pleased that she was so satisfied with the result and had saved a fortune in relaying the floor.

“I was about to replace my Limestone 12 year old floor … then Phil the Tile Doctor worked his magic… I now have a good as new lovely floor, I am absolutely delighted. Thanks, so much Phil.” Louise O, Yelvertoft

Limestone Kitchen Floor After Renovation Yelvertoft


Limestone Tiled Floor Professionally Cleaned and Polished in Northamptonshire

12-Year-Old Limestone Floor Renovation in Yelvertoft Read More »

Victorian Hallway Tiles Before After Restoration Wellingborough

Restorative Cleaning of Victorian Hallway Tiles in Wellingborough

I recently visited a property in Wellingborough to survey their Victorian Hallway floor and work out the best method and products to restore it. The tiles were extremely dirty as the sealant had worn off allowing dirt to become ingrained. They had not been maintained for many years and there was evidence of adhesive which was due to a carpet being stuck down at some point in the past.

Victorian Tiled Hallway Floor Wellingborough Before Restoration

To restore the Victorian floor, I would need to remove the glue and give the tiles a professional deep clean to extract the years of ground-in dirt and staining. Following this the tiles would need sealing in order to protect them going forward. After discussing the work in detail with the owner I sent over a quotation by email which was accepted, and a date arranged for work to commence.

Victorian Tiled Hallway Floor Wellingborough Before Restoration

Restorative Cleaning of Victorian Hallway Tiles

On my return I applied a cocktail of Tile Doctor Oxy-Gel and Tile Doctor Nano-Tech HBU to the tiles. This creates a strong cleaning/coatings remover that would soften the embedded soiling and glue making it easier to remove. I left this to dwell on the floor for about an hour so it could break down the soil and adhesive. I then fitted a coarse 100-grit diamond pad to a rotary floor buffer and scrubbed the floor vacuuming up the resulting residue as I went along working in small sections of 2/3 metres at a time. I then repeated the process using a 200-grit pad, rinsing and extracting afterwards with water to remove the fine slurry this process generates.

Old floors like these were laid before the invention of the damp proof membrane which can result in moisture rising through the floor as it evaporates potentially leaving alkaline salt deposits on the surface. This process is known as Efflorescence and although I minimised the use of water during the cleaning process, I was concerned that this may still present a problem later. To neutralise any alkaline salts in the floor that could cause this problem my last action for the day was give the floor an acid wash using Tile Doctor Acid Gel.

Once this was done and extracted from the floor, I followed up with a further clean using Tile Doctor pH Neutral Tile Cleaner which was applied with a microfibre cloth. I left the floor to dry off overnight so it could be sealed the next day.

Sealing Restored Victorian Hallway Tiles

On day two I used a damp meter to check the moisture levels in the floor to ensure it had dried overnight. The results were good, so I set about applying the sealer. For this floor I decided to go with three coats of Tile Doctor Colour Grow which is an impregnating sealer that as well as protecting the Victorian tiles form staining also enhances the colours in the tile. This sealer is also fully breathable so any moisture will be able to evaporate up through the tile and not get trapped under the floor where it could cause problems.

Victorian Tiled Hallway Floor Wellingborough After Restoration

Before leaving I also discussed maintenance cleaning with the customer and left them a bottle of Tile Doctor Neutral Tile Cleaner which is safe to use on sealed floors and will help keep the tiles looking at their best. It’s supplied in concentrated form so it should last them some time before they run out. The customer was very happy with the end results and has left positive comments on our website.

Very happy with the restoration of my Victorian tiled floor, cleaned, sealed and polished bringing it back to life. Phil was prompt to get back to me with any aftercare questions/queries/visits. Paula B, Wellingborough

Victorian Tiled Hallway Floor Wellingborough After Restoration


Victorian Hallway Tile Restoration in Northamptonshire

Restorative Cleaning of Victorian Hallway Tiles in Wellingborough Read More »

Flagstone Tile and Grout Before After Cleaning Long Buckby

Clean and Seal a Flagstone Floor in Long Buckby

A client in the village of Long Buckby called us out to look at her Flagstone floor that needed some love and attention. As you can see in the pictures the floor was looking very dull which was due to dirt becoming ingrained in the pores of the stone.

The Flagstone tiles were installed in the dining room and well suited the look of the period property. Long Buckby is a small village with a long history that dates to the Vikings and is situated midway between Rugby and Northampton, so not too far from my base over in Rushden.

Flagstone Floor Before Cleaning Long Buckby

I went over to inspect the floor and could see the Flagstone and grout was in need of deep clean to extract the dirt. It looked as if they had never been sealed since installation which according to the owner was many years ago. With no sealer to protect the pores of the stone it wouldn’t have been long before the build-up of dirt had become unsightly in the high traffic areas. I discussed with the client the best way to clean the floor and we agreed a price for the work to be done, booking it in for the following week.

Flagstone Floor Before Cleaning Long Buckby

Cleaning and Restoring a Flagstone Tiled Dining Room Floor

To start I decided to apply a dedicated cleaning agent, Tile Doctor Pro-Clean. The cleaning solution was sprayed onto the floor and then left to soak in for about twenty minutes. It was then agitated with a buffing machine fitted with a black scrubbing pad and also with stiff brushes run along the grout lines. The soiled solution was then extracted using a wet vacuum and the floor rinsed with clean water and left to dry.

As the floor dried, we could see that the deep clean was a success and that we had managed to clean the floor and remove all the embedded dirt in one go. This is quite rare, and normally more work is required before it meets the standard we aim for. The floor was left to dry overnight in preparation for the all-important sealing process.

Sealing a Flagstone Tiled Dining Room Floor

Returning the following day, we checked the floor was dry enough to seal with a moisture meter. It met the acceptable level, so we sealed the floor with Tile Doctor Colour Grow which is an impregnating sealer that helps bring out the deep colour from within the flagstone.

Colour Grow also offers superior protection from everyday staining and will prevent dirt from reaching the pores of the stone so it keeps its appearance for some years to come. Another benefit is the sealer is breathable which is useful for older properties with no damp proof course membrane, as the sealer allows the floor to pass moisture from the sub floor. Three coats of sealer were applied, allowing each coat to dry before applying the next.

Flagstone Floor After Clean Seal Long Buckby

The client was over the moon with the result, as you can see from the pictures the floor was now looking good and should be easier for them to maintain.

Flagstone Floor After Clean Seal Long Buckby

For general cleaning and to get a longer life out of the sealer we recommended the use of Tile Doctor Neutral Tile Cleaner. It’s super concentrated product so a small amount product goes a long way.


Professional Renovation of Flagstone Tiled Flooring in Northamptonshire

Clean and Seal a Flagstone Floor in Long Buckby Read More »

Slate Tiled Floor Before and After Renovation Ravensthorpe

Cleaning and Sealing Multi Coloured Slate Flooring in Ravensthorpe

I recently visited a customer living in the village of Ravensthorpe, just outside Northampton to rejuvenate a 15-year-old multi coloured Chinese riven slate floor that needed a deep professional clean. Slate is a hard-wearing tile used for flooring high traffic areas but does need sealing to bring out its best features. In this case the sealer had long since worn off and dirt had become ingrained in the stone making it difficult to clean effectively.

Chinese Riven Slate Kitchen Floor Before Cleaning Ravensthorpe

We discussed the client’s requirements and the cleaning process I planned to follow to rejuvenate the floor. I had to check on availability, so I e-mailed over a quote and some dates later that day. They were happy with my proposal and agreed for the work to be done whilst the customers were on holiday.

Chinese Riven Slate Kitchen Floor Before Cleaning Ravensthorpe

Cleaning Riven Multi Coloured Slate Tiles

My first task was to test a small area to determine which products would give the best results. In this case, I decided to start with a strong dilution of Tile Doctor Remove and Go which is a strong alkaline cleaner/coatings remover that’s safe to use on Tile and Stone. I spread this solution across a section of the floor and left it to seep into the pores of the stone and lift out the ingrained dirt.

Chinese Riven Slate Kitchen Floor During Cleaning Ravensthorpe

After allowing the solution adequate time to dwell, I scrubbed the slate with a carbon brush fitted to a rotary machine to gradually reveal the fantastic natural colours of the Slate hidden beneath the dirt. Happy with my choice of cleaning product I repeated this process in sections until it had been carried out throughout the entire area. Following this, I rinsed the entire floor several times with clean water, before soaking up the resulting soiled residue with a wet vacuum.

Chinese Riven Slate Kitchen Floor During Cleaning Ravensthorpe

The next part of the cleaning process entailed paying attention to the grout lines which were scrubbed using Tile Doctor Grout Clean-Up. The resulting residue was promptly extracted with the wet vacuum and I finished by giving the whole floor a rinse with Tile Doctor pH Neutral Tile Cleaner. This is a day to day tile cleaning product which is recommended for stone floors, many supermarket tile cleaning products are only suitable for ceramic tiles due to their acidic formula and can damage a floor over years of use so you should always read the label. However, I always leave my clients with a complimentary bottle of a suitable Tile Doctor product to maintain their floors.

Sealing Riven Multi Coloured Slate Tiles

The floor was left to dry off overnight and I returned on the second day to seal the floor. Before starting I checked the floor was dry using a damp meter which confirmed the Slate was dry and ready to seal. The floor must be completely dry before sealing as any excess moisture has the potential to the damage the performance of the sealer. Since my client had specifically requested a silk finish, I opted to use Tile Doctor Seal and Go which dries to leave a lovely subtle sheen that really enhances the look of the stone. Five coats were applied to ensure a good hard-wearing protection.

Chinese Riven Slate Kitchen Floor After Sealing Ravensthorpe

My client was very pleased with the results, particularly as they hadn’t realised how much colour it had lost over the years and left the following feedback on our website.

”I despaired of having a clean-looking floor again. Phil Vissian assured me that intensive deep cleaning and resealing could restore our fifteen year old, subtly coloured, Chinese riven slate kitchen floor. He has done a fantastic job. Looks like new, and I shall book Phil for an annual professional clean, so that it never gets as bad again.” Sally M, Northampton

Chinese Riven Slate Kitchen Floor After Sealing Ravensthorpe


Cleaning and Sealing a Slate Tiled Floor in Northamptonshire

Cleaning and Sealing Multi Coloured Slate Flooring in Ravensthorpe Read More »

Limestone Tiled Flooring Before and After Renovating Ecton

Honed Limestone Floor Renovated in Ecton

I was contacted by the owner of a property in the picturesque village of Ecton who was concerned that her Limestone floor spanning the kitchen and open plan breakfast area was starting to lose its natural appeal and was finding it harder to clean and maintain.

Limestone Tiled Dining Room Floor Before Renovation Ecton

I went over to take a closer look at the floor and carry out a survey. In order determine the best cleaning method I conducted a test on a small area of the floor. This gives the clients confidence in my abilities and a good idea of what result we they can expect. The Limestone was honed smooth but was not polished and the customers were keen not to add too much of an unnatural shine to the floor. The grout lines in some of the more heavily used areas, such as by the sink, were also discoloured and would require a decent scrub with an appropriate cleaning product.

I spoke to the clients about options for the finish to be applied after cleaning and they decided that they wanted to keep the tiles as light as possible with a slight shine. With the clients impressed with the test area I prepared I went away and produced a detailed quote which was e mailed to them along with our general T&Cs and the work was booked in to be completed shortly after.

Limestone Tiled Kitchen Floor Before Renovation Ecton

Cleaning a Limestone Tiled Floor

The floor covered quite a large area, some 38m2, and had some larger items of furniture that needed to be moved before starting. The first task was to scrub the grout lines with a specialist grout brush, designed to work the product into the grout. Limestone is an acid-sensitive stone, so a strong alkaline cleaner was required. I used Tile Doctor Pro-Clean mixed with warm water at a ratio of 3:1 which was left to dwell for around twenty minutes.

The area was then rinsed with water and the soil extracted before applying a series of diamond impregnated burnishing pads attached to a rotary scrubbing machine, ranging from a coarse 400 grit (200 in some of the more stubborn areas), a medium 800-grit and finishing with a fine 1500 grit to clean the stone. The whole area was then rinsed again and extracted using a wet pick up vacuum. The floor was then left to dry overnight.

Sealing a Limestone Tiled Floor

The following day a very fine 3000 grit diamond pad was used to ‘spray burnish’ the floor which uses very little water and ensures that any remaining residues are lifted as well as finishing the floor in the highest level of mechanical polishing possible prior to sealing.

If the clients desired a higher level of shine a powdered high shine sealer would have been worked into the tiles to achieve a highly reflective surface, however the mechanical polish was the highest level of shine wanted.

My client requested a completely natural finish so to seal the stone after cleaning I applied an impregnating sealer called Tile Doctor Ultra Seal. Impregnating sealers soak into the pores of the tile protecting them from within and Ultra-Seal doesn’t alter the appearance of the floor and so maintained the natural appearance of the stone keeping it as light as possible.

Limestone Tiled Kitchen Floor After Renovation Ecton

Aftercare instructions along with a bottle of suitable pH Neutral Tile Cleaner were supplied.
The customer was thrilled with the result and was surprised at the transformation of the floor, they even left the following feedback on the Tile Doctor website.

“Thank you so much Phil for a professional service resulting in my floor looking just as I wanted it too. You were attentive to all detail. I would strongly recommend Phil as a trustworthy, honest person to anyone who is considering work done. See you again in the Summer Phil to clean my patio. Natalie W, Northampton”

Limestone Tiled Dining Room Floor After Renovation Ecton


Cleaning and Sealing a Limestone Tiled Floor in Northamptonshire

Honed Limestone Floor Renovated in Ecton Read More »

Terracotta Tiles Before After Deep Cleaning and Sealing Maidford

Terracotta Tiled Kitchen Floor Renovated at a Maidford Cottage

This Terracotta tiled floor was installed in the kitchen of a cottage in the small village of Maidford near Towcester. The tiles were not looking their best and the owner of the property realised it was time to do something about it and contacted Tile Doctor to have the floor stripped and resealed. Stripping and Sealing tile and stone floors is our bread and butter so I was more than happy to pop round and survey the floor which was approximately 9m2.

The grout had darkened with dirt and the previous tile sealer was failing so dirt was now getting ingrained in the Terracotta making it difficult to clean in places and leading to a patchy appearance. We discussed the work involved, my quote was accepted, and a date agreed for me to return and complete the work which would take two days, one to clean and one to seal.

Terracotta Tiled Kitchen Floor Before Cleaning Maidford

Stripping Terracotta Kitchen Floor Tiles

After tidying up the Kitchen and removing the kickboards from underneath the kitchen units I set about working on cleaning and stripping the Terracotta floor of old sealers. To start I tested a small area with a strong dilution of Tile Doctor Wax Away. Wax was quite often used on Terracotta so I figured this product would be a good place to start. My suspicions were proved correct, and I found this to be the best product for removing the many layers of sealant on the floor. Wax Away is a new alkaline product by Tile Doctor and ideal for cleaning clay-based tiles such as Terracotta.

Terracotta Tiled Kitchen Floor During Cleaning Maidford

With my sights set on the rest of the floor Wax Away was scrubbed into the tile using a 17” rotary floor scrubbing machine and a black scrubbing pad running on a slow speed which helps to reduce splashing. This activity soon brought the dirt off the floor and the soiled cleaning solution was removed using a wet vacuum and the floor was rinsed down with clean water. The cleaning process was repeated a couple of times until I was happy with the floor, a stiff hand brush was then used along the grout lines with a dilution of Tile Doctor Pro-Clean to clean up the grout.

Terracotta Tiled Kitchen Floor During Cleaning Maidford

After rinsing and extracting the floor again the floor was inspected, and I noticed there were a few stubborn paint splashes on the tiles. I managed to remove these and these by spot treating the affected area with Tile Doctor Remove and Go and a steamer to lift the stain out of the clay tile. Once happy the floor was clean it was given a thorough rinse to neutralise it and remove any trace of cleaning products and then left it to dry.

Terracotta Tiled Kitchen Floor After Cleaning Maidford

Sealing Terracotta Floor Tiles

I allowed the floor to dry for several days before returning to seal the Terracotta using numerous coats of Tile Doctor Seal and Go which is an ideal sealer for Terracotta and provides durable stain protection together with a low sheen finish. Terracotta is by its nature very porous and so it’s not unknown for it to take up to nine coats of sealer, which can take some time to apply as like paint you have to wait until it’s dry before it will take the next coat.

Terracotta Tiled Kitchen Floor During Sealing Maidford

The customer was so impressed by the results I achieved in their kitchen they decided to go ahead and book me in to carry out this process throughout the whole of the ground floor which included lounge, study and hallway.

Terracotta Tiled Kitchen Floor After Sealing Maidford


Renovating a Terracotta Tiled Kitchen Floor in Northamptonshire

Terracotta Tiled Kitchen Floor Renovated at a Maidford Cottage Read More »

Victorian Tiled Hallway Floor Before After Restoration Kettering

Victorian Tiles Discovered Under Lino Renovated in Kettering

The customer called me after she had removed the lino in her hallway to discover a traditional Victorian tiled floor hidden underneath. Unfortunately, at some time in the past this floor hadn’t been protected whilst decoration was carried out and had been heavily stained with splashes of paint. Although the customer had tried her best to clean the paint off the floor, she had found it was impossible to remove. She was really keen to restore the floor back to its’ former glory and see the back of the nasty looking lino!

I visited the property in Kettering which is a lovely town in Northamptonshire, approx. 15 miles from Northampton itself. The area is now very popular with commuters with regular trains heading to London St Pancras taking just one hour. As the pictures she had sent me showed the floor needed professional cleaning as no amount of household products would be able to remove the problem areas. I discussed with the customer what we could do to get the floor restored and we agreed a price for the work, scheduling it in for a few weeks later.

Victorian Tiled Hallway Before Cleaning Kettering Victorian Tiled Hallway Before Cleaning Kettering

Deep Cleaning a Victorian Tiled Hallway Floor

To clean the floor, it was first sprayed with a solution of Tile Doctor Remove & Go which was left to dwell for fifteen minutes to help soften the paint. We then used our heavy-duty scrubbing machine with the appropriate attachments to scrub the floor. A little warm water was added to the solution on the floor to help remove the paint as the scrubbing was underway. Once done a wet vacuum was used to remove the slurry generated by the scrubbing process.

This process was repeated several times in the most stubborn areas to ensure the floor was as clean as possible. This action removed around 90% of the paint which was a huge improvement, but more work was required before it would meet my standards.

To further improve the condition of the tiles my next course of action was to apply Tile Doctors 100 and 200-grit burnishing pads to the floor with water to help lubricate. After each pad the find slurry that was generated was extracted off the floor using the wet vacuum. This process reconditions the surface of the Victorian tile and removed the remainder of the paint, it also cleaned the remaining areas that needed further attention leaving the floor spotless. I left the floor to dry overnight and arranged to return the following morning to complete the restoration with the application of a sealer.

Sealing a Victorian Tiled Hallway Floor

The customer wanted the floor to look natural so requested a matt finish sealer, also being an old floor without a damp proof membrane I specified the sealer should be fully breathable so moisture can pass up from the sub floor and not become trapped under the tile where it could cause problems. With these factors in mind we agreed on Tile Doctor Ultra Seal which ticks all these boxes.

As you can see from the after pictures, the restorative cleaning process really did the trick. The colours in the floor were now nice and clear and the floor looked as it should.
The customer was over the moon with the outcome, she had not expected the finish achieved to be as good.

Victorian Tiled Hallway After Cleaning Kettering Victorian Tiled Hallway After Cleaning Kettering

No matter how bad you think the floor is with the use of professional machinery and Tile Doctor products we can restore most floors to a high standard, which certainly in this case exceeded the customers’ expectations.


Professional Restoration of a Victorian Tiled Hallway in Northamptonshire

Victorian Tiles Discovered Under Lino Renovated in Kettering Read More »

Tumbled Travertine Tiled Kitchen Floor Before After Renovation Braybrooke

Pitted and Dirty Tumbled Travertine Kitchen Floor Renovated in Braybrooke

I was called by the owner of a property in Braybrooke who was keen to have their Tumbled Travertine tiled kitchen floor renovated. The floor hadn’t been cleaned professionally for over eight years and the owner was concerned that dirt was getting trapped in the natural holes and crevices (pits) which are a natural feature of Travertine.

Pitted Tumbled Travertine Before Cleaning Braybrooke

I went over to survey the floor at the property in Braybrooke which is a lovely small village in north west Northamptonshire halfway between Market Harborough and Desborough. We carried out a test clean on two separate tiles in the kitchen, the customer was thrilled at how clean they came up and especially with the grout. She said it reminded her how they used to look when they were first installed.

Pitted Tumbled Travertine Before Cleaning Braybrooke Pitted Tumbled Travertine Before Cleaning Braybrooke

A quote to restore the floor was sent and was quickly accepted; a date was then agreed for the work to be completed. The job would take just two days to complete, one day to clean and then a return visit to seal the floor.

Cleaning a Tumbled Travertine Tiled Kitchen Floor

On our return the first thing we did was to protect the kitchen units by removing plinths and covering base units and appliances with a protective film. This ensures nothing is accidentally damaged during the process.

We then commenced work with a rotary scrubbing machine fitted with a tile brush attachment. This was used to scrub in a hot water dilution of Tile Doctor Pro Clean mixed 3:1. The slurry was then removed with a wet pick up, followed by cleaning the grout with hand brushes using more Pro-Clean. The strong alkaline product makes quick work of removing the ingrained dirt and grime and removing what was left of the original sealer.

The next step was to burnish the stone with a set of Tile Doctor Diamond Encrusted Burnishing pads which polish the floor to achieve an as new look. The pads are run over the Travertine tiles with water in sequence from coarse to very smooth. After each pad is applied the floor is rinsed with water and the slurry removed with the wet pickup machine.

Fans were left in place to assist drying the floor whilst I spent time filling the larger holes with filler in a colour chosen to match the existing floor as closely as possible.

Sealing a Tumbled Travertine Tiled Kitchen Floor

The floors were left to dry off fully overnight and I returned the next day to carry out the final polish with a very fine 3000 grit burnishing pad and to apply two coats of Tile Doctor Ultra-Seal which will protect the stone going forward. Ultra-Seal is a no-sheen, natural-look, penetrating sealer which is formulated to provide maximum stain protection and is especially recommended for food preparation areas like a kitchen.

Pitted Tumbled Travertine After Cleaning Braybrooke Pitted Tumbled Travertine After Cleaning Braybrooke

The floor looked so much better and the customer was very happy that it had been restored to its’ former glory as requested. She really thought the floor was beyond saving. We suggested that she used the Tile Doctor Stone Soap for ongoing cleaning. Most floor cleaning products sold in the supermarket are not recommended for the cleaning of natural stone as they can erode the sealer prematurely so always read the label.

Pitted Tumbled Travertine After Cleaning Braybrooke


Renovation of a Tumbled Travertine Tiled Floor in Northamptonshire

Pitted and Dirty Tumbled Travertine Kitchen Floor Renovated in Braybrooke Read More »

Pitted Travertine Floor Tiles Before After Renovation Weston Favell

Pitted Travertine Kitchen Floor Tiles Filled and Polished in Weston Favell

Travertine floor tiles are very appealing and very hardwearing, but without the protection of a sealer to stop dirt becoming ingrained in the pores of the stone their appearance will degrade. Fortunately, this can be remedied as demonstrated in these pictures of a Travertine floor I recently polished at a house in Weston Favell, Northampton.

Travertine Tiled Floor Weston Favell Before Polishing

This owner of the property had called me out as their kitchen floor was looking very sorry for itself and he was concerned that a lot of holes were appearing which was making cleaning the floor difficult as dirt was getting trapped in the holes. I went over and carried out a test clean on two separate tiles in the kitchen and the customer was amazed at how clean they came up and especially the grout.

Travertine Tiled Floor Weston Favell Before Polishing

The kitchen was stunning, but unfortunately the state of the Travertine tiled floor was bringing down its overall appearance. Impressed with the test clean they were keen to get the whole floor renovated so we agreed a price and I scheduled the work in for the following month.

Cleaning and Restoring Travertine Tiled Kitchen Floor

I returned on the agreed data and made a start by protecting the kitchen units by removing the plinths and covering base units and the appliances with a protective film. We then commenced the cleaning process to remove surface dirt by cleaning with Tile Doctor Pro-Clean paying special attention to the grout lines. The holes in the Travertine were filled with a stone resin, mixing it to closely match the colours of the stone.

The resin was allowed to dry before starting to re-polish the Travertine using a set of Tile Doctor Diamond encrusted burnishing pads. These pads are applied individually to each tile in sequence starting with a coarse 400-grit pad before moving onto the 800-grit and finishing with the fine 1500 grit pad. A little water is used to lubricate the process along the way and the floor is rinsed in between each pad with the resulting residue extracted from the floor using a wet vacuum. The process takes some time, but it really brings up the polished appearance of the stone and the results are well worth the effort. After a final rinse the floor was inspected and then left to dry off fully overnight.

Sealing a Travertine Tiled Kitchen Floor

When we returned the next day, the floor had dried, and we were able to give the floor a final polish with a very fine 3000-grit burnishing pad applied with a little water sprayed onto the tile. Finally, the floor was then sealed with two coats of Tile Doctor Ultra-Seal which provides excellent protection without changing the colour of the stone to provide a natural look.

Travertine Tiled Floor Weston Favell After Polishing

The client was over the moon with the outcome and surprised at the improvement. They were left with a floor that would be easy to clean and maintain.


Professional Restoration of a Travertine Tiled Kitchen Floor in Northamptonshire

Pitted Travertine Kitchen Floor Tiles Filled and Polished in Weston Favell Read More »

Stained Marble Tiled Floor Before After Polishing Northampton Northamptonshire

Marble Floor Tile Polishing in New Duston, Northampton

The Marble floor tiles in the pictures below covered a large kitchen, family room and utility area at a property in New Duston near Northampton. The client who was a builder had been recommended our services by one of his own clients, so he contacted us for advice on how to renovate the Marble flooring.

Marble Floor Restoration New Duston Before Polishing

I went to the property to survey the floor and could see straight away that the tiles were dull, lifeless with some staining and hardly recognisable as Marble. I recommended the floor was honed through a polished process known as burnishing, followed by the application of a sealer to provide durable protection for the stone. I organised a quote which was accepted, and we arranged a date for the work to start.

Marble Floor Restoration New Duston Before Polishing

Apologies in advance for the quality of the photographs, it’s tricky this time of year when the light is failing to capture a good photo.

Restoring Polish to a Marble Tiled Floor

I began the burnishing process, which involves the application of a set of Tile Doctor diamond encrusted burnishing pads attached to a 17” rotary machine. At Tile Doctor we work with a four-pad system that allows us to gradually refine the polish on suitable stone floors which generally including Marble, Travertine and Limestone. I started the process by applying a 400-grit coarse burnishing pad lubricated with a little water, working in small sections. Following this, I worked my way through the burnishing system, repeating the process with 800-grit medium and 1500-grit fine grit burnishing pads. I also used some small hand-held burnishing blocks in the difficult to reach corners and edges. The floor is given a quick rinse using a wet pick up machine between pads in order to remove the resulting slurry before starting with the next pad.

Marble Floor Restoration New Duston During Polishing

I left the floor to dry off overnight to give the Marble tile and grout time to dry and returned the next day to finish the polishing and seal the floor.

Sealing a Marble Tiled Floor

The last 3000-grit pad builds up a high polish on the floor and is applied dry with only a little water squirted on the tiles in a process we call a Spray Burnish. One of the advantages of this method is it leaves the floor dry so is ready for sealing.

Now that I had achieved a good level of shine, I then proceeded to seal the floor to protect the stone against future dirt, stains and damage, which is more common in busy areas of a house like the kitchen. I applied two coats of Tile Doctor Ultra Seal allowing drying time between each coat. This is a no-sheen, natural-look, penetrating sealer which is formulated to provide maximum stain protection, especially in food areas such as the kitchen. Once the sealant had hardened, I ran over the floor with a white buffing pad to further enhance the look of the Marble floor.

Marble Floor Restoration New Duston After Polishing

The customers were extremely happy with the results and as with all customers I advised on the best maintenance for their floor and provided a complimentary bottle of Tile Doctor Stone Soap to help them maintain the beauty of their floor.


Professional Restoration of Polished Marble Tiled Floor in Northamptonshire

Marble Floor Tile Polishing in New Duston, Northampton Read More »

Mosaic Tiled Edwardian Floor Cleaning Abington Park

Cleaning 100 Year Old Mosaic Tiles in Abington Park

My customer recently got in touch and requested a site visit to look at her hallway floor.
The Edwardian property was situated in the Abington Park part of Northampton which is an area is steeped in history, with the nearby Manor House said to have been the home of William Shakespeare’s daughter Elizabeth Bernard. The house has since been turned into a museum.

As you can see from the photos, the floor which was laid when the house was built over 100 years ago using small square brown and beige mosaic tiles in a repeating. Although in good physical condition for its age the floor was looking a little tired and had lost its lustre and vibrant colour. The hallway also had stained wood panelling on one side which was another original feature and the owner of the property was keen to maintain the period feel.

Edwardian Mosaic Tiled Hallway Floor Before Cleaning Abington Park

I discussed with the customer what we could do to restore the floor, explaining the process, timescale and of course the cost. She was happy to go ahead so we scheduled the work in without delay.

Edwardian Mosaic Tiled Hallway Floor Before Cleaning Abington Park

Cleaning an Edwardian Mosaic Tiled Hallway Floor

In order to protect the wall panels and keep the moisture in the floor to a minimum I decided to keep the use of cleaning products to a minimum. This is always a concern with these old floors which have no damp proof membrane as the use of too much water can lead to efflorescence salts appearing later. With this in mid I decided to clean the floor using Tile Doctor burnishing pads as these pads only require a small amount of water and no products, this would also have the benefit of slightly levelling out the surface of the tiles.

My first course of action was to vacuum the floor to ensure there was no loose debris followed by masking up the bottom of the stairs carpet to protect it. I then started the restoration process by using a coarse 100-grit Tile Doctor burnishing pad attached to a 17” industrial rotary machine and a small amount of water to lubricate the process. The 100-grit pad is quite an aggressive pad which removes deeply imbedded stains and as mentioned before a small amount of unevenness. To remove the resultant slurry the floor was rinsed with a small amount of water which was then extracted using a wet pick up machine. This process was then repeated with a 200-grit burnishing pad to smooth out any scratches and polish the tile ready for sealing.

Although it was a relatively small area, 12 square metres this process took the whole day as we work in small sections at a time. Moving the machine slowly with multiple passes over each area.

Sealing an Edwardian Tiled Hallway Floor

I returned the following day and assessed the floor to ensure we were happy with the result from the previous days cleaning. I also took damp meter readings and was pleased to see they were within normal expectations for a floor of this age. Next, I applied Tile Doctor Colour Grow Sealant which is a breathable sealant that will allow any moisture in the sub floor to rise though the tile. This particular sealer is a colour enhancing sealer that protects and improves the natural colours in the tile and leaves a lovely natural finish. The floor now has a much more even finish and will be much easier for the client to maintain in the future.

Edwardian Mosaic Tiled Hallway Floor After Cleaning Abington Park

The customer was very happy with the results and left the following feedback on the Tile Doctor feedback system.

“Great communication about the work planned and quotation. A super job in bringing my Edwardian mosaic tiled floor back to life. Would highly recommend this service”
Karen M”

Edwardian Mosaic Tiled Hallway Floor After Cleaning Abington Park


Professional Restoration of Mosaic Hallway Tiles in Northamptonshire

Cleaning 100 Year Old Mosaic Tiles in Abington Park Read More »

Limestone Flagstones Before and After Renovation Clipston

Limestone Tiled Floor with Grout Haze Cleaned in Clipston

These photos are of a Limestone tiled floor which was installed in the Kitchen of a property in the small parish of Clipston, which is close to the towns of Market Harborough and Daventry, approximately three years ago. The customer was never very happy with it since it was laid as it never seemed to look clean asked me to cover over and work out what could be done.

On my initial visit I soon realised that the installer had not cleaned off all the grout from the tiles before applying the sealer. This effectively trapped the grout under the sealer and gave the whole floor a dirty appearance, this explained the problem the customer was frustrated with as she could never ever seem to get the floor looking clean.

Limestone Floor With Grout Haze Before Cleaning Clipston
This issue is known as Grout Haze or Grout Smears and is a problem we often come across where the floor has been laid without the excess grout residue being completely polished off the tiles after the grouting. Some manufacturers recommend the tiles are sealed before grouting to make it easier to polish the grout off later. After discussing how we could remedy this I issued a quote which the customer accepted, and we scheduled the work to be done.

Limestone Floor With Grout Haze Before Cleaning Clipston

Removing Grout Haze from Limestone Kitchen Tiles

I arrived on site on the arranged date, as it was a painted kitchen it was not possible to mask up the units, so I used a small hand-held polishing machine fitted with a six inch 400-grit burnishing pad to carefully clean around the edges and break through the sealant. This process was then repeated with a larger seventeen inch 400-grit burnishing pad fitted to a floor polishing machine throughout the rest of the area.

Once the original sealant had been removed using the burnishing pad the next step was to remove the Grout Haze by given the floor an acid wash with Tile Doctor Acid Gel. Being a gel, this product is easier to control than a liquid and sits on the surface where it’s needed to break down the unsightly Grout Haze. It’s left to dwell for a short period before being worked in with a special brush that is designed for this purpose. The resulting slurry is then removed with a professional wet pick up machine and the floor given a rinse with water to remove any trace of the product.

After treating the Grout Haze my next step was to refine the surface of the Limestone using a medium 800-grit and fine 1500-grit diamond encrusted burnishing pad which are applied with water and restore the polished appearance of the stone. The floor is rinsed with more water between the application of each pad to remove the slurry that is generated and then dried with the wet pickup machine.

Sealing a Limestone Tiled Kitchen Floor

I returned the following day to buff the tiles with a white polishing pad as the customer didn’t want a high shine finish which is normally achieved with the 3000-grit diamond burnishing pad, this gave a low sheen honed look as the customer had requested. The floor was then sealed with two coats of Tile Doctor Ultra-Seal which is a natural look sealer that and will protect the newly restored and polished tiles going forward.

Limestone Floor With Grout Haze After Cleaning Clipston
The customer was very happy with the results and has left the following positive feedback on our website.

‘Professional, floor looks much better’ – Vicki S, Clipston

I gave the customer some tips on maintenance and a complimentary bottle of Tile Doctor Stone Soap to enable her to keep the floor looking its best, this product is designed for the regular cleaning of polished stone floors and is pH neutral, so it won’t prematurely degrade the sealer.

Limestone Floor With Grout Haze After Cleaning Clipston
 

Professional Restoration of a Limestone Tiled Kitchen Floor in Northamptonshire

Limestone Tiled Floor with Grout Haze Cleaned in Clipston Read More »

Scratched Victorian Hallway Tiles Before After Renovation Rushden

Removing Wax Scratches from Victorian Hallway Tiles in Rushden

This customer called me as she was concerned about the scratches on her hallway tiles, they were not only unsightly but were also starting to trap dirt. The Victorian property in Rushden which lies between Bedford and Kettering on the east side of Northamptonshire.

We always offer a site visit to take a look at the job before doing any work, that way we can discuss what the cleaning options are, and it also demonstrates to the customer that we know what we’re talking about.

The hallway floor was a lovely and intricate example of Victorian tile installation and I could see that overall it was in good condition for its age. On closer inspection the customer was relieved to find out that it was the old wax sealant breaking down and not actually scratches on the tiles. I carried out a test on a small area to ascertain how difficult it would be to remove this wax. I realised I would be able to use Tile Doctors new product for the removal of the wax sealant, Tile Doctor Wax Away which is a fast and effective formula that is designed just for this type of job, it offers safe removal of wax and polish from tile and natural stone. We agreed the quote and the work was booked in for the following month.

Victorian Tiled Hallway Floor Before Wax Removal Rushden

Cleaning/Repairing a Victorian Tiled Hallway Floor

On our return we started to remove the wax coating using the Tile Doctor Wax Away product. It was applied neat and left to dwell for ten to fifteen minutes before working it into the floor with a small amount of water and a black stripping pad attached to a rotary machine. The resulting slurry was then removed using a wet vacuum. The floor was then inspected, and I decided to repeat this process with a hand brush in a couple of small areas and around the edges to ensure the old wax sealant was fully removed in these stubborn areas. The floor was then rinsed with water to remove any remaining slurry and trace of cleaning product and the wet vacuum was used to dry the floor again.

Victorian Tiled Hallway Floor During Wax Removal Rushden

My next course of action was to run over the floor with a 400-grit burnishing pad to remove imbedded dirt and stains from the tiles, this was followed by a second rinse with water. After removing the water with wet vacuum, the floor was then left to dry out fully for a few days aided by a large fan that I left on site. It’s important that the tiles are fully dry before applying a sealer and this is even more important on older floors where no damp proof membrane has been installed.

Sealing a Victorian Tiled Hallway Floor

I returned three days later and started by giving the floor a light vacuum and clean. I also took damp meter readings to check the floor was fully dry. Once I was satisfied I started to apply 2 coats of Tile Doctor Colour Grow Sealant, this is a breathable sealant which will allow the tiles to breath and allow moisture vapour from the sub floor to rise through the tiles which is important in these old houses where no damp proof membrane exists. Colour Grow is an impregnating sealer that works by occupying the pores in the tile thus preventing dirt from becoming ingrained there, the sealant enhances the natural colours in the tile and dries to a lovely natural matt finish.

Victorian Tiled Hallway Floor After Cleaning Rushden

Once finished the floor looked great and the customer was hugely relieved that the tiles could be restored easily and cost effectively, she had thought the damage may have been irreversible. Moving forward it will now be easier for her to maintain and keep clean. The floor is now back to its’ true self and properly in keeping with the rest of the period features in the house.

Victorian Tiled Hallway Floor After Cleaning Rushden


Professional Restoration of a Victorian Tiled Hallway in Northamptonshire

Removing Wax Scratches from Victorian Hallway Tiles in Rushden Read More »

Indian Sandstone Patio Northampton

Indian Sandstone Patio Northampton

The scorching hot summer has meant we are all in the garden and making much more use of our outside spaces. Our client got in touch because her Indian Sandstone patio was looking a little unloved. Looking forward to entertaining outside it was time to bring it back up to scratch so it wouldn’t be an embarrassment.

This house in Northampton which is the county town of Northamptonshire, lying on the River Nene it is one of the largest towns in the UK, had a lovely large patio. The Sandstone paving was looking tired and dirty, it was covered in lichen, embedded soil and was missing grout. I discussed with the client how Tile Doctor could help, and she agreed to go ahead so I returned a few days later. Indian Sandstone is a very hardwearing material, but one of the biggest problems we find with stone flooring outside is it soon becomes stained by the elements, especially with our great British weather, sun, (acid) rain, and ice. Without its’ protective sealer porous stone quickly becomes ingrained with dirt making it increasingly difficult to clean effectively.

Indian Sandstone Patio Before Cleaning Northampton

Cleaning and Restoring Indian Sandstone Patio in Northampton

I pre-treated the entire are with a medium dilution Tile Doctor Pro-Clean and left it to dwell for about 15 minutes, so it started breaking down the soil. This is a highly concentrated multi-purpose high-alkaline cleaner which is great on heavily soiled areas, breaking down the dirt and the lichen. This was then scrubbed in using a rotary machine and stiff buffing brush.

This was followed by pressure washing and rinsing the entire area with water, removing the soiled waste with a wet vacuum. It is always a little easier carrying out this type of messy job as we are outside. This process took much of the day to complete and got the Indian Sandstone tiles really clean. They were already looking good and had changed from a dull grey colour to a lovely warm beige.

Indian Sandstone Patio After Cleaning Northampton

Grouting and Sealing Indian Sandstone Patio Northampton

I allowed a few days for the area to dry and then returned to finish renovating the patio, thankfully the weather remained dry! My first task was to re-grout areas where the grout had become loose, this made an instant difference defining the tiles as they should be, also this will prevent the problem with weeds growing between the paving slabs.

Finally, I applied Tile Doctor Colour Grow Sealant to enhance the natural colours of the stone. Colour Grow is an impregnating sealer that soaks into the pores of the stone protecting it from within. It is also a breathable sealer which is ideal for external areas where moisture is an issue.

As you can see from the pictures this process made a huge impact and the colours appear much brighter, the customer was delighted with the results and she is looking forward to being able to enjoy her garden. The hot weather is thankfully continuing so she will be able to enjoy the space for many weeks to come.

Indian Sandstone Patio After Sealing Northampton
 

Clean and Restoration of an Indian Sandstone Patio in Northamptonshire

Indian Sandstone Patio Northampton Read More »

Renovating a Black Limestone Patio in Walgrave

Renovating a Black Limestone Patio in Walgrave

The following photos show a large black limestone patio that had been installed at a house in the village of Walgrave by a local builder who had sealed the stone before cleaning it first. Doing so trapped the dirt and grout smears (ka grout haze) underneath the sealer which resulted in a hazy appearance that could never be cleaned off.

Black Limestone Patio Before Cleaning Walgrave
Spring is an ideal time to work on patios which tend to get stained most from leaves and other detritus during the windy autumn and then ravaged by the winter frosts. If you want to seal the stone though its best to wait until a spell of continuous hot weather for the best results.

Black Limestone Patio Before Cleaning Walgrave

Cleaning a Black Limestone Patio

To clean the stone, I would first need to remove the builder’s sealer, so I started by applying Tile Doctor Remove & Go which is a strong product designed to safely remove coatings such as sealers and paint from stone and tile. A strong dilution of Remove and Go was applied to the floor and left to soak in for about ten minutes before being worked into the Limestone using a black scrubbing pad fitted to a rotary floor scrubbing machine. The soiled cleaning solution was then rinsed off the patio with water and extracted using a wet vacuum.

Black Limestone Patio During Cleaning Walgrave
With the sealer removed along with the dirt then next task was to tackle the smears of grout that had been left on the surface of the stone. To do this I applied a specially developed product called Tile Doctor Acid Gel which is left to dwell on the surface of the stone just long enough to weaken the unwanted grout which can be then scrubbed off. The solution is then rinsed off the patio and extracted as before. This process was done in sections worked across the length of the patio and then when finished it was given a through rinse.

Sealing a Black Limestone Patio

I would need the limestone patio to be dry before sealing so I left it fully dry out over the course of a few days before coming back to finish off, fortunately the weather was good, and it wasn’t long before I returned.

Black Limestone Patio During Sealing Walgrave
My sealer of choice for Black Limestone is Tile Doctor Colour Grow, it’s an impregnating sealer the penetrates the pores of the stone protecting it from within and simultaneously enhancing the natural colours in the stone. This product is also fully breathable which makes it ideal for external use or damp areas where moisture needs to rise through the stone and evaporate. Two coats of Colour Grow were all that was required to fully seal the stone.

Black Limestone Patio After Cleaning Walgrave
The work was a huge improvement to the look of the patio which is now vibrant, inviting and fully transformed by the process.

Black Limestone Patio After Cleaning Walgrave
 

Limestone Patio Maintenance in Northamptonshire

Renovating a Black Limestone Patio in Walgrave Read More »

Travertine Floor Tiles Filled and Polished in Abthorpe Near Towcester

Travertine Floor Tiles Filled and Polished in Abthorpe Near Towcester

The following pictures show a polished Travertine kitchen and dining room floor at a house in the small village of Abthorpe near Towcester. The stone floor had lost its shine and had become dull and difficult to clean which was mainly due to the holes that had appeared in the surface of the Travertine where dirt had become ground in and trapped. This is a common problem with all Travertine stone, the holes are natural and usually filled at the factory but due to wear and tear over time and the use of acidic cleaning products the filler can become dislodged. The small holes gave the floor an unsightly appearance and become magnets to dirt.

Polished Travertine Kitchen Floor Before Polishing Abthorpe Towcester
We find the best way to restore the shine is to apply a set of diamond encrusted burnishing pads, they take off the layer of dirt and then slowly build a resilient polish on the surface; however, to get the best results we would need to fill the holes in the Travertine.

Polished Travertine Kitchen Floor Before Polishing Abthorpe Towcester

Burnishing and Cleaning a Travertine Tiled Floor

I gave the floor a sweep to remove any loose dirt and grit and started with the application of the first pad which is a coarse 400-grit and designed to remove minor scratches, old sealers and ingrained dirt. The pads fit a 17” buffer machine and is applied with water to lubricate the process, then once the pad has been applied to each tile the floor is rinsed with water and the resultant slurry is extracted using a wet vacuum.

Before moving onto the second pad in the set I gave the grout lines a clean with Tile Doctor Pro-Clean which was scrubbed into the grout using a stiff narrow brush. The pads can struggle to reach into the recessed grout lines, so I usually find this is the best way to get the grout clean.

Polished Travertine Dining Room Floor Before Polishing Abthorpe Towcester
The floor was given another rinse with water and then I continued to work through the medium 800-grit and then fine 1500-grit pads rinsing with water and then extracting the slurry with a wet vacuum after each pad.

The Travertine was now clean and after drying with fans I commenced the task of filling the holes with stone filler that matched the natural colour of the stone as close as possible, in this case the colour we opted for to achieve the best match was Straw. These activities took up most of the day so once I was done filling I left for the day, so the filler and floor could dry out thoroughly overnight.

Polished Travertine Holes Filled Before Polishing Abthorpe Towcester

Sealing a Travertine Tiled Floor

I returned the following day and started by completing the polishing process by applying the last 3000-grit very fine burnishing pad with the 17” rotary machine, the pad is applied dry with a small amount of water sprayed on the floor as you go along. With the floor now fully dry and the filled holes polished flat the last step was to apply the sealer which will protect the floor going forwards.

Polished Travertine Kitchen Floor After Polishing Abthorpe Towcester
With Travertine floors I usually recommend Tile Doctor Colour Grow which is a colour enhancing sealer or Ultra-Seal which is a natural look sealer. On this occasion the client preferred the natural look, so I applied two coats of Tile Doctor Ultra Seal and along with the previous polishing the floor now look transformed.

Polished Travertine Kitchen Floor After Polishing Abthorpe Towcester
 

Professional Travertine Tiled Floor Restoration in Northamptonshire

Travertine Floor Tiles Filled and Polished in Abthorpe Near Towcester Read More »

Honed Limestone Kitchen Floor Restoration Upper Boddington Daventry

Honed Limestone Kitchen Floor Restoration – Upper Boddington, Daventry

The following photos show a recent job we undertook at a timber framed house in the village of Upper Boddington, just south of Daventry. The client was having a new kitchen installed but didn’t want to replace the floor as it was generally in good condition, just dull with some staining and general wear and tear.

As the photos show the kitchen units had already been removed and as the tiles were wall to wall this was an ideal time to have this work carried out as the kitchen was being reconfigured and the customer wanted the floor to look uniform throughout, we also included the hallway in the cleaning process.

Honed Limestone Floor Before Restoration Upper Boddington

Burnishing and Cleaning Polished Limestone Tiles

With tiles made of Limestone, Travertine, Marble and other high quality polished stone, we find that the best way to restore appearance is through a process known as burnishing and in the before photo you will see the specialised grinding and polishing equipment we use to achieve brilliant results and a professional finish.

Honed Limestone Floor Before Restoration Upper Boddington
As the tiles were worn and stained in the high traffic areas we applied Tile Doctor Pro-Clean which had been diluted and decanted into a pump-up sprayer. After leaving it to soak in for ten minutes it was scrubbed into the tile and grout using a rotary floor machine and a stiff brush. This was followed by washing and rinsing of floors with water and extracting the soil with a wet vacuum.

The next step was to apply a full set of Tile Doctor Stone Burnishing pads from 200 grit, 400 grit, 800 grit and finishing with 1500 grit for a honed look. We worked through the pads in 10 metre sections at a time lubricating with water and rinsing with water between each pad.

The kitchen and hallway floors were then allowed to dry out fully overnight.

Sealing Polished Limestone Tiles

The next day I returned to the property and completed the polishing process by applying the very fine 3000 grit burnishing pad with a little water and leaves a high shine finish.

The floor was then sealed with three coats of Tile Doctor Ultra Seal, which is a premium, natural look, impregnating sealer designed to provide maximum stain protection without altering the colour of the stone. The sealer takes an hour to dry and with three coats to apply it took most of the day to finish.

Honed Limestone Floor After Restoration Upper Boddington
The customer was happy with the results and left the following 5-star review on our site.

“Superb Service Chris P, Daventry”

Honed Limestone Floor After Restoration Upper Boddington
 

Professional Cleaning, Polishing and Sealing of a Honed Limestone Floor in Northamptonshire

Honed Limestone Kitchen Floor Restoration – Upper Boddington, Daventry Read More »

Pitted Travertine Floor Tiles Filled and Polished in Rushden

Pitted Travertine Floor Tiles Filled and Polished in Rushden

Not only do we carry out the deep cleaning and restoration of all types of natural stone, we can also carry out repairs such as the filling of holes in stone, whether it be limestone, marble or as in this case Travertine. Travertine in particular is prone to a natural process of erosion know as pitting, this results in holes developing that easily fill up with dirt and muck over time and can be a real problem to maintain.

Pitted Travertine Before Filled Polished Rushden
This customer in Rushden called me in, as he felt the floor hadn’t been properly maintained since it had been installed twelve years prior and he was becoming concerned about the number of holes and pits that were appearing in the high traffic areas. The Travertine tiles had been laid in the hallway, kitchen and upstairs bathroom of the property but the problem was most apparent in the Kitchen.

Pitted Travertine Before Filled Polished Rushden

Burnishing and Cleaning a Travertine Tiled Floor

To get the floors clean and restore the polished appearance of the Travertine I decided to apply a set of Tile Doctor diamond encrusted burnishing pads. The process involves the application of four different pads applied in sequence from coarse to very fine, rinsing in-between each pad to remove dirt. As the floor had been installed in the Kitchen and the Hallway it made sense to split the work into two parts and work on each area separately.

The first pad is a coarse 400 grit pad that is attached to a rotary machine running at slow speed and with only water for lubrication. The pad is applied to the stone to removes minor scratches, sealers and dirt. It’s run over the entire floor and afterwards the floor is rinsed with water which is then extracted with the soil using a wet-vacuum.

I then repeated this same procedure with the second pad, which is a Medium 800 grit pad used to remove dirt from minor scratches and holes in the stone. After rinsing again, I went onto the third burnishing pad in the sequence which is a Fine 1500 grit pad that starts to rebuild the polish on the Travertine. I gave the floor another rinse and used the wet vacuum again to extract the water and soil from the floor. The last 3,000 grit super fine pad was then applied with a small amount of water sprayed onto the floor, this last pad really builds a nice shine on the stone.

Sealing a Travertine Tiled Floor

Once the burnishing process was completed the floor was left to dry off fully overnight and I came back the next day to continue with the work. I took a few moisture readings to confirm the floor was dry and then applied a single coat of Tile Doctor Colour Grow to seal the tiles. Colour Grow is a colour enhancing sealer that impregnates into the pores of the stone protecting it from within and improving the natural colours of the stone in the process. I particularly like to use it on Travertine as it really does bring out the brown shades in the stone.

Filling Holes in a Travertine Tiled Floor

Once the first coat of sealant had dried I started the work to fill the holes throughout the installation using appropriate colours of stone filler resin. I purposely delayed doing this until the first coat of sealer was in place in order to prevent excess resin from being absorbed into the tile and causing unwanted staining. There were quite a few holes to fill so it took a while to complete, the filler also needs several hours to dry and harden even when assisted with a fan. Excess filler is then polished off using a 17” rotary scrubbing machine fitted with a white polishing pad and any dust is carefully vacuumed up before applying a second coat of sealer. The floor was then allowed to dry before a final polish with a new 3000 grit pad to achieve a high sine finish.

Once the cleaning process was complete and the first coat of sealant had dried I then commenced the repair work by filling all holes throughout using appropriate colours of stone filler resin, the first coat of sealant is to stop the excess resin from being absorbed into the tile and causing staining, the filler is allowed to dry and harden for several hours assisted with a fan on site. Excess filler is then polished off using a 17” rotary scrubbing machine and a white buffing pad. Any dust is carefully vacuumed up before applying a second coat of sealant. This is then allowed to dry before a final polish with a new 3000 grit burnishing pad to achieve a deep sine finish.

Pitted Travertine After Filled Polished Rushden
I’m not sure the photographs really show off the transformation that I had managed to achieve, however my customer was certainly happy and left me the following glowing review via the Tile Doctor feedback system.

My hall and kitchen floor has been down for 12 years and has been a high traffic area. The Tile Doctor has literally made it look like new again. Holes filled, smooth, shiny and new again! My fully tiled bathroom has also been rejuvenated, wall tiles, shower tiles and floor tiles. The water now beads on the tiles like a freshly waxed car, and the walk-in shower has been perfectly resealed. Money very well spent.
Thank you so much! Mr.J. White, Rushden

Pitted Travertine After Filled Polished Rushden
It’s always nice to get feedback like that, it really does make your efforts feel appreciated.

Professional Travertine Tiled Floor Restoration in Northamptonshire

Pitted Travertine Floor Tiles Filled and Polished in Rushden Read More »

Travertine Tiled Floor Maintenance Visit in Orlingbury

Travertine Tiled Floor Maintenance Visit in Orlingbury

At Tile Doctor, we have a long history of bringing tiles back to life – typically after they have experienced many, many years’ worth of neglect. If fact you can see photos on our many websites, that show the dramatic difference we can make.

Keeping a floor looking good once it’s been restored is the job of the sealer which will protect the tile from dirt becoming ingrained in its pores. However, sealers do wear off with use so in most cases we generally recommend you ask us to pop back every six to twelve months to give the floor a quick clean and top-up the sealer. We call this a Tile Doctor Maintenance Plan and it’s designed to ensure your tiles always look their best.

By way of example the photographs on this page are of a beautiful Travertine tiled floor, at a property in the Northamptonshire town of Orlingbury. The floor was originally laid around ten years ago and we were called in three years ago to perform a full restorative clean which took a couple of days to complete. The customer was amazed with the results achieved by the initial work and wanted to ensure it remained that way, so we worked out a maintenance plan for the customer and we pop back every year to do a maintenance clean and top-up the sealer.

Travertine Tiled Floor Orlingbury Before Maintenance Travertine Tiled Floor Orlingbury Before Maintenance

One of the advantages of the maintenance plan is that it can be paid for over the course of the year with monthly instalments, or as a one-off payment once the work is completed. The customer can choose either option.

The photos below show the same Travertine tiled floor after we had performed a maintenance clean for the third time. You won’t see a dramatic difference, just a floor that has retained its natural beauty all year round. This annual clean is far less disruptive than the original full restoration service and can normally be carried out over the course of a single day.

Maintenance Clean and Seal for Travertine Tiled Floor

The products and methods involved in the maintenance clean vary depending on the type of stone. To begin with, we vacuum the floor to remove any debris and then perform a light clean with a Tile Doctor product. This product is usually either Tile Doctor Neutral Tile Cleaner or Stone Soap depending on if the floor is polished stone.

Neutral Tile Cleaner is a pH neutral cleaner that is specially formulated for regular cleaning and ensures your sealed surface remains undamaged. Stone Soap is a similar product for light duty cleaning but with an additive that help build patina.

If we are restoring polished stone, such as Travertine, Marble or Limestone, we proceed to perform a light polish of the tiles using a very fine 3,000 grit Tile Doctor diamond encrusted burnishing pad fitted to a floor polishing machine.

Travertine Tiled Floor Orlingbury After Maintenance Travertine Tiled Floor Orlingbury After Maintenance

To finish, the floor is dried quickly using a series of fans and one coat of a Tile Doctor sealant is applied to top up the sealant that was originally applied during the restoration clean. In this situation, we applied Tile Doctor Colour Grow, which is an impregnating, colour-intensifying sealant that dries with a matte finish.

Again, you won’t see a dramatic difference in the pictures above, the idea is to maintain the original finish which given time will degrade as the sealer wears off.

Northamptonshire Tile Doctor Maintenance Plan Information

Travertine Tiled Floor Maintenance Visit in Orlingbury Read More »

Limestone Tiled Kitchen Floor Before and After Renovation in Ashton

Limestone Kitchen Tiles Cleaned, Polished and Sealed in Ashton

It’s always nice when one of our former customers refers their family and friends to Tile Doctor as it’s a testament to the great work we do. As the Tile Doctor for Northamptonshire, I often carry out tile cleaning and restoration jobs in the Oundle area.

Recently, a customer from the nearby village of Ashton was referred to me by a friend. Her friend has the same type of floor in the same type of barn conversion in the area, and had chosen to use our services both last year and this year for their annual maintenance clean.

This new customer had a polished Limestone kitchen floor that was proving difficult to keep clean. The grout had become extremely dirty and – in the absence of an effective sealer – dirt and general muck had easily penetrated the pores of the Limestone itself. The result was a very dull appearance – not one that any property owner wants to suffer!

Polished Limestone Floor Before Cleaning Ashton Polished Limestone Floor Before Cleaning Ashton

On our initial inspection visit, we always carry out a test clean within a small area of the floor to give the customer an idea of the final results they can expect. Upon my first visit to this property, I carried out the test clean and the customer couldn’t believe the difference made to the appearance of the grout lines. In fact, she had even forgotten their original colour!

Cleaning and Burnishing Polished Limestone Kitchen Tiles

When I next visited the property, it was time to carry out the full restoration. The work was carried out in sections of around 10m2 each, with two Tile Doctor technicians on site using the latest Tile Doctor products and machinery.

The issue of the extremely dirty grout lines was tackled first. We cleaned them with Tile Doctor Pro-Clean, which is a high alkaline tile and grout cleaner. We will use Tile Doctor Pro-Clean on all types of natural stone – it’s just that reliable for cutting through the grime. The product was applied using specialised grout brushes and the resulting chemical slurry was rinsed away using fresh water and extracted with a wet vacuum.

Polished Limestone Floor During Cleaning Ashton
Satisfied with the cleanliness of the grout lines, we moved onto improving the appearance of the polished Limestone tiles. When it comes to restoring polished stone, including Limestone, Travertine and Marble, we typically use a process we have developed known as ‘burnishing’. Burnishing involves both cleaning the tile and gradually polishing it to achieve a high-quality, long-lasting sheen finish.

We use a set of four diamond-encrusted burnishing pads fitted to a rotary machine to do this. The first to be applied is a pad with a Coarse grit, which breaks down any old sealer and shaves off the very top layer of the dirty stone, leaving a fresh surface beneath.

Next, burnishing pads with Medium, Fine and Very Fine grits are applied to slowly but surely polish the stone, achieving a very pleasant and shiny appearance. In most cases, the tiles come out looking better than they did when they were originally installed!

Once burnished, the floor was left overnight.

Sealing Polished Limestone Kitchen Tiles

The following day, we returned to seal the tiles. We did this using two coats of Tile Doctor Ultra-Seal, a sealant which is formulated to protect the floor and grout lines against dirt build-up and staining.

Polished Limestone Floor After Cleaning Ashton
The very happy customer was given a complimentary bottle of Tile Doctor Stone Soap, which is a highly concentrated neutral stone cleaner that helps to maintain the patina on polished stone. This will help her keep the appearance of the floor maintained until her next maintenance clean with Tile Doctor.

Polished Limestone Floor After Cleaning Ashton
 

Professional Renovation of a Dirty Limestone Tiled Floor in Northamptonshire

Limestone Kitchen Tiles Cleaned, Polished and Sealed in Ashton Read More »

Ceramic Tile Grout Before and After Cleaning in Rushden

Ceramic Tile and Grout Deep Cleaned is a Rushden Sun Room

A customer from Rushden which is a large town in the east side of Northamptonshire, and my home town asked me to take a look at the Ceramic tile and grout in his Sun room. He has a large dog that sleeps on the sofa in this room and over the years the dog has walked in mud which has slowly degraded the grout lines and I suspect had probably never been sealed correctly or sealed at all.

The glazing on Ceramic tile is very resilient so we usually find it’s the grout discolouring that becomes most noticeable first due to the cementitious top layer which can trap dirt. In this case the Ceramic tiles had dulled over the years and as you might expect the white grout lines had become soiled and were almost black in places.

Ceramic Tile and Grout Before Cleaning Rushden Sun Room Cleaning Ceramic Tile and Grout Before Cleaning Rushden Sun Room

Deep Cleaning Ceramic Tile and Grout

To get the tile and grout clean the floor was first soaked in a strong dilution of Tile Doctor Pro-Clean and this was left to dwell for ten minutes. A rotary machine fitted with a black scrubbing pad was then used to scrub the cleaning solution into the tile and release the dirt. The pad can struggle to reach the recessed grout so to ensure this was also clean it was given a good scrub with a narrow stiff brush.

Cleaning Ceramic Tile and Grout During Cleaning Rushden Sun Room
We then used a spinning tool which forces hot water under high pressure onto the floor whilst simultaneously extracting the dirty water with a powerful vacuum. The objective of this action is to power wash the floor whilst rinsing and extracting the dirty cleaning solution at the same time.

Cleaning Ceramic Tile and Grout During Cleaning Rushden Sun Room
We inspected the grout lines and stubborn stains were treated with Tile Doctor Grout Clean-Up which was scrubbed in with hand brushes, this was then rinsed a second time until we were happy with the results. Grout Clean-Up is an acidic product that is particularly good at removing grout smears which can form a haze over a tile reducing its brilliance.

We then polished the floor with a white buffing pad and allowed the floor to dry overnight before returning the following day to apply Tile Doctor Ultra-Seal to all grout lines.

The furniture was too large and heavy for the customer to move out of the room, which was on a lower level than the rest of the ground floor. As a result, it was necessary to clean the floor in sections moving the furniture around the room on pads as needed.

Cleaning Ceramic Tile and Grout After Cleaning Rushden Sun Room
The Sun room floor look great afterwards, the grout especially looked clean and the sealer should ensure it stays that way for some time to come.

Deep Cleaning Ceramic Tile and Grout in Northamptonshire

Ceramic Tile and Grout Deep Cleaned is a Rushden Sun Room Read More »

Tumbled Travertine Kitchen Tiles Rejuvenated in Lower Boddington

Tumbled Travertine Kitchen Tiles Rejuvenated in Lower Boddington

Some of the world’s best-known Travertine quarries are found in Italy. In fact, the curved columns of the Vatican City are made from Travertine. But the stone is popularly used for flooring in many other countries, including the UK. It’s a form of Limestone which is quite soft and porous, but has unique aesthetic characteristics, including natural pits and voids.

The natural process of corrosion, known as pitting, makes it so that without the right maintenance and adequate sealer, Travertine is very difficult to clean. The small holes that form in the stone can quickly become ingrained with dirt and other muck. Making things worse, many modern cleaning products are not suitable for use on Travertine: they are acidic and over time will cause further corrosion to occur.

Recently, I was called to a property in the quaint Northamptonshire village of Lower Boddington to rejuvenate a tumbled Travertine tiled kitchen floor. The house was a very busy one, with children and dogs running around. Needless to the say the tiles were looking worse for well and were in desperate of restoration, including cleaning, polishing and sealing to brighten the appearance of the floor and protect it from everyday stains and foot traffic.

Tumbled Travertine Kitchen floor Before Cleaning in Lower Boddington Tumbled Travertine Kitchen floor Before Cleaning in Lower Boddington

Cleaning and Polishing Tumbled Travertine Kitchen Tiles

The first thing I needed to do was to remove the plinths from the kitchen units and cover the base units and appliances with a protective film to prevent them from encountering the cleaning products.

Next, I began the process we know as burnishing, which involves the application of diamond encrusted burnishing pads to the tiles to resurface and polish them. In the Tile Doctor system, there are four such pads, each possessing a different level of grit. These pads are fitted to a rotary scrubbing machine and then applied sequentially, starting with the Coarse pad, before moving through to the Medium, Fine, and Very Fine.

A small amount of water is used as lubrication with each pad and I stopped in this case between the application of each pad to soak up any excess moisture using a wet vacuum. The result after completing the burnishing process is a very refined and high-quality polished finish.

After burnishing the tiles, I followed by cleaning the grout lines carefully using a combination of handheld brushes and Tile Doctor Pro Clean, which is an alkaline-based tile and grout cleaner.

Sealing Tumbled Travertine Kitchen Tiles

I left to the floor to dry out completely overnight and would return the following day to carry out a final polish of the tiles and to seal the stone. I did this using two coats of Tile Doctor Ultra-Seal, which is a natural-look, impregnating sealer designed to provide maximum protection. You can see the fantastic results in the photos below.

Tumbled Travertine Kitchen floor After Cleaning in Lower Boddington Tumbled Travertine Kitchen floor After Cleaning in Lower Boddington

Before leaving my very happy customer to the enjoy, I left her with customer with a complimentary bottle of Tile Doctor Stone Soap, a neutral and highly reliable cleaner for natural stone floors such as Travertine. This will assist her in maintaining the appearance and condition of the tiles going forward. Another satisfied customer!

Professional Tile Cleaning, Polishing and Sealing for a Tumbled Travertine Tiled Kitchen Floor Restoration in Lower Boddington

Tumbled Travertine Kitchen Tiles Rejuvenated in Lower Boddington Read More »

Damaged Marble Bathroom Countertop Polished and Sealed in Northampton

Damaged Marble Bathroom Countertop Polished and Sealed in Northampton

Marble is known for its premium quality, toughness and aesthetic, making it a very popular choice for bathroom countertops, such as this one at a house in Northampton. However just because it’s tough doesn’t mean that Marble can be cleaned with the usual household cleaners. Like all natural stone, Marble is acid sensitive and unsuitable products can have a very damaging effect on its appearance.

In this situation, the property owner had used a limescale remover to remove some unsightly marks from the countertop. Unfortunately, the product was acid-based and instead of making an improvement it just made it worse and caused severe etching.

Black Marble Vanity Worktop Before Polishing in Northampton
The first photo above shows the limescale marks from where toiletries have been placed on the side whilst wet. Since Northampton is a hard water area, the limescale deposits over time caused these marks to appear.

Burnishing a Damaged Marble Bathroom Countertop

The only way to effectively remove the Limestone deposits – while at the same time rectifying the damaged caused by the botched cleaning attempt – was to use a system of hand-held diamond encrusted pads and hand help blocks of various grits to cut back the stone and re-polish it, a process we call burnishing.

Before officially beginning the burnishing process, I ran a few tests to determine the type of pad I would need to use to achieve the best results. I found that, in most areas, I would need to use the Tile Doctor 400 Grit (Coarse) pad to resurface the tile and remove the damaged layer of stone, but in some areas where the etching was worse, I would need to use the 200 Grit (Very Coarse) pad.

After burnishing the affected areas with the Coarse and Very Coarse grit pads, I started to incrementally polish the stone to achieve a high-quality shine, working my up through the Medium, Fine and Very grit pads.

Black Marble Vanity Worktop During Polishing in Northampton
No chemicals were used during this process – only water for lubrication, combined with the six-inch diamond encrusted burnishing pads fitted to a hand-held buffing machine.

Sealing a Marble Bathroom Countertop

The final part of the restoration was to seal the stone to maintain a long-lasting, deep polished appearance. To do this, I used Tile Doctor Shine Powder, which is a crystallising sealer in powder form. The powder is applied directly and combined with water, before being worked into the stone to seal it.

Black Marble Vanity Worktop After Polishing in Northampton
The customer was very happy with the results and the level of shine achieved. I gave the customer a complimentary bottle of Tile Doctor Stone Soap, which is our aftercare cleaner for polished natural stone, along with instructions on periodic maintenance to help maintain the finish we had achieved for as long as possible.

Removing Limescale Marks from a Polished Marble Countertop in Northamptonshire

Damaged Marble Bathroom Countertop Polished and Sealed in Northampton Read More »

Bleach-Damaged Slate Poolhouse Tiles Restored in Oundle

Bleach-Damaged Slate Poolhouse Tiles Restored in Oundle

This very nice house in a village near Oundle in Northamptonshire features something we don’t see too often in residential property – an indoor swimming pool. The pool is surrounded by some very complementary and rustic looking Slate tiles which act as the flooring in the poolhouse.

Slate Tiled Pool Surround Oundle Village Before Cleaning
However, over the years, the Slate tiles had been badly damaged by the chlorine bleach which is used to sterilise the pool water. The cumulative effect of people splashing water onto the tiles or walking around wet on the floor had caused the sealant to break down and the bleach had left a white blotchiness on the stone. I was asked to rectify the situation by deep cleaning the tiles, resurfacing some of the damaged stone, and applying a fresh sealant.

Slate Tiled Pool Surround Oundle Village Before Cleaning

Cleaning Bleach-Damaged Slate Tiles

My first course of action in restoring these tiles was to clean the entire floor using Tile Doctor Pro-Clean, which is a strong alkaline-based cleaner for most types of natural stone. This product was scrubbed into the tiles using a stiff brush fitted to a rotary machine. After cleaning, I rinsed the floor with fresh water and used a wet vacuum to soak up the resulting slurry. Although the pool was protected with a cover I had to take care not to allow any of my cleaning water to contaminate the pool.

Slate Tiled Pool Surround Oundle Village During Cleaning
The process was effective in removing most of the white calcium deposits caused by the bleach, but not all of them. I tackled the more embedded stains with Tile Doctor Acid Gel, which is a blend of phosphoric and hydrochloric acids which treats stubborn smears such as these. The gel was brushed onto the tiles and left to dwell for 15 minutes, and then agitated using a black stripping pad fitted to a rotary machine.


After rinsing the floor again, I found that there were yet still stubborn stains remaining that didn’t respond to chemical cleaning. I decided that removing these would necessitate a more aggressive approach, and so used a set of diamond-encrusted burnishing pads to literally remove the damaged layer of stone and resurface the face of some of the badly damaged tiles.

Slate Tiled Pool Surround Oundle Village During Cleaning Slate Tiled Pool Surround Oundle Village During Cleaning

Sealing Slate Tiles

The tiles were left to dry overnight after being cleaned and repaired. The next day, I returned to the property to applying the fresh sealant. For this I used Tile Doctor Colour Grow, a sealant which impregnates the stone to provide maximum protection and enhances its natural colours.

Slate Tiled Pool Surround Oundle Village After Cleaning
The customer was very impressed with the result and was very much keen to make sure the tiles remained in such good condition, so I made sure to provide the groundsman with instructions on routine maintenance.

Slate Tiled Pool Surround Oundle Village After Cleaning
I informed him that each time the pool is used the entire area needs to be hosed and brushed down as no sealer can withstand continuous exposure to chlorine bleach. I also left a complementary tin of Colour Grow sealant with him for periodic top-ups, as well as information on the yearly maintenance plan we offer at Tile Doctor.

Professional Removal of Calcium Deposits from Slate Pool House Tiles in Northamptonshire

Bleach-Damaged Slate Poolhouse Tiles Restored in Oundle Read More »

Neglected Egyptian Marble Patio Transformed in Bozeat

Neglected Egyptian Marble Patio Transformed in Bozeat

Patios are particularly difficult to keep clean as they are continuously exposed to the elements fortunately Tile Doctor specialises in cleaning and restoring all different types of natural stone internal and external.

I was recently asked to restore a patio at a house in Bozeat, a village in Northamptonshire. The patio was consisted of both floor tiles and walls, and was made of a rather uncommon stone: Egyptian-style Marble.

Stained Patio Wall Before Cleaning
The customer had clearly taken pride in the presentation and aesthetic of his garden but, having a concentrated on other projects for the past couple of years, he had neglected to preserve the condition of patio. Making matters worse, the patio had never been sealed, and this had allowed dirt and moss to become ingrained in the stone. The customer was also concerned by a large rust mark left on the stone where old garden furniture had been sitting.

Egyptian Marble Patio Path Bozeat Before Cleaning Rust Stained Egyptian Marble Patio Bozeat Before Cleaning

Upon my first visit to the property, I carried out a test clean on a small patch of Marble using Tile Doctor Pro-Clean, which is a high-alkaline cleaner that we find particularly reliable to use on natural stone. The customer was very impressed by the sudden improvement in the condition of the test patch. I also tested a new product by the name of Tile Doctor Rust Away, which is a non-acidic rust remover. Amazingly, the product helped to reduce the rust stain by about 90%.

The full restoration was booked in to take place within a fortnight.

Cleaning an Egyptian Marble Patio

The first part of the restoration involved cleaning the entire patio with Pro Clean, although I worked one small section at a time. The product was worked into the stone using a black scrubbing pad fitted to a rotary machine. The resulting slurry was rinsed away using a Honda Petrol jet washer and a spinning tool, leaving the patio clear of most of the dirty, algae and moss.

Next, I treated the entire rust stain with Rust Away. The product was scrubbed in using a handheld brush and left to dwell for a few minutes, before I rinsed the area with the jet washer and spinning tool. The stone had a matte finish, but to remove the deeper staining, I needed to use a set of three diamond-encrusted burnishing pads, which we typically use for polishing stone and removing light scratches and marks.

Sealing an Egyptian Marble Patio

Luckily, the weather proved to be good, so I could return to the property the following day to seal the patio, including the walls, with Tile Doctor Ultra-Seal, which is an impregnating, natural-look sealer designed to ensure maximum stain protection.

Egyptian Marble Patio Bozeat After Cleaning Egyptian Marble Patio Bozeat After Cleaning

The photos really do speak for themselves, showing the amazing results and transformation of the garden. I left the happy customer with some maintenance instructions to keep the appearance of stone up as it is exposed to the elements.

Egyptian Marble Patio Path Bozeat After Cleaning
 

Professional Restoration of an Egyptian Marble Patio in Northamptonshire

Neglected Egyptian Marble Patio Transformed in Bozeat Read More »

Annual Maintenance of a Victorian-Era Quarry Tiled School Floor in Oundle

Annual Maintenance of a Victorian-Era Quarry Tiled School Floor in Oundle

It was back in 2013 that I first visited this school in Oundle to attend to a 150-year old Victorian Quarry tiled floor which, at the time, had extensive problems with damp and a poor performing sealer that had gradually peeled away.

Victorian Quarry Tiles Oundle School in 2012
Over a few weeks, we successfully stripped away the old and ineffective sealant and addressed the damp issues, before applying a breathable sealer. We subsequently allowed the tiles to successfully dry out for several months before returning to the school to provide a light clean and apply our topical sealer, known as Tile Doctor Seal and Go, as the school required a shiny, yet hard-wearing finish.

I posted a story on my website about this original job, which you can see here:

150 Year Old Quarry Tile Restoration in Northants School

As part of my initial visit, I had supplied the school with five litres of Tile Doctor Neutral Tile Cleaner, which is a pH neutral formula designed for regular use, and a white buffing pad. I had also spent an hour with their in-house cleaner (who was already familiar with using a buffing machine) to talk through daily maintenance of the floor, as over 100 children can be walking over these floors at any one time on an almost daily basis.

Of course, not every floor will receive this amount of traffic and suffer from this level of wear and tear, but in these situations Tile Doctor can offer a maintenance plan for our customers.

Victorian Quarry Tiles Oundle School in 2013

Cleaning and Sealing Quarry Tiles for Maintenance

The school have me back annually to carry out a full maintenance clean and seal. This involves, firstly, etching the top coats of sealant with a green diamond-encrusted burnishing pad to remove any build-up of dirt and staining. Then, I rinse the whole floor with fresh water and soak up the residue with a wet vacuum.

After drying the area with fans, I proceed to reapply two fresh coats of Tile Doctor Seal & Go. This is now my fourth year of visiting the school and, as the photos show, an annual maintenance plan is the best way to keep floors in top condition without the disruption caused by a full clean or restoration.

Victorian Quarry Tile After Maintenance Oundle School in 2017
Contact your local Tile Doctor consultant about the maintenance plan we offer for any natural stone flooring after an initial clean.

Professional Victorian Quarry Tiled Floor Maintenance at a School in Oundle

Annual Maintenance of a Victorian-Era Quarry Tiled School Floor in Oundle Read More »

Restoring a Riven Slate Patio Suffering from Grout Haze in Wollaston

Restoring a Riven Slate Patio Suffering from Grout Haze in Wollaston

This customer, who lives in Wollaston, a small village in Northamptonshire, called me to look at the unfortunate condition of her Riven Slate tiled patio. She had hired a builder to install it, but he had neglected to remove the grout haze which had occurred quickly enough, allowing it to set. He was subsequently unable to remove the haze because he had already sealed over it. This had left it looking very unsightly, as you can see in the photo below.

Newly Laid Riven Slate Patio Wollaston Before Cleaning
The customer initially contacted me back in December 2016. At that time, I did explain to the customer that the Winter wouldn’t be an ideal time to restore the patio, and that it would be best to carry out the work in the Spring. However, she was so unhappy with the appearance of the patio and – knowing she had guests coming over for Christmas – wanted something to be done to improve the condition of the tiles as soon as possible.

It was agreed that I would immediately carry out the removal of the old sealer and the grout haze beneath, but leave the re-sealing until the Spring of the following year when the weather was dry. The customer understood that when I returned in the Spring, the patio would require another light clean and brush to prepare it for sealing.

To put the customer’s mind at rest somewhat, I carried out a test clean on one slab of the patio using Tile Doctor impregnating, colour intensifying sealer, known as Colour Grow. This darkened the tile and provided a natural look finish, which was preferred by the customer. I also returned to the property several days later to carry out a water repellency test, but as you can see from the photo below, the rain beat me to it. Thankfully, the repellency test had positive results.

Newly Laid Riven Slate Patio Wollaston Testi Cleaning
I was then able to begin the cleaning process.

Cleaning and Sealing a Riven Slate Tiled Patio

To begin, I removed the old sealer using a strong mix of Tile Doctor Remove & Go, which is a stripper and cleaner. This product was scrubbed into the tiles with a rotary brush machine. Net, I rinsed away the resulting slurry and soaked up the water with a wet vax machine.

This initial clean exposed the true extent of the grout haze – it was over all every tile! My next course of action was therefore to remove this using Tile Doctor Acid Gel, which is a gel cleaner specially formulated to neutralise grout haze. This was allowed to dwell for a short period before I brushed it in.

Newly Laid Riven Slate Patio Wollaston During Cleaning
Following this, I gave the whole area a second brush with a small amount of water, before using a wet vax machine once again to make sure all cleaning chemicals were removed. I used the customer’s hosepipe to rinse down the entire patio as there was good drainage.

Newly Laid Riven Slate Patio Wollaston After 2nd Cleaning
I allowed the tiles to dry out naturally, before waited for a dry day in April this year to return to the property. During this day, I sealed the entire area with Tile Doctor Colour Grow sealer to really deepen the colour in the stone and provide the whole patio long-lasting protection against the elements.

Newly Laid Riven Slate Patio Wollaston After 1st Coat
The customer was exceptionally happy to have the patio restored to perfect condition. I’m sure she’ll make great use of it over the Summer!

Newly Laid Riven Slate Patio Wollaston Completed
 

Professional Riven Slate Tiled Patio Restoration in Northants

Restoring a Riven Slate Patio Suffering from Grout Haze in Wollaston Read More »

Dull and Dirty Slate Tiles Deep Cleaned and Sealed in Little Harrowden

Dull and Dirty Slate Tiles Deep Cleaned and Sealed in Little Harrowden

The problems with not maintaining a natural stone floor properly are manifold. The build-up of ingrained dirt and muck is not just unhygienic, it also makes the stone appear dull and discoloured – and for many property owners, this can completely ruin the character of a room.

Here’s an example of a very dull and lacklustre Slate tiled floor at a small cottage in Little Harrowden, which is tiny village of less than 1,000 people situated roughly three miles north-west of Wellingborough in Northamptonshire. The owner was concerned that the poor condition of the floor was making the feel kitchen narrow and confined, and so she called me to help with brightening it up with a deep clean and seal. Achieving a sheen finish would help to reflect the natural light that comes into the room.

Slate Floor Before Cleaning in Little Harrowden Wellingborough

Cleaning a Dirty Slate Tiled Floor

I began the restoration by masking up the edges of the room and applying a clear silicon to the base boards of the kitchen units to prevent any water damage.

My choice of cleaner was Tile Doctor Oxy Gel, which is a strong alkaline-based gel cleaner. It’s like Tile Doctor Pro Clean, which is also alkaline-based, except it sticks to the tile due to its consistency and so it’s excellent for cleaning vertical surfaces such as bathroom walls. On this occasion, I wanted to use Oxy Gel to keep the amount of water I needed to use to a minimum. Since this was an old cottage there were a few damp issues that I wanted to avoid exacerbating.

I spread the Oxy Gel out evenly over half of the floor, before agitating it with rotary brushes. I allowed this to dwell for 10 minutes before adding a small amount of water and agitating the floor again, this time paying attention to the grout lines, which were very badly soiled. This process was subsequently carried out over the rest of the floor.

Slate Floor During Cleaning in Little Harrowden Wellingborough
I wet-vaxed each area after completion of the process and then wet-vaxed the entire floor again to neutralise the tiles and remove any remaining product. The floor was then left to dry overnight.

Sealing a Slate Tiled Floor

Returning to the property the following day, I took damp meter readings to see if the tiles were dry enough to be sealed. As I mentioned, the floor had some damp issues so this was important to check. I did, in fact, have to use a heat gun to finish drying a few damp areas of grout.

Once satisfied, I sealed the Slate with Tile Doctor Seal & Go Extra, which is a breathable water-based sealer, which is ideal in situations where no damp proof membrane is present or where there are damp issues. Once dry, the sealer provides an aesthetically pleasing light sheen finish.

Slate Floor During Sealing in Little Harrowden Wellingborough
As you can see from the photo below, the deep clean and fresh seal really helped to improve the patina of this Slate tiled floor, helping the entire kitchen feel brighter and more spacious. Another satisfied client!

Slate Floor After Cleaning and Sealing in Little Harrowden Wellingborough
 

Professional Cleaning and Sealing for a Dirty Slate Tiled Floor in Wellingborough

Dull and Dirty Slate Tiles Deep Cleaned and Sealed in Little Harrowden Read More »

Scroll to Top